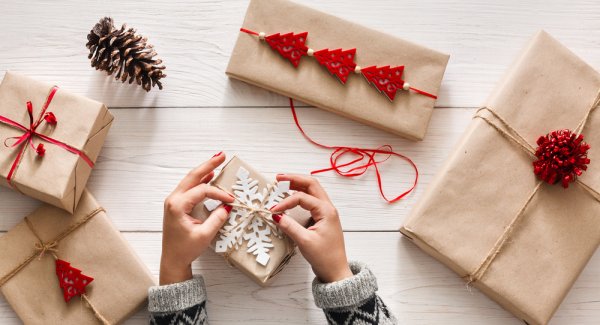


Catch Attention By Being Unconventional
To wow your family and friends the minute they receive your gift from you, then a unique and captivating creative gift wrapping is exacttly what you need to do. Get the gift item, get the wrapping sheets and then wrap it distinctly in a way they would never have imagined. Let their minds be blown by the way the gift iswrapped that it takes them a while to actually see what is inisde. Luckily, it doesn’t take much time, skill or money—once you have a few gift wrapping ideas. Seeing the joy on a loved one’s face when they’re handed a gift is one of the most rewarding moments.
Related articles

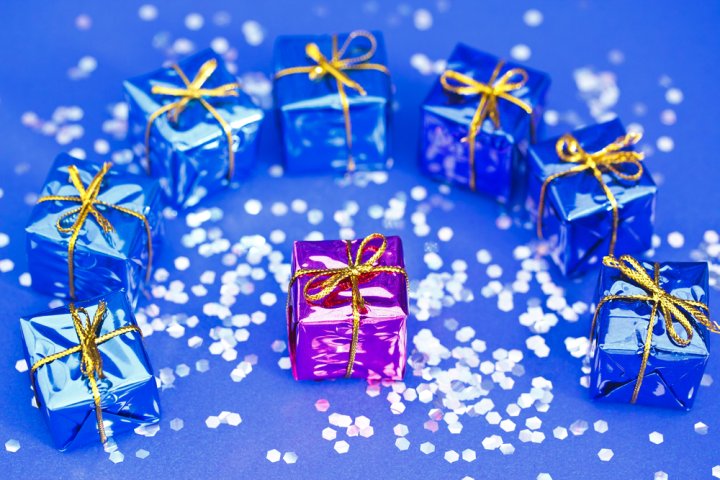
Do it Creatively and Colourfully
A present needs to be wrapped, otherwise you will only be handing a mere object. A gift without a gift wrapper is like a cake without icing. To give your gift a perfect finishing, you need to wrap it up intelligently and with a touch of class. There are so many things you can use to wrap up a gift and this can be determined by the size and the type of gift you will be presenting. Don't just stick to the usual shinny and slippery wrapping sheets; go for the unique paper types that allow you add some embellishments on it. Let these wrapping papers be attractive and smooth to touch. Use your creativity to wrap those gift items in a way that you wished you were the one who will be receiving the gifts.
Do it Neatly and With Precision
Have you ever received a gift that was wrapped haphazardly and the wrapping sheet looked like something that has been used before? How did you feel? Picture that for a minute, not appealing right. A gift wrap is as important as the gift that it has been used wrap, this should serve as a guide when picking the wrapping paper or whatever you want to use t wrap the gift and ensure you do it neatly and with precision. Let the edges be smooth and perfectly done.
Related articles
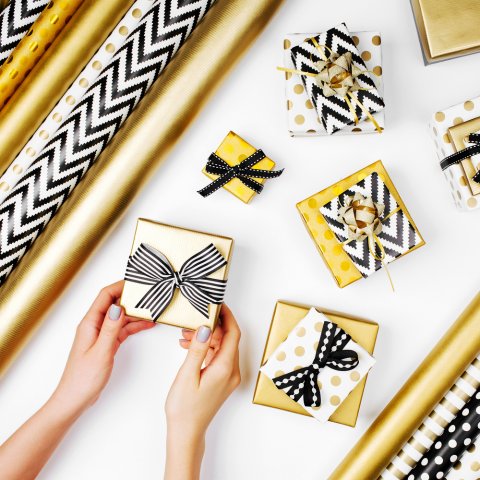
Let the Wrapping Paper Display the Season, Event or Name of a Loved One

Don't use a wedding gift wrap for a birthday and vice versa. Get the right gift wrap for the right event or occasion. Never make the mistake of mixing them up, it sends a wrong message. If it is for Christmas celebration, Sallah or for Thanksgiving celebration, get the right gift wrap. You can go further to personalize the gifts wrap cursively.
Get Inspired By These Amazing Gift Wrap Ideas
Go Symmetrical
No matter where you stand on geometry, there is no denying that artfully arranged lines, squares, triangles and rectangles can create sheer art. Mix it up for a touch of whimsy!
- Brown Paper
- Mathematical material and fabric tape
- Scissors
How to make
- Wrap the gifts neatly. Align your tape along the straight guidelines of the graph paper and start making geometric patterns according to your taste. We suggest you have a few designs at hand and maybe do some test runs on a plain piece of paper before making the final touches on your gift.
Tissue Paper Fringe
Transform a plain brown bag into festive Christmas gift wrap. A tissue fringe can range from the exceedingly simple to one with interesting twists and turns; either way, you will end up with a gorgeous looking gift. Watch the video to see how.
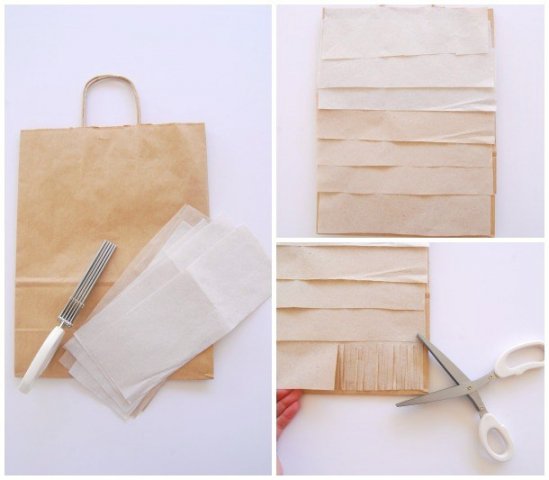
- Fringe scissors
- Hot glue gun and stick
- Brown Paper Bags
- Tissue paper in neutral colours
How to make
- Cut your tissue paper into 3″ tall strips that are the width of the bag. Hot glue them to the bag starting at the bottom with the darkest coloured paper first. Layer the tissue paper towards the top as you go. Once the hot glue has dried, use your fringe scissors or regular scissors to cut fringe on each layer.
Yarn Pom Poms
These fluffy little balls of yarn are lots of fun to make and if you have kids at home you can involve them in the pom-pom making and turn it into an afternoon of fun. Watch the video above or follow the instructions below, either way you will have some gorgeous gift wrapping material in no time.
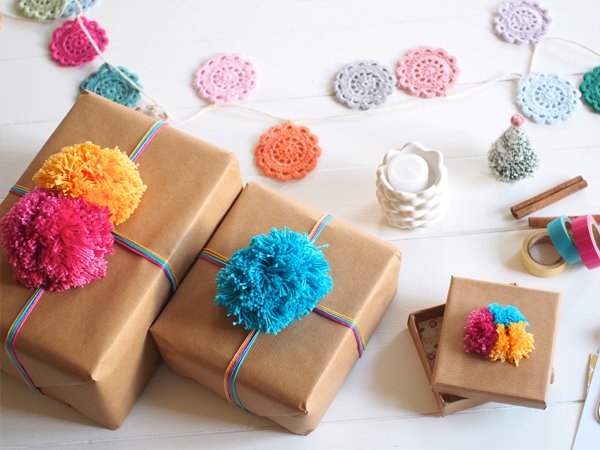
- Brown Parcel Paper
- Yarn
- Sharp fabric scissors
Materials needed
- Wrap your Christmas gifts in brown parcel paper. Take three lengths of yarn in different colours and tie each around your present.
- Open up your pom-pom maker and wrap your yarn around the first two arms. Wrap the yarn right to each edge of the pom-pom maker. Continue wrapping until it is thick with many layers. The thicker your pom-pom, the fuller it will be.
- Fold the pom-pom maker back to its circle shape and cut along the ridge of each half of the pom-pom maker. Hold both sections tightly while you cut.
- Take a length of yarn and thread it between the two disks of the maker. Pull tight and tie a couple of knots to hold your pom-pom together. Remove pom-pom from maker
- Trim the pom-pom to give it a perfect circular shape. (Do not trim the yarn length used to tie the pom-pom)
- Place the pom-pom on your wrapped present and tie to the yarn-wrapped gift. Cut excess strands. Tweak and twiddle with your poms until they are arranged beautiful on your present.
How to make

Fiesta Wrap
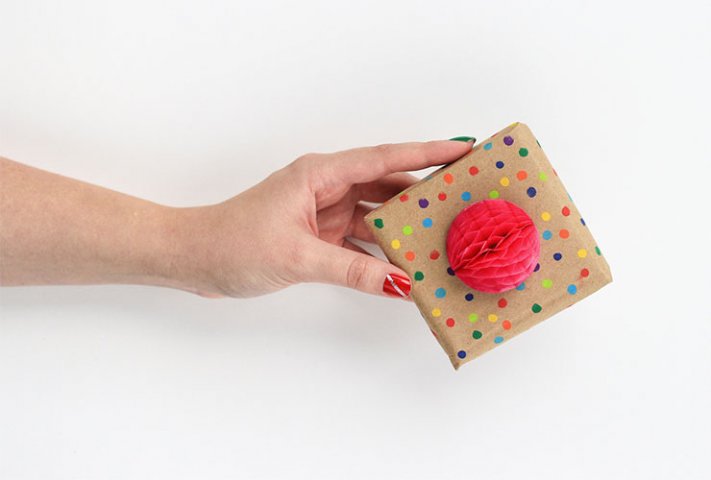
Sprinkle your paper with colourful dots, using paint and a cotton q-tip to make it eye-catching and irresistible. The results are festive and fun!
- Paper bag
- Paper bag, stamp pad (or acrylic paint)
- Q-tips Cotton Swabs
- Precision Tips,
- Glue gun
- Take your Q-tips Cotton Swab, dap it on your ink pad and then dot on your paper
- You should be able to get 2-3 dots per ink dip
- Continue adding colors until you’ve covered the paper
- Wrap the gift
- After wrapping you can add a few more dots
Materials needed
How to make
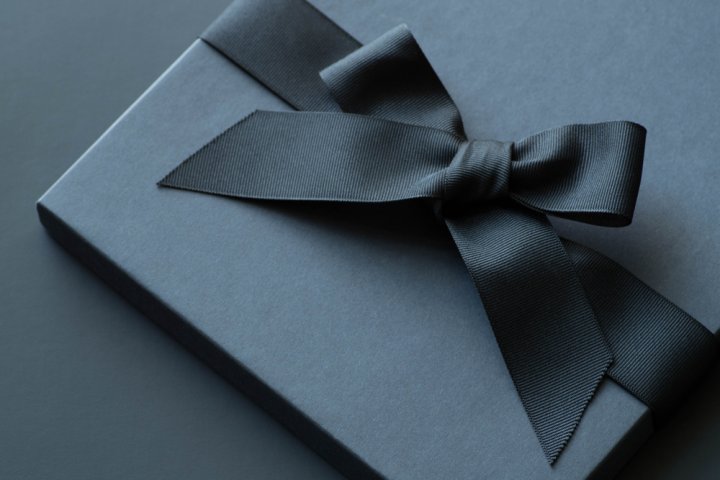
Chalkboard Effect
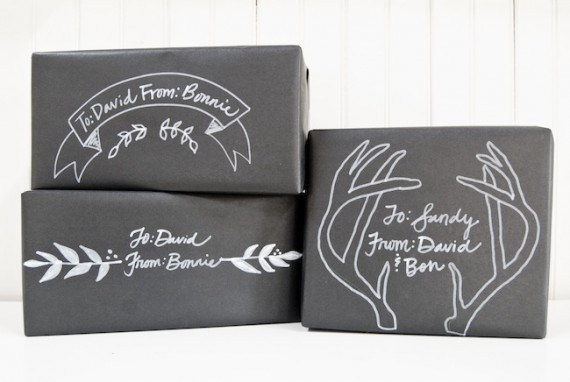
Design a unique chalkboard look by layering white marker on top of black paper. Write a thoughtful message or draw customized designs for your loved ones.
- Black Craft Paper
- White Paint marker
- Wrap your gift neatly with the Black Craft Paper
- Then draw any specail design you have on the wrapped gift. They are simple, affordable and really cute all bundled together.
Materials needed
How to make
Related articles
Jingle All The Way
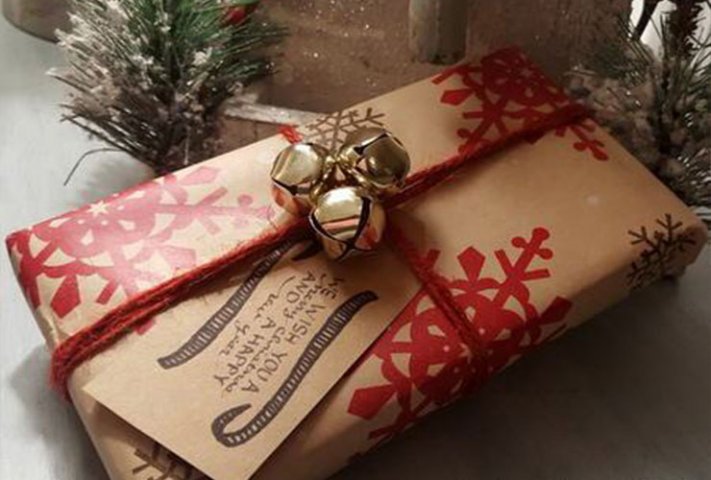
- Ribbon
- Twine
- Candy Canes
- Jingle Bells
- Ensure your gift is properly wrapped.
- Wrap twine around your gift and then string on a few jingle bells.
- Use 2″ wired ribbon to create a beautiful full topper. Wrap twine around your gift then tie a candy cane to the center.
- Tip: Choose a colour of string or twine that complements your wrapping paper.
Materials needed
How to make
Silver Detailing
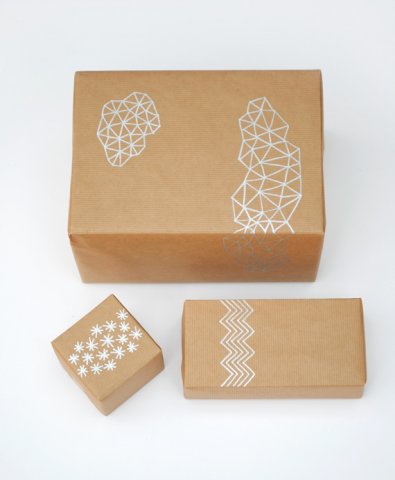
It is easy and quick, and the designs are really simple. A simple silver marker on a plain paper wrapping can create stunning effects. Don't have a steady hand? Use a template to trace out a pattern you like!
- Brown Paper
- A silver pen
- Draw geometrical shapes, snowflakes or simple lines to accentuate your package
- Wrap your gift in plain brown paper. The darker the colour, the more your design will be highlighted. Alternatively you can mix and match different colour papers with shimmery pens in another colour. Gold against black, for instance, will look stunning.
- Then use a lustrous silver pen. If you are not that confident at drawing then sketch your doodle in pencil first.
Materials needed
How to make
Related articles
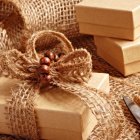
Natural Elements
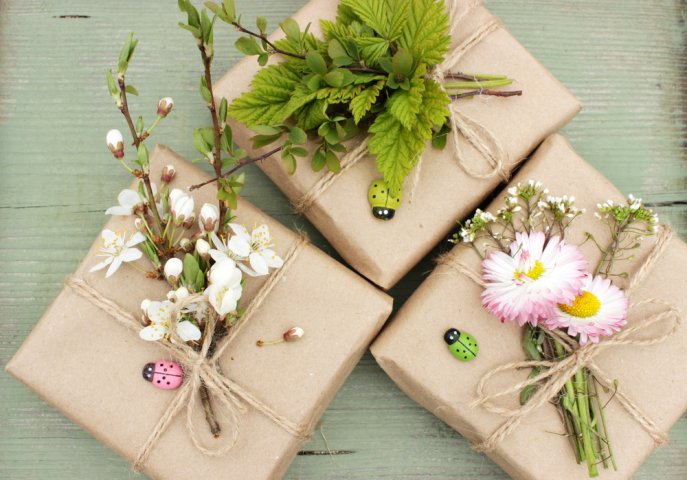
Forage your backyard for tree clippings, pinecones, and other pieces of fresh greenery to top your gifts. It is fast and free. Sometimes the holiday inspiration you’re looking for can be found in right in your home.
- Hot-glue gun
- Kraft paper
- Twine
- Seasonal natural elements
- Wrap the gift and put the twine around it. This now serves as your blank canvas.
- Use hot glue to piece two pine-cones together, and use this as a base on which to apply smaller elements.
- If you're using flowers and leaves, gently tie them together with twine and then attach the bunch to your gift.
Materials needed
How to make
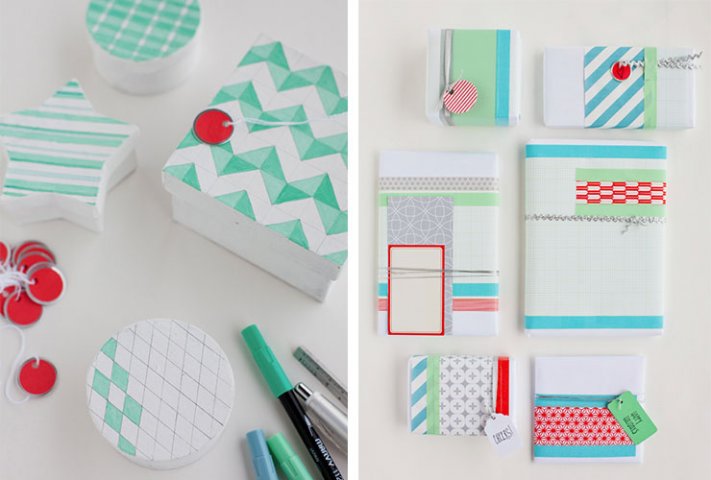
Washi Tape Weave
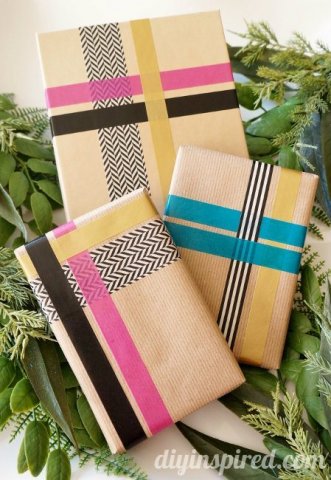
Washi tape is not just for home decor, you can use it to dress up your gift wrapping, too.
- Brown paper
- Washi tape
- Scissors
- Wrap the gift with the brown paper
- Place the Washi tape in a weave pattern. For example, lay one horizontal, the next vertical, and keep alternating
- Create a layered effect by weaving the tape horizontally and vertically in an alternating pattern
Materials needed
How to make

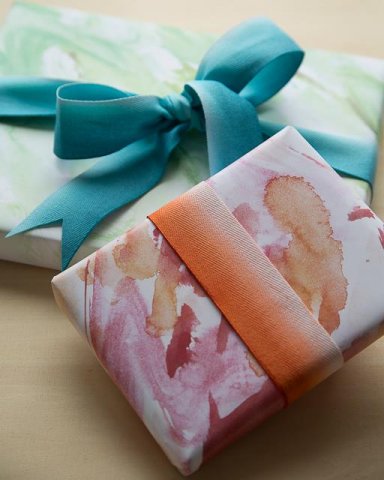
Watercolor Gift Wrap
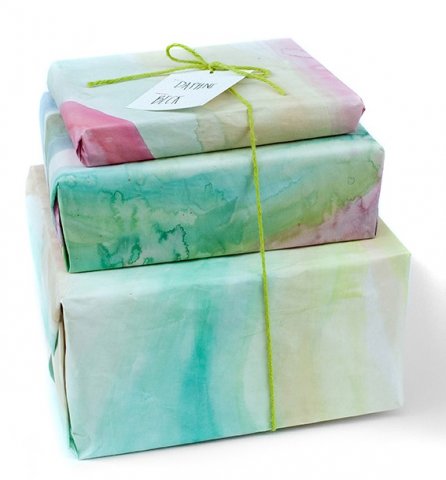
The holidays are expensive so instead of wasting precious pennies on overpriced gift wrap, make your own in three easy steps. The good news is that it is easy, cheap and pretty.
- Roll of butcher paper
- Set of water colour paints
- Paint brush
- Water
- Cut several sheets of paper in various sizes
- Dip your brush in water, then the paint and start going over the paper in an abstract pattern. Make sure not to use too much water since the paper is so thin
- When done with design, let the paper dry. It will crinkle but will straighten out once you wrap it tightly around a box.
- Pro tip: choose colours that blend especially well together. You can even have the kids grab their aprons and have fun doing this together.
Materials needed
How to make
Rudolph Gift Wrap
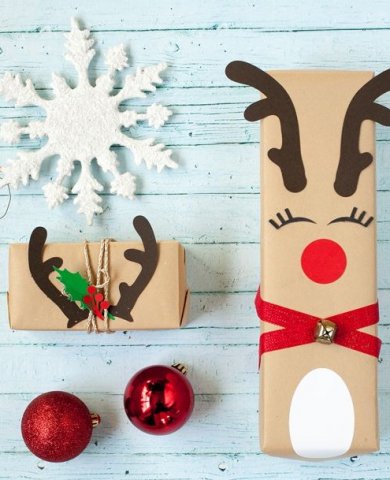
Create your very own fleet of reindeer with this easy craft that you can display under your tree or anywhere in your home.
- 2 twigs
- Brown craft paper or paper bag
- Wrapping paper (preferably a plain color)
- 2 buttons for eyes
- 1 Red pom pom
- Red Ribbon
- Snowflake stickers or hole punches
- Jingle bell
- Elmer’s glue
- Hot glue gun
- Preheat your hot glue gun while you wrap your present with the wrapping paper.
- Cut out a reindeer head from the craft paper or a paper bag. Likewise cut out the various other elements of the reindeer you want to use on your gift wrapping.
- Start glueing, in any order you like! Start with the top or bottom elements, so you can have the antlers first, followed by bead eyes, the pompom nose and so on.
- Finish with the jingle bell and the red ribbon. And you're done!
Materials needed
How to make
Related articles
Your Gift Wrap Can Also Double as a Gift
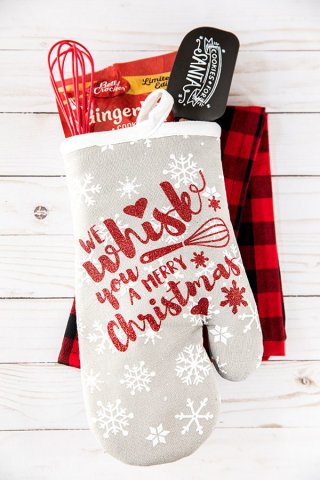
Take your creativity to another level as you think of likely items that can be used to wrap a gift. A napkin can be used to neatly wrap a set of cooking spoons, with that the receiver has both spoons and napkins as gift items. Don't limit your wrapping ideas to the conventional stuffs for wrapping, spend time thinking and come up with ideas that will stun and bring smiles to the receiver. This way, instead of just one gift, the receiver receives double gift items.
-
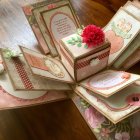
 Have the Perfect Gifts for Your Loved Ones But Can't Find the Right Gift Boxes? Learn How to Make Them Yourself!
-
 Turn Your Stash of Photos into a Treasured Book of Memories. Don't Know How to Make a Scrapbook with Photos? Turn to a Professional Scrapbookist!
-
 Know All About Gift Boxes with Paper: Top 10 Paper Gift Boxes to Pack Your Gifts in And 3 Ways to Make It Extra Special!
-
 Tips on Gift Wrapping and How to Achieve the Perfect Finish: 10 Quirky and Time Saving Gift Wrapping Ideas to Embellish Your Presents
-
 Looking for Gift Boxes? Making Them isn't as Hard as You'd Expect. Learn How to Make Gorgeous Gift Boxes in Different Shapes & How to Decorate Them
Let your imagination go free!
Let your imagination wander around to bring the most out of your creativity. The more you will be creative, the more your gift will stand out from the others. Hence, we have brought this article for you to help you out in this stuff. Go, work out your fingers!
 Highlight the Best Facets of Your Incomparable Beauty: Discover the Best Face Highlighter Currently Available in India and Everything You Need to Know About Using Face Highlighters for Maximum Effect (2023)
 Forget the Blemishes and Get that Picture Perfect Flawless Radiance on Your Face: Check out the Best Foundations for Oily Skin Currently Available in India and Everything You Need to Know About Makeup Foundations (2023)
 Make Your Presence Felt Wherever You Go: Discover the Best Perfumes Under 2000 for Both Men and Women to Announce Your Arrival and Make Any Occasion Memorable (2023)
 Protect Your Oily Skin from the Harmful Rays of the Sun: Discover the Best Gel Based Sunscreens for Oily Skin and Everything You Need to Know Before Buying One (2023)
 Minor Blemishes and Wrinkles Affecting Your Confidence? Check out the Best BB Creams to Conceal Your Worries and Nourish Your Skin to Restore the Healthy, Radiant and Glowing Complexion Back Again (2023)