-
 Looking for the Most Incredible Gift Wrap Ideas to Take Your Gifts to the Next Level? We Give You 10 Easy and Pocket Friendly Ideas of Gift Wrapping
-
 Have the Perfect Gifts for Your Loved Ones But Can't Find the Right Gift Boxes? Learn How to Make Them Yourself!
-
 Why You Must Gift a Plant: 15 Plants to Buy Online + The Benefits of Plants at Home and 4 Tips on How to Buy Them
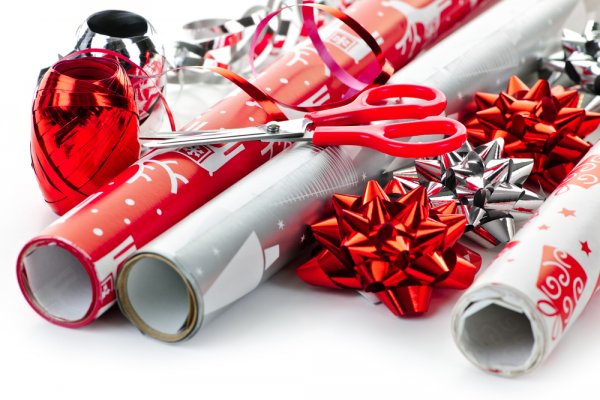
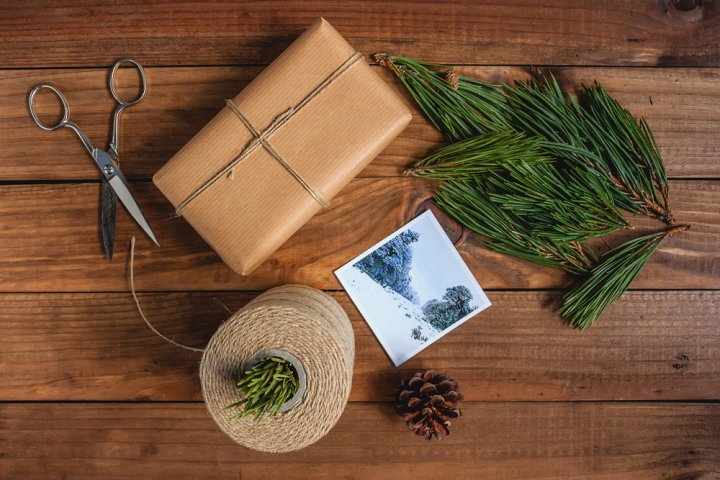
Tips on Creative Gift Wrapping
Time Saving Gift Wrapping
To save time, its best to work with time saving gift wrapping tips. For instance, you can put an odd shaped gift in a box that’s not been used for easy wrapping, use the rip-cord easy open wrapping method, use bits of cardboard to wraps soft items to support them.
Cute and Quirky Wraps
Use eco-friendly ways of wrapping gifts so your wrapping ideas don’t weigh heavy on Mother nature and are creatively appreciable too. Up cycle pages from old books to create cute little gift bags, use square pieces of cloth to wrap and fold around your gifts, tying them into a knot or use toilet rolls to create pillow boxes for holding trinkets and small gifts, you’d also use old wrappers and ribbons from previous gifts and shred them all to be used as lining or stuffing for your gift boxes.
Delightful DIY Wrapping
To give the finishing touches to your unique gift wrapped presents, you can use foliage from festive trees to adorn them, make origami bows from leftover scraps of wrapping paper, use personalized salt dough gift tags, which can also double up as decor ornaments during festive occasions. You can use themed confetti, add a variety of embellishments to add a bit of glamor to your gifts.
10 Gift Wrapping Ideas and How to Execute Them
Hand Stamped Gift Wrap
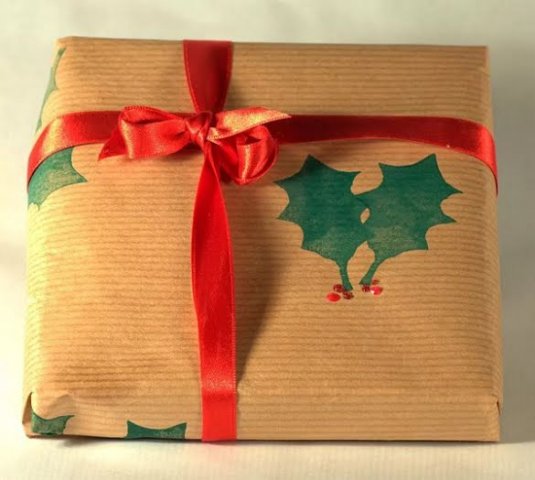
Rubber stamped wrap paper is one easy way of designing a unique gift wrapper to make your gift stand out. Made to complement greetings, created in a variety of colors matching the present or occasion or simply to add some character to your gift, a hand stamped wrap will be a cool idea for wrapping.
Hand Stamped Gift Wrap
What You Need:- A craft or postal paper
- Your choice of a rubber stamp
- Stamping inks which are dyed or pigmented
How to Make It
- To begin with, spread the paper over your work area, securing the corners to avoid any paper curls.
- Now stamp a design over the paper as you like. For instance, you can experiment by stamping in lines or columns, forming patterns or exploring other new techniques.
- In case of dye inks, you should allow the paper to dry flat and if you’re using pigment inks, then heating the paper would be best to set the ink and keep the images from getting smudged.
- You’d also add gift tags to your present by stamping on some blank tags or card stock.
You’d work with a few tips when working on a hand stamped gift wrap category. If wrapping an odd shaped gift, you’d wrap it in a plain paper, then create a wrapper that’s customized to complement the shape of the gift. You’d explore using different kinds of paper textures and different color themes as well.
Layered Gift Wrap
Go around the conventional style of wrapping and pair your plain wrappers with strips of patterned paper or contrasting card stock. Different layers can give an interesting dimension to the gift. One of the simpler yet differing way of wrapping a gift is to use brown paper as the base layer, and then go onto adding pretty ribbons, or different papers as additional layers over the base paper. Cut thin strips of patterned paper, securing the base of the gift with a double sided tape, then tie a matching ribbon around the center or another layer of a different paper, off-setting it by placing it on one side of the base paper. There are varied possibilities and each one unique to the other!
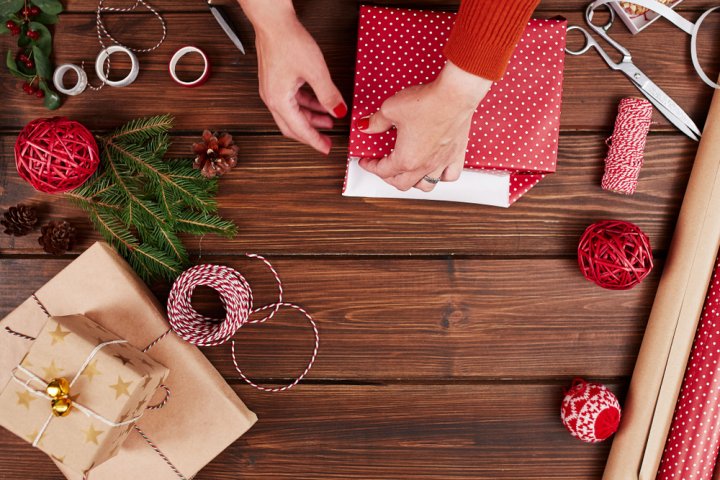
Newspaper Gift Wrap
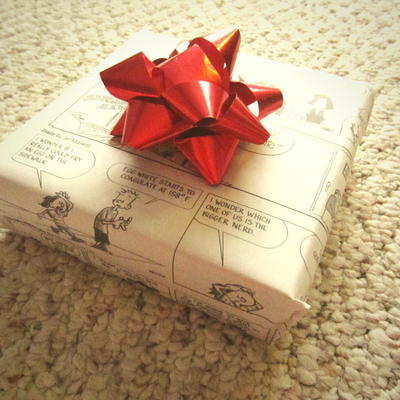
Newspaper wrapped gifts has been a popular recycled way of presenting gifts. It not only saves you money on expensive wrappers but also helps create a unique and memorable gift presentation. The black and white combination, or full color newspaper is a wonderful way to create a vintage or exciting look for the gift.
Newspaper Gift Wrap
What You Need:- Newspapers
- Scissors
- Tape
How to Make It
- To begin with, place your present on the paper sheet, folding two opposite edges of the paper towards the center, which will then overlap a bit, cut the excess paper.
- Repeat the step for the remaining opposite sides.
- Folding the edges to the middle point then, tape them in a way that your gift doesn’t slide around, fold in the smaller edges and create a triangle on the top.
- Folding it up and to the middle, tape the paper edges down and then flip the present over.
- Now adorn the gift with a ribbon bow on the top.
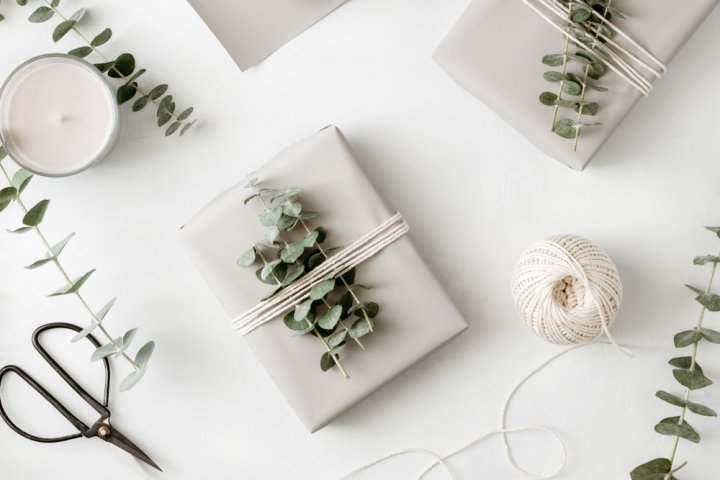
Wrapping Gifts without a Gift Wrap
Besides wrapping gifts in paper, there are other alternatives as well that you can experiment with. Using a pretty and colorful handkerchief is not only a beautiful way of wrapping your present, but very useful too. It can be used repeatedly to wrap other presents. Mason Jars are a unique way of wrapping gifts, from storing cookies, hot cocoa mix to mulled wine and or succulents, the jars add a touch of class to an otherwise ordinary piece of wrapper, embellish and adorn it with ribbons, twines, fabrics or confetti strips and make it as creatively appealing as you’d like!
For small goodies, toilet paper rolls can be transformed into tiny boxes embellished with ribbons and bows to hold the trinkets. Reuse old magazine covers, catalogs or shopping bags and make them into gift bags. You can use maps also as wrapping papers when gifting travel accessories or photo albums. Transform your mundane and dull looking grocery bag into a unique creation by cutting the bag and flipping it inside out, so the pattern side is on the inside and plain to the outside. Then wrap your present with it, decorating it with ribbons, twines, stamps, etc.
Ripcord Quick Open Wrap
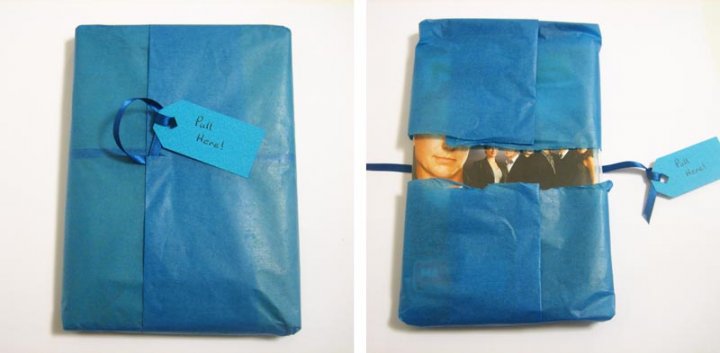
We usually focus on the delay factor when opening gifts to extend the element of surprise for the gift receiver. But here’s a unique way of using this thought to instead opening a gift in no time at all! For an easy to open gift, make a rip cord with a thin ribbon or string, and place it inside the wrapping paper, so it goes around the gift, with an excess string of about 2”-3” extending at the seam. With two small cuts in the paper, one of each side of the ribbon, get the rip-cord started. This method of wrapping gifts is ideal for kids or for people with stiff fingers.
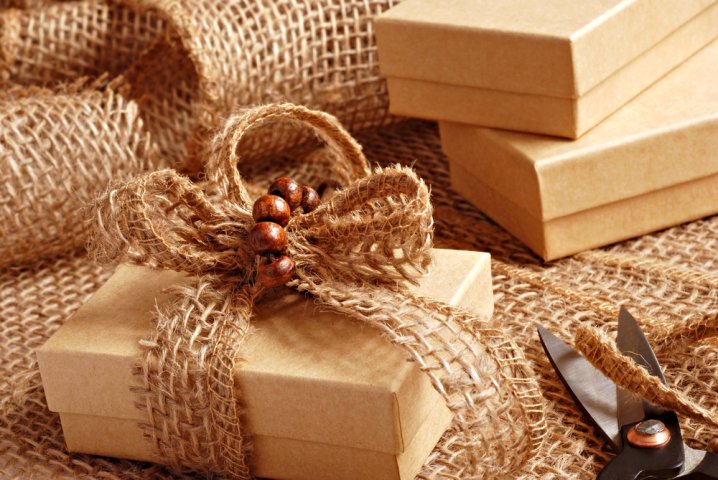
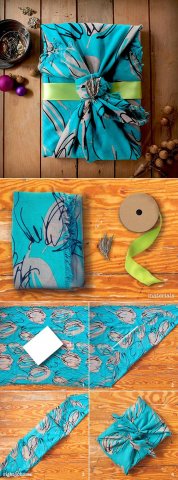
Japanese Furoshiki Wrapping
It is a known fact that wrapping papers or expensive gift bags aren’t so eco-friendly and very hard hitting on the pocket too. But there are environment friendly options like the Japanese Furoshiki wrapping, which is simple and lovely. A furoshiki wrapping cloth is a rectangular or square shaped fabric that’s undergone decades of transformations to be finally used a wrap for gift items, books, groceries, wine bottles, et all. This form of wrapping is not only unique, but very eco-friendly. It can be reused time and again, flexible and can be adapted to form different shapes.
You can make the furoshiki wrap by using handkerchiefs or bandanas, tablecloth, bed sheets, tea towels or cloth napkins, however it is important that the furoshiki fabric is about 3 times the size of your gift and strong and thick enough to protect and conceal the gift. Using a cotton fabric is much recommended.
Ribbon Weave Wrapping
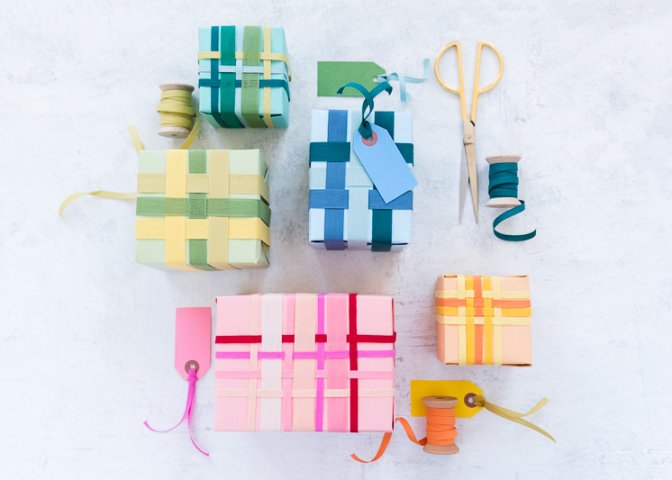
For a ribbon weave wrap, you need ribbons in different color and width, tape, scissors and covered packages to wrap with ribbon. Once you’ve decided which kind of ribbons to use, pick two different lengths of ribbons for weaving, one to fill the package lengthwise and the other widthwise. The ribbons should hence be cut accordingly. Begin with wrapping all the ribbons around the package in one direction and tape them at one place to the base. Now, moving vertically, take the first ribbon and tape it to the bottom of the package and wrap around. When you come to the top, weave the ribbons under and over the ribbons you’ve already set and keep following the pattern. Repeat the process with the next ribbon, but differently – under and over. Once you’ve completed the weave, tape the ribbon ends to the base like the rest.
Ribbon Weave Wrapping
What You Need:- Ribbons in different color and width
- Scissors
- Tape
- Covered packages to wrap with ribbon
How to Make It
- Begin with wrapping all the ribbons around the package in one direction and tape them at one place to the base.
- Now, moving vertically, take the first ribbon and tape it to the bottom of the package and wrap around.
- When you come to the top, weave the ribbons under and over the ribbons you’ve already set and keep following the pattern.
- Repeat the process with the next ribbon, but differently – under and over.
- Once you’ve completed the weave, tape the ribbon ends to the base like the rest.
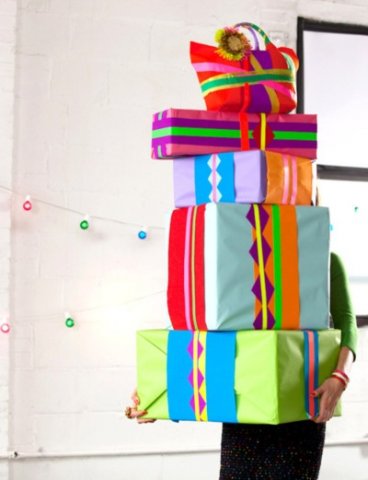
Color and Pattern Wraps
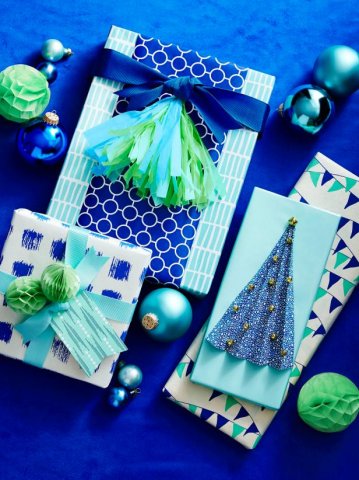
Complementing colors and patterns are another creative ways of wrapping gifts. For instance, you’d choose wrappers with a white base and a blend of one color in different patterns, like a white base paper with different shades of blue, green, red or yellow. You’d then further customize the wrappers by using ribbons and paper tissues styled in different shapes like trees, pom poms or shreds or strips and adorn them at the top of the gift.
Stencil Gift Wrap
Using plain boxes or bags with stenciled effects can be yet another way of adding a unique touch to your gifts. Using a masking tape, stretch the paper you’ll be stenciling on to a flat & even surface. Using a non-permanent mount spray, apply it on one side of the stencil. Place it on the paper. With some paint poured in a roller tray, roll the paint roller into the tray ensuring proper coverage and roll it over the stencil. Peel off the stencil and place it on the paper for the next shape, repeat the process. Once the paper has dried, then use it.
Odd-Shaped Gift Wrapping
If you’d like to gift someone an outdoor gift like a ski helmet or trekking poles or a vacuum insulated growler with additional tumblers, their odd shapes would be a tad difficult to work around for wrapping. In order to do justice to the whole wrapping experience, it is important to customize the process as per the gift item. For instance, in the case of the ski helmet, you’d innovate and use tissue paper, an aluminum foil or plastic bags, toilet rolls, recycled cardboard, googly eyes and transform them all to form a turtle!
To wrap the helmet, remove it from its packaging, and wrap it up in your choice of wrapping paper. Take the tissue paper/foil or plastic bag and compress it into a ball form to form a little turtle head, taping it all up to hold the shape and then wrap it with your choice of the wrapping paper, attaching it to the front of the helmet with tape. Move ahead, with cutting two toilet paper rolls in half, wrapping them in paper and tape them to the base of the helmet to form turtle feet. Then, roll up a cardboard piece into a turtle tail, wrap it up and tape it on the back of the helmet.
You can further attach different wrapping paper patterns shaped like hexagons to be taped on the helmet to make for turtle shell patterns! And finally add a pair of googly eyes to complete the effect!
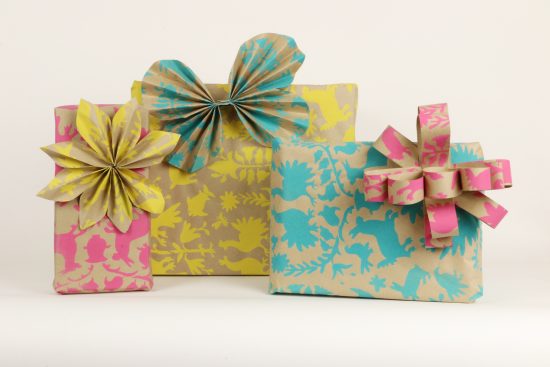
Bonus Tip: Wrapping Up your Holiday Gifts with Eco-friendly Options
Here are two easy wrapping ideas to complement your holiday gifts.
- Cut a decorative paper into an isosceles triangle, and beginning with one of its longer sides, fold the paper accordion style, trimming the base to keep it straight and then unfold the paper, hot glue tiny bells to it and your paper tree is ready!
- Use a patterned paper and cut it into 5 ½ inch long petals & 5 - 2 ½ inch long petals. Hot glue the large petals to one another, overlapping them slightly, and then glue the smaller ones on the top so the larger ones stick out creating a flower. Embellish the flower top with 3 tiny pearls.
-
Why You Must Gift a Plant: 15 Plants to Buy Online + The Benefits of Plants at Home and 4 Tips on How to Buy Them
-
 पेड़-पौधे न केवल हमारे परिवेश को सुंदर बनाते हैं, वे अद्भुत उपहार भी हैं। 15 सुंदर और उपयोगी पौधे जिन्हें आप उपहार के रूप में देने के लिए ऑनलाइन खरीद सकते हैं
-
 Having a Party to Celebrate Moving into Your New Home? 10 Return Gifts for Housewarming Party Guests
-
 Can't Find the Perfect Present Present for Your friend's Housewarming Party? 7 Home Decor Gifts You Can Buy Online + 3 DIY Gifts If You Want to Gift Something Personalised! (2021)
-
 10 Thoughtful Gift Ideas to Take to a Housewarming Party. Because New Home Owners Will Enjoy Something Besides That Bottle of Wine (2019)
Add Glamaour To Gift Giving By Gift Wrapping
Gift wrapping is a method used to present gifts that has been used for quite a long time. Different cultures in the past have made use of it and it is still and applicable method to date. This is because, it is a courteous and formal way to present a gift and make it more appreciable by the giftee. There are also some eco-friendly methods to wrap a gift and above, some methods have been detailed. There are some tips also provided to have you on your way to presenting a gift that is elegantly and stylishly wrapped to put a smile on the giftee.
 Highlight the Best Facets of Your Incomparable Beauty: Discover the Best Face Highlighter Currently Available in India and Everything You Need to Know About Using Face Highlighters for Maximum Effect (2023)
 Forget the Blemishes and Get that Picture Perfect Flawless Radiance on Your Face: Check out the Best Foundations for Oily Skin Currently Available in India and Everything You Need to Know About Makeup Foundations (2023)
 Make Your Presence Felt Wherever You Go: Discover the Best Perfumes Under 2000 for Both Men and Women to Announce Your Arrival and Make Any Occasion Memorable (2023)
 Protect Your Oily Skin from the Harmful Rays of the Sun: Discover the Best Gel Based Sunscreens for Oily Skin and Everything You Need to Know Before Buying One (2023)
 Minor Blemishes and Wrinkles Affecting Your Confidence? Check out the Best BB Creams to Conceal Your Worries and Nourish Your Skin to Restore the Healthy, Radiant and Glowing Complexion Back Again (2023)