-
 10 Stunning Birthday Cakes for Girls in 2020: Must Have Cake Designs She'll Fall in Love with and Where to Buy Them Online
-
 10 ऐसे केक जिनको देखकर और खाकर आपके बच्चे और मेहमान हमेशा आपको याद करेंगे ! लेटेस्ट केक रेसिपीज आपकी बेटी के जन्मदिन के लिए ।(2020)
-
 How to Make Cake at Homes: Tips & Tricks + 6 Easy-to-Make Cake Recipes that You Can Prepare Right in Your Kitchen! (2020)
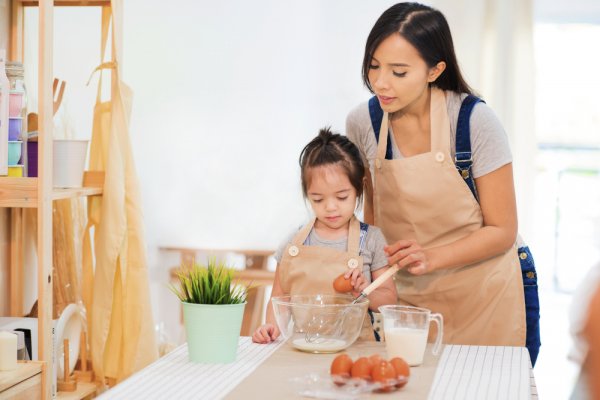
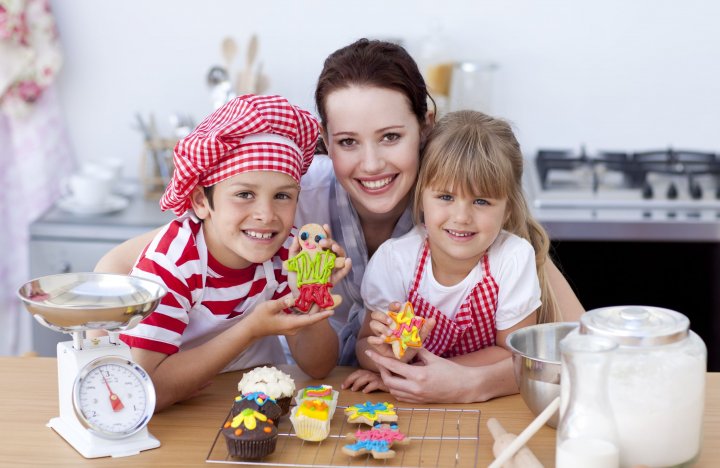
Make a Special Cake for Your Little Ones
A cake is a sweet dessert made from a mixture of flour, fat, eggs, sugar, and other ingredients, baked and sometimes iced or decorated.
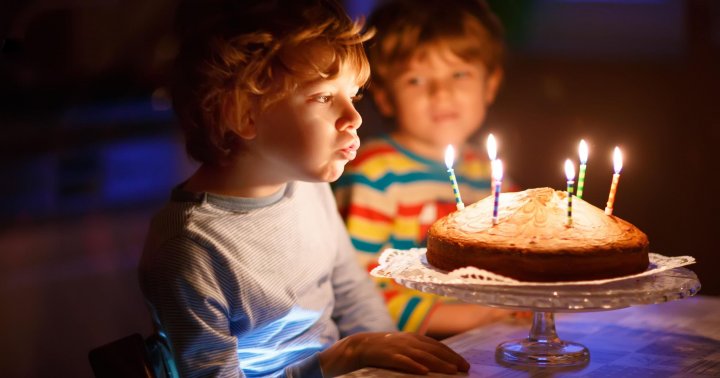
It is easy to buy a cake from the bakery but why buy one baking one has become so much easier! They are the centerpieces of a birthday party, but it is unfair only to have cake on birthdays. They are easy to make at home, and can be a special treat all year round!
Some moms might be a bit intimidated by the whole baking process, and so they end up missing out on the delightful experience of trying out different cake recipes for their children. Baking a cake for your child is way cheaper than buying the cake from stores, it can look exactly how you want it to look, and according to your child's preferences, and when your child tells you how delicious it tastes, all that time and energy put into making it would seem totally worth it!
10 Delicious Cake Recipes to Make Your Kids Super-Duper Happy!
1. Rainbow Marble or Layer Cake Recipe
Ingredients
- 2 cups plain flour (sifted)
- 3 tsp vanilla extract - 1 tsp for the cake and 2 tsp for the icing
- 1 1/2 cups white sugar
- 1/2 cup butter (softened)
- 3 eggs (lightly beaten)
- Liquid food colouring (any colour you want)
- 1 tbsp baking powder
- 3/4 cup milk
- 200 g butter (softened) - for icing
- 2 1/2 cups icing sugar mixture
- 2 tbs milk - for icing
How to Make
- Preheat oven to 180°C. Line and spray your cake tins and set aside.
- Whisk flour, baking powder, baking soda, and salt in a mixing bowl and set aside. In a different bowl, beat the butter, sugar and vanilla extract till they are pale and fluffy then beat in eggs and mix well.
- Divide the mixture evenly between different bowls (depending on the number of colours you want). Using the food colouring, tint each bowl of mixture.
- Divide the batters between each cake pan, making sure there are scoops of each color of batter in each pan, using a skewer or butter knife, swirl the batter a few times in each pan.
- Bake for 20 minutes or until the cakes spring back to the touch and a toothpick inserted comes back clean. Cool cake on a wire rack before frosting.
For Icing
- Beat the butter until it's pale and fluffy. Then beat in the vanilla and icing mixture, half a cup at a time. Add the milk at the end and beat it in until there is no random streak.
- To assemble, Spread about 1/2 cup of frosting over the first layer, stacking the second layer on top and repeat until the cake is filled and stacked.
And you have your rainbow cake ready to serve.
2. LEGO Birthday Cake
Ingredients
- 1 whole butter cake
- 8 whole marshmallows
- 180 g butter (softened)
- 3 tsp vanilla extract
- 3 cup soft icing sugar mixture (sifted)
- 3 tbs milk
- 2 tsp food colouring of your choice
How to Make
- Trim your butter cake into the shape of a LEGO brick.
- Put the cake on a cake board or plate and put it in the freezer for 1 hour.
- While it is in the freezer, put butter in a bowl and mix with an electric mixer until it is pale and fluffy, then add egg and mix until they're combined.
- Using half a cup at a time, add the icing mixture and mix well. Once the mixture becomes stiff, add a little of the milk and the food colouring until all of the icing ingredients are combined.
- Remove the cake from the freezer then coat the entire cake in a thin coat of icing before returning the cake back to the freezer for another 30 minutes.
- When the cake is chilled, mix the remaining icing and give the cake an all over smooth coat.
- Add a few drops of milk to the icing to thin it then place the marshmallows on a fork and dip into the icing. Position the marshmallows onto the cake using a knife.
- Share this delight with your children and other members of the family!
3. Easy Spiderman Cake
Ingredients
- 1 chocolate cake
- 1 1/2 quantity buttercream icing
- 1 blue food colouring
- 4 fresh strawberries
- 1 tube black writing icing
- 1 tube white writing icing
How to Make
- Make your cake and let it cool before making the buttercream icing.
- Once you have made the buttercream icing, save 1/3 of the white icing for the crumb coat.
- Add blue food colouring to the remaining 2/3 icing until it turns the colour of blue you want it to be.
- Give the cake a crumb coat (spread a thin layer of white icing over the cake).
- Put the crumb coated cake in the fridge for 30 minutes or until set.
- With the use of a large heated palette knife, spread the blue icing over the top of the crumb coat to get a smooth finish. You can heat the palette knife by dipping it in hot water and wiping it dry before using it to smooth out the icing.
- Put the cake in the fridge again, until the blue layer has hardened. (About 30 minutes)
- To make strawberry superman heads, cut each strawberry in half and use black writing icing to draw the outlines of the eyes. Fill in the eyes using white writing icing.
- Once you have the amount of Spiderman heads that you want, mark out where you are going to put them on the cake using a toothpick.
- Shape each toothpick so that only a small section pokes up out of the cake. Spike each strawberry face onto the toothpick in the places you marked around the edge of the cake.
- Use icing to stick your Spiderman figurine to wherever you want it to be on the cake. Be creative! Check out the YouTube video for more details.
4. Sheep Cake
Ingredients
- 2 packet vanilla cake mix
- 1 tbsp jelly crystals (strawberry)
- 2 quantity buttercream icing
- 1/2 cup white marshmallows
- 1 cup mini marshmallows
- 1 tube black writing icing
- 1 jelly beans (pink)
- 2 dark chocolate chips
How to Make
- Bake two cakes (a big one and a smaller one) and set aside to cool completely.
- Cut the domed top off each cake to create a flat even surface to work with. To make it easier to ice, turn each one upside down, so that the bottom is the top.
- Double the quantity of white buttercream icing.
- Print out the template twice and cut a head and body shape from each. Place the head template onto the smaller cake, secure it with toothpicks to keep it in place and then cut around the template.
- Place the body template onto the larger cake and do the same as above.
- Spread a thin layer of icing all over the body and head shaped cakes(crumb coat). Then put the cakes in the fridge for 30 minutes so that the crumb coat can set.
- Remove the cakes from the fridge and spread icing on the underside of the head. Put it on top of the body, just off centre, to create a double-layered sheep shape.
- Finish icing the cake by adding a second, final layer of white buttercream icing all over the cake.
- Place marshmallows around the edges of the sheep's head and all over the body. Squeeze two large marshmallows into ellipse shapes. Coat each one with a thin layer of icing and dip into the jelly crystals to create the sheep's pink ears.
- Use the pink jelly bean as a nose. Use the black writing icing to draw the mouth. You can also use the black writing icing to draw the eye, or you can use chocolate chips.
- Add licorice as legs and voila! Your Sheep Cake is ready!
5. Raspberry Ripple Cake
Ingredients
- 200 g self-raising flour
- 1 tsp baking powder
- 3 tbsp milk
- 200 g caster sugar
- 200 g softened butter
- 4 eggs
- 1 tsp vanilla extract
- 200 g punnet raspberry
- 140 g marshmallow
How to Make
- Heat oven to 190 degrees C/fan 170 degrees C/gas, then line and spray your cake tin.
- In a bowl, whisk sugar and butter until creamy and soft.
- Beat in the eggs, one by one, until they're incorporated.
- Mix in the vanilla extract, then the flour and baking powder, then mix in the milk to loosen the mixture.
- Fold in half the raspberries. Make sure you don’t mix too vigorously so they won't fall apart.
- Bake the cake for 20-30 minutes until it has been cooked through.
- Remove the cake from the oven and scatter the marshmallows all over the cake. Make sure you leave at least a 2 cm border around the edge of the tin as the marshmallows will expand when cooking, then place raspberries into any gaps.
- Put the cake back into the oven for another 10 minutes until the cake has fully cooked through, and the marshmallows are lightly browned and gooey.
- Leave to cool for 5 mins then cut up and share with everyone!
6. No-Bake Orange Cheesecake
Ingredients
- 12 oz. vanilla wafers
- 1/2 cup powdered sugar
- 2 cups heavy cream
- 1/2 tsp. vanilla extract
- Zest of one orange
- 1 & 1/2 cups granulated sugar, divided
- 4 tbsp (1/2 stick) unsalted butter, melted
- 2 (8 oz. each) packages cream cheese, softened to room temperature
- 1 box (3 oz.) orange jello
- 1 cup boiling water
How to Make
- Grind vanilla wafers in a food processor until it resembles crumbs. Add 1/2 cup granulated sugar and melted butter and continue grinding.
- Spray a springform pan generously with cooking spray and press mixture into the bottom of the pan and slightly up the sides. Chill in the freezer for at least 30 minutes.
- In a large mixing bowl, beat cream cheese and 1 cup granulated sugar together until the mixture is smooth and creamy.
- In a different bowl, mix orange jello and boiling water until mixture dissolves.
- In a different bowl, Whip heavy cream, vanilla extract, and confectioners sugar until stiff peaks form. Mix in half of the whipped cream mixture into the orange jello mixture and the other half with the cream cheese mixture.
- Alternate spreading each mixture into the pan, starting with the cream cheese mixture and ending with whipped cream. Leave in the fridge for at least 4 hours or overnight before serving. So easy and yet so yummy!
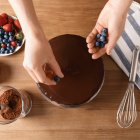
7. Chocolate Fudge Cake
Ingredients
- 2 & 1/2 cups all-purpose flour
- 1 teaspoon baking soda
- 1 cups of milk
- 1 & 1/2 cups white sugar
- 2 eggs
- 1 teaspoon vanilla extract
- 1 tablespoon fresh lemon juice
- 1/2 cup unsweetened cocoa powder
- 1 cup hot water
- 1 teaspoon baking powder
- 1/2 teaspoon salt
- 1/2 cup butter
Instructions
- Mix butter or margarine and sugar together in a large bowl until they cream. Add vanilla, and then, eggs to the mixture.
- In a different bowl, mix together flour, soda, baking powder, and salt.
- Add the lemon juice or vinegar to sour the milk.
- Alternate placing the mixtures into the creamed mixture, starting with the flour mixture and ending with the soured milk.
- Mix cocoa and hot water together, and mix into batter.
- Bake 30 to 35 minutes at 175 degrees C. Cool, and frost with desired frosting.
Your cake is ready to serve
8. Ice Cream Cone Cakes
Ingredients
- 200 g plain flour
- 12 flat-bottomed ice cream cones
- 200 g golden caster sugar
- 4 tbsp custard powder
- 1 tsp vanilla
- 200 g softened butter
- Paste with seed
- 2 large eggs, beaten
For Decorating
- 350 g butter, softened
- 350 g icing sugar, sifted
- 2 tsp vanilla extract
- Sprinkles, wafers, chocolate, glacé cherries, sauces- whatever your child likes on ice cream.
How to Make
- Heat oven to 180C/160C fan/gas and then place the cones in a muffin tin to hold them upright.
- Put the butter, flour, custard powder, vanilla, sugar, and eggs in a large mixing bowl.
- Beat the mixture together until smooth.
- Scoop the cake batter into a food bag or disposable piping bag, cut off the end to give you a wide hole, then pipe into the cones, filling them 3/4 full – this will make sure you get the batter right to the bottom.
- Bake the cone cakes, still in the muffin tin, for 30 minutes until the cake is fully cooked. Leave the cake to cool.
- To decorate the cakes, beat the butter until it is smooth, then add icing sugar and vanilla before beating it again until well mixed.
- Put into a piping bag fitted with a nozzle, then pipe icing on top of each cake as you would a cupcake. Decorate with chocolate, cherries, sprinkles, drizzles of sauce – whatever your child likes!
9. Popsicle Birthday Cake
Ingredients
- 2 cups (500ml) strawberry ice cream, softened
- 2 cups (500ml) vanilla ice cream, softened
- 2 cups (500ml) chocolate ice cream, softened
- 8 large popsicle sticks
How to Make
- Spoon the softened strawberry ice cream into a silicon loaf pan. Place the ice cream into the freezer for 2-3 hours or until set, then carefully push the 8 popsicle sticks into the ice cream, an even distance apart.
- Repeat the above with the softened vanilla and chocolate ice cream. (They would be the second and third layer respectively)
- Remove from freezer and pop out the ice cream block.
- Slice it in between popsicle sticks and serve.
10. Frosted Carrot Squares
Ingredients
- Cooking spray
- 1 cup flour
- 3/4 teaspoon baking powder
- 1 egg, lightly beaten
- 1 cup sugar
- 1 teaspoon lemon juice
- 1/2 cup powdered sugar
- 1/2 cup granulated sugar
- 1/4 teaspoon salt
- 1 teaspoon cinnamon
- 3/4 teaspoon baking soda
- 1/3 cup vanilla fat-free yogurt
- 1/3 cup vegetable oil
- 1 cup shredded carrot
- 1/2 cup chopped fresh or canned, drained pineapple
- 1/2 cup flaked sweetened coconut
- 1/3 cup chopped pecans
- 4 ounces Neufchatel cheese, softened
How to Make
- Preheat oven to 350 degrees C.
- Thoroughly spray a baking pan with a cooking spray. Set it aside.
- Combine flour, salt, baking soda, flaked coconut, baking powder, and cinnamon in a large bowl and mix together.
- In a different bowl, beat together sugar, yogurt, oil, and egg, then mix in the carrot and pineapple. Mix with dry ingredients. Fold in pecans.
- Pour batter into pan. Bake 25 minutes, or until it's fully cooked. Let it chill for a while.
- Beat cream cheese in a medium bowl. Beat in lemon juice and powdered sugar.
- Spread frosting over cake. Cut into slices and enjoy with your loved ones.
This cake is healthier than a chocolate cake!
Characters Based Cake Ideas Your Kids Will Love
Barbie Doll
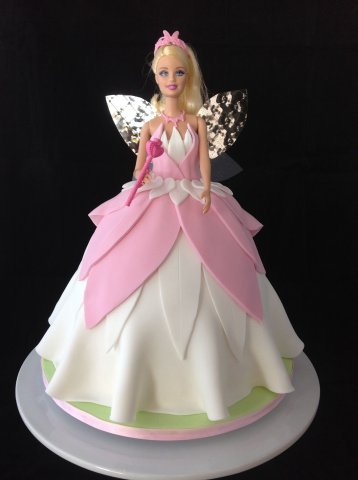
Children love their toys and often form an attachment with them. For 56 years, Barbie has been the doll on every little girl’s holiday or birthday wishlist -but often, it seemed the toy boxed young girls into traditionally feminine careers, including flight attendants or fashion editors. However, a recently released commercial from Mattel, Barbie's creator, shows barbie deviating from the cliche feminine role she used to be stuck into. In the ad, girls are encouraged to be veterinarians, pro soccer coaches, college professors, and high-powered business executives. The ad asks, “What happens when girls are free to imagine they can be anything?” This is a great cake to make to teach your child that they can be anything they want to be.
Nemo & Dory
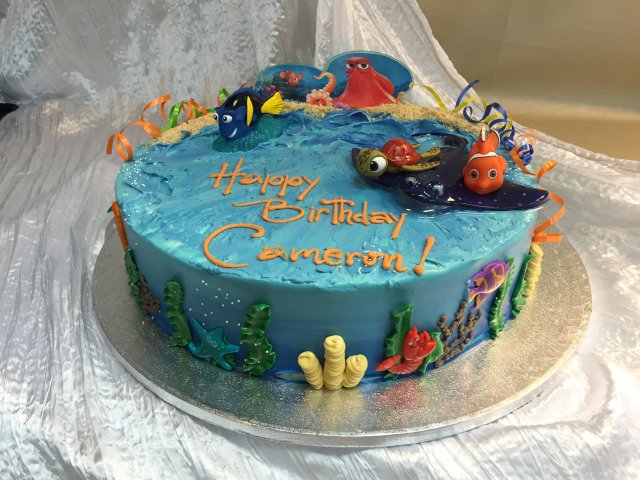
Finding Nemo and Finding Dory are classic cartoons that teach a lot of lessons like, don't give in to peer pressure, beware of strangers, listen to your parents, just keep swimming through every difficulty, and most importantly, never give up!
These are great lessons for your child to learn. Don't just bake this cake for your child. Bake the cake, watch the movie with them, and have a discussion about what they learned from the movie. This is a great way to make your children learn some important life lessons at such a young age.
Apart from the lessons, Nemo and Dory cakes are simply pretty, fun and colourful, just like the cartoon fishes themselves.
Ninja Turtle
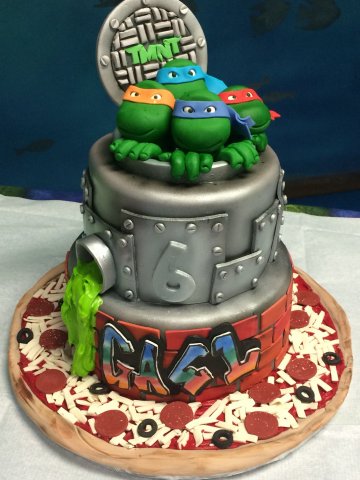
Turtles are supposed to be slow, right? You're right if you're talking about reality, but these turtles are anything but slow!
The Teenage Mutant Ninja Turtles team consists of four power-packed turtles who go about fighting crime. We don't know what is more inspirational, the fact that these animals that are well known to be slow are portrayed as fast who can do anything or the fact that they fight crime!
Ninja Turtles are not just limited to comic books, or cartoon series or films – their popularity has even forced people to make Teenage Mutant Ninja Turtles cakes. The characters of this cartoon series are prevalent among children. If your kid is a Ninja Turtles fan, make a Teenage Mutant Ninja Turtles themed cake for them and watch that happy smile blossom on your child's face.
3 Toppings Which Can be Used on Any Kind of Cake
Fresh Fruit such as Orange Wheels & Mixed Berries
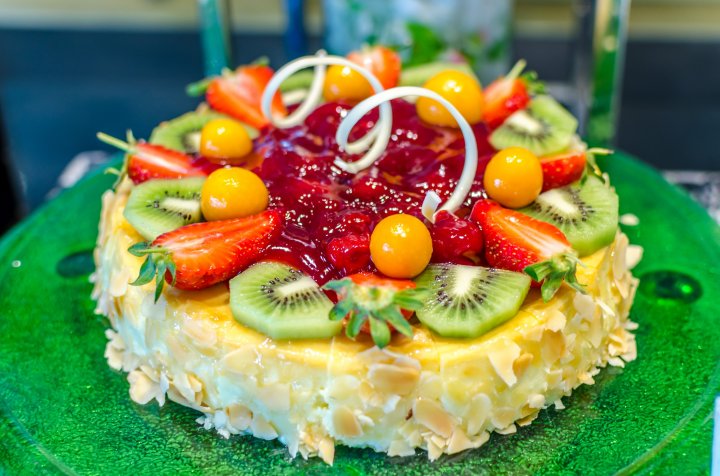
If you're looking for something light and refreshing to give your cake a taste of summer, fruits are the best choice.
Decorating a cake with fruit on top is a great way to let nature add the flair to your cake. It is also a great way to make sure your kids get a lot of vitamins and other healthy antioxidants and minerals which are found in so many fruits used as toppings in a cake.
Decorating a cake with fresh fruits is a quick and delicious way to turn a simple frosted cake into a garden-fresh masterpiece. You can theme your cakes with seasonal fruits, use berries in the summer, and clementines and dried fruit in the winter. You can use Orange wheels to top your cake all year round!
Decorating a cake by using fruits as a topping can be simple enough for every day and elegant enough for special occasions, the best part being, you don't even need to invest much of your time in learning how to master it.
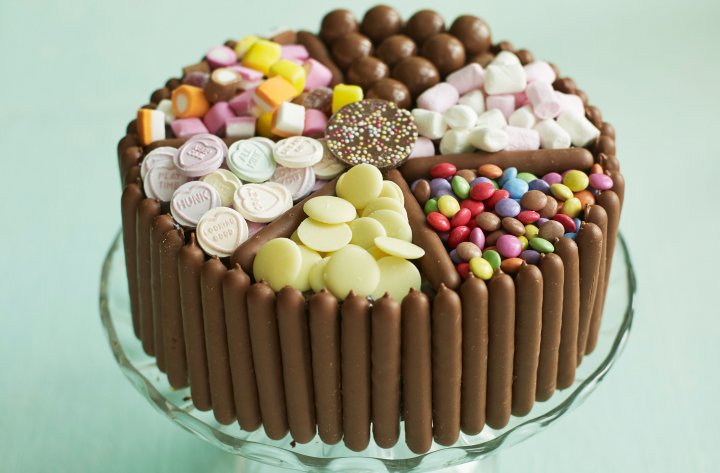
Mini Chocolate Candies, Crushed Peppermints, Colourful Candies such as Jelly Beans
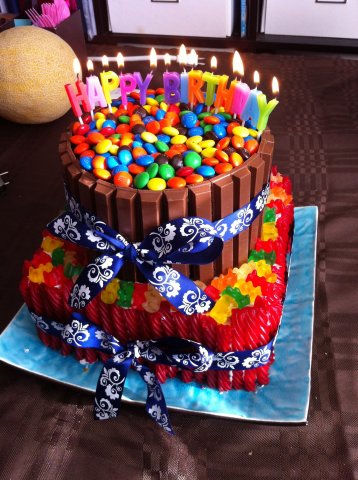
It's no secret that children go gaga for candy. Whether you pile them up in the middle, cover the whole cake in them or make a pattern like spelling out their names or outline their favourite cartoon character, your kids are going to love a cake decorated with masses of candies.
If you want to cover the frosting or add a burst of colour and texture, using candies such as mini chocolate candies, crushed peppermint, and colourful candies such as jelly beans as toppings is a fantastic idea. Your child will be excited to see a cake that has two mini-candy canes placed together on top of the cake to create a heart shape.
Small Cookies such as Animal Crackers or Sugar Cookies Cut into Shapes
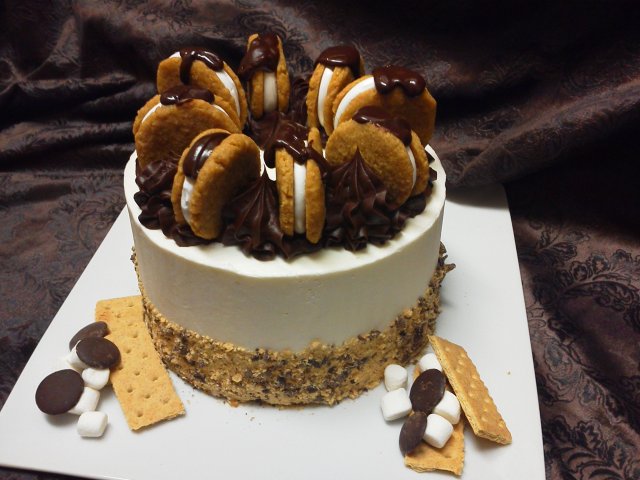
Cake + Cookies equals a child's perfect daydream! Cookies shaped like animals and other different shapes are great options to be used as toppings for a cake.
You can never go wrong with adding cookies to a cake. Children love cookies. And they also love cake. So a 'cookies cake' would naturally be doubly loved.
Give your child a cake that is topped with cookies shaped like their favourite animal, and they'll adore you for it. You can even take the cake to your child's school to share some happiness with other kids as well.
-
 You Don't Need Batteries Toys to Encourage Kids to Play! 14 Cool, Creative and Fun Wooden Toys That Will Keep the Child Engaged for Hours(2020)
-
 Still Searching for the Best Gifts for a 1 Year Old Boy? Here's a List of 8 Fun and Exciting Gifts which Will Surely Make Him Squeal with Happiness! (2019)
-
 Magnets Can Be Fun at Any Age, but These 10 Magnetic Toys Have Been Created to Aid the Development of Children. Buy One for Your Little One Today (2020)!
-
 Looking for a Gift for a 1-Year-Old Birthday Boy? 10 Fabulous Gifts to Captivate His Attention and 3 Tips to Buy an Appropriate Gift
-
 Importance of Presenting Gifts to Your 8 Year Old Girl and 10 Fun Gift Ideas for Her
Prepare Your Own Flavours & Add Your Unique Twists!
There are endless options to try from when it comes to choosing the perfect cake recipes. Internet is filled with delicious cake recipes all around, and in this piece, we just showed you some of the best ones from out there. However, we want to encourage you to try and make your cake recipe from scratch and share it with the world! Make a hybrid off two different cake recipes or add some flavours which you think would be unique, prepare the most delicious cake the world has ever seen, or should we say, eaten. Happy Baking!
 Highlight the Best Facets of Your Incomparable Beauty: Discover the Best Face Highlighter Currently Available in India and Everything You Need to Know About Using Face Highlighters for Maximum Effect (2023)
 Forget the Blemishes and Get that Picture Perfect Flawless Radiance on Your Face: Check out the Best Foundations for Oily Skin Currently Available in India and Everything You Need to Know About Makeup Foundations (2023)
 Make Your Presence Felt Wherever You Go: Discover the Best Perfumes Under 2000 for Both Men and Women to Announce Your Arrival and Make Any Occasion Memorable (2023)
 Protect Your Oily Skin from the Harmful Rays of the Sun: Discover the Best Gel Based Sunscreens for Oily Skin and Everything You Need to Know Before Buying One (2023)
 Minor Blemishes and Wrinkles Affecting Your Confidence? Check out the Best BB Creams to Conceal Your Worries and Nourish Your Skin to Restore the Healthy, Radiant and Glowing Complexion Back Again (2023)