-
 Ever Wondered How to Make Paneer at Home? Here is the Complete Guide to Take Out Soft and Creamy Paneer from Milk at Home (2021)
-
 Want More Tantalizing Breakfast Ideas? Here are 6 Scrumptious Egg Recipes for Breakfast That Will Make You Want to Eat Eggs All Day (2020)
-
 How to Increase Weight: Foods to Include in Your Diet for Your Weight Gain Journey + Tips for Gaining Weight (2020)
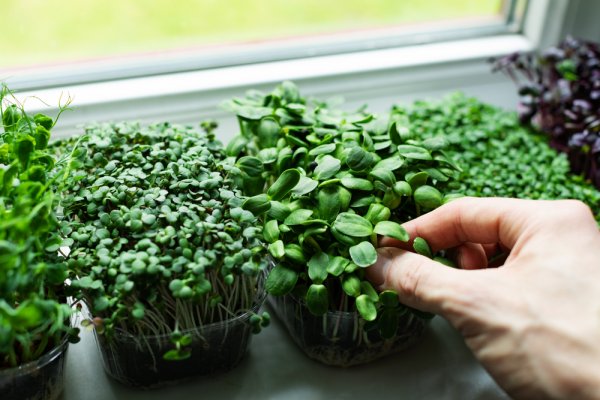
Reasons for Growing Microgreens at Home
Microgreens are the smaller version of plants that are rich in vitamins and enzymes. Even more so than the mature plant itself. Here are some of the reasons to grow microgreens at home:
- Nutritional Value: Microgreens are highly nutritious. As per a study, it is known that microgreens have five times more nutritional value than mature vegetables.
- They Grow Quickly: Microgreens are easy to grow as they sprout up quickly. So there is no hassle of waiting for a long time.
- Tasty: Microgreens are quite tasty and there are so many recipes to try. They are packed with flavour and the taste is quite distinctive from that of the fully grown plant.
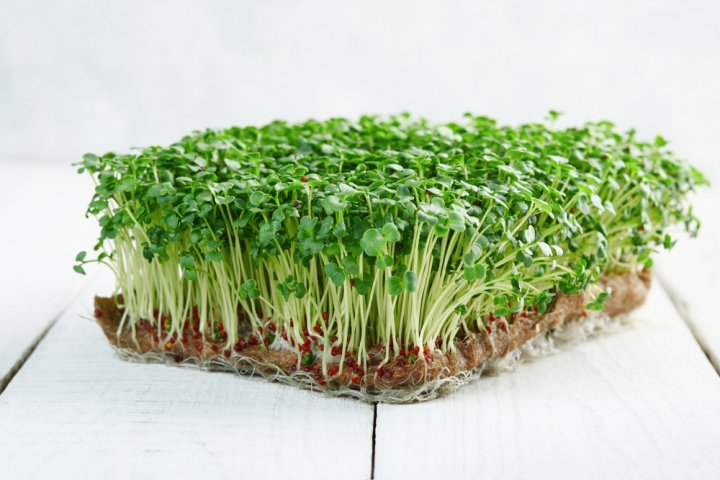
List of Microgreens You Can Grow at Home
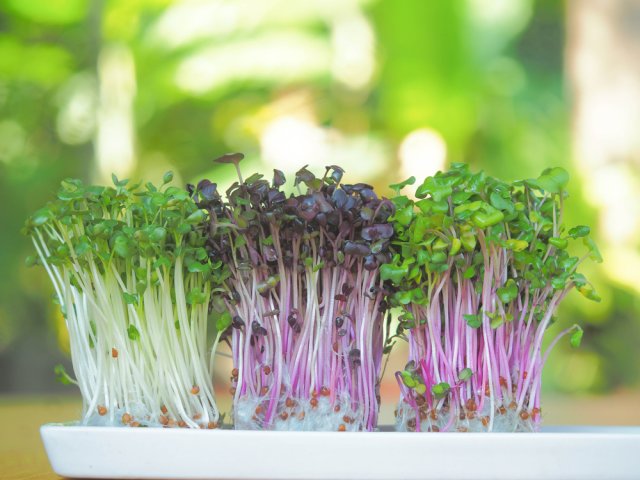
Radish Microgreen:
This is one of the fastest growing microgreens and it is rich in vitamins C, B, antioxidants, phosphorus and magnesium. It grows well at room temperature throughout the year.Broccoli Microgreen:
This is rich in vitamin A, C, K and E, calcium, proteins and more. It also has anti-inflammatory properties that help to flush out the toxins from your body. It is easy to grow and grows best in a soil-based medium. It reaches the stage to harvest in just about 8-10 days.Parsley Microgreen:
Parsley microgreen helps in improving liver health and is rich in magnesium, iron, potassium, calcium, vitamins A, K and C. This also has a high germination rate and grows best in a soil-based medium.Beetroot Microgreen:
This is rich in magnesium, iron, zinc, calcium and vitamins A, B, C and K, etc. It reaches the stage of harvest in 18-20 days and grows well throughout the year.Spinach Microgreen:
Spinach microgreen is a great source of calcium, iron, potassium, vitamins A and C. It grows well under ample sunlight and airflow. It is very healthy and keeps the blood pressure in check, reduces the chances of diabetes and also prevents cancer to an extent.
How to Grow Microgreens at Home without Soil
Microgreens are a great source of energy and nutrients. They make a quick healthy snack that also tastes very good. They make great additions for salads, breakfast and also pizzas when used as toppings. Though it is appealing, it is difficult to grow microgreens in the soil medium due to the mess it creates. You may often wonder for a way to make things simpler and mess free. Here’s one such method that allows you to grow microgreens at home without having to deal with high maintenance.
Microgreens grow tremendously well even in water, there is no requirement of soil. The process of growing microgreens in water is called Hydroponics. There are many aquatic based plants that receive oxygen and nutrients from water. Here are the things necessary to grow microgreens at home without soil:
Things Needed:
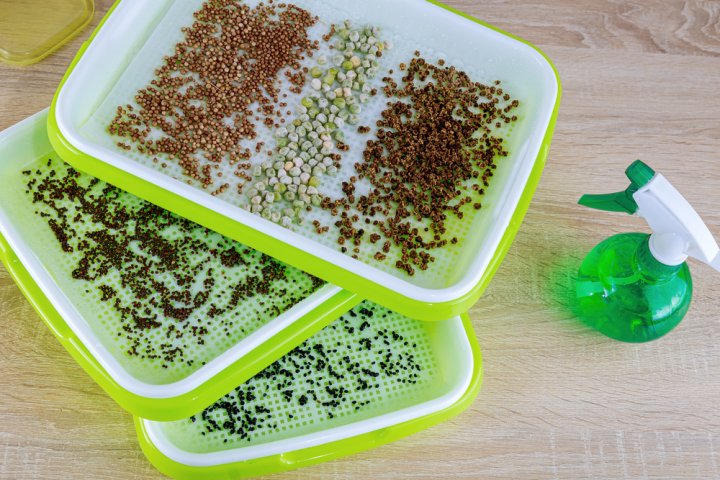
- Microgreen Seeds: There are many options available in the market for seeds, but ensure to buy the one that is specifically bred for growing microgreens. Always go for organic seeds and avoid those treated with fungicides.
- Growing Medium: The main reason for adding a growing medium is to ensure that the microgreens have something to hold on to and they grow straight. There are a variety of growing mediums, but hemp mats and coconut coir are the best.
- Nutrients: Hydroponic microgreens absorb nutrients from the water and grow well, but their growth is amplified with the addition of nutrients. Although it is not mandatory, if you choose to add nutrients, then go for an organic product.
- Spray Bottle: Do not reuse any spray bottle if it has chemicals in it. Always buy a new one as it costs less and does not harm the microgreens.
- Trays to Grow In: Any plastic tray that has drainage holes in it is good and it is up to your taste and the ambience of your kitchen. There are also standard size plastic trays available in the market. If there is no hole in the tray, poke in some holes.
- Light Source: T8 and T5 Fluorescent lights are the best suited for growing microgreens.
Step by Step Procedure:
- Test and Adjust the Water: The pH of the water in the range of 5.5 to 6.5 is ideal. Test the pH, add lime to raise the pH and phosphoric acid to reduce the pH and adjust accordingly. Add the nutrients and let them sit for a while.
- Soak the Growing Medium: Cut the grow mats to fit the tray and transfer them to the water. Let them absorb the water and nutrients, then drain off the excess and transfer them into the tray.
- Add Microgreen Seeds: Sprinkle the seeds on the growing medium based on the density required for that particular microgreen as this differs from plant to plant. Then spray the mist of water on them all.
- Cover Them: Cover the seeds with an opaque object to ensure complete difference. A flipped tray on top does the job.
- Mist: Keeping the tray covered and in darkness is very important in the germination stage. Open the tray once in 12 hours to spray.
- Growth: After 5 days in the dark, they start to grow well. Leave them under the fluorescent lighting and start watering them instead of misting.
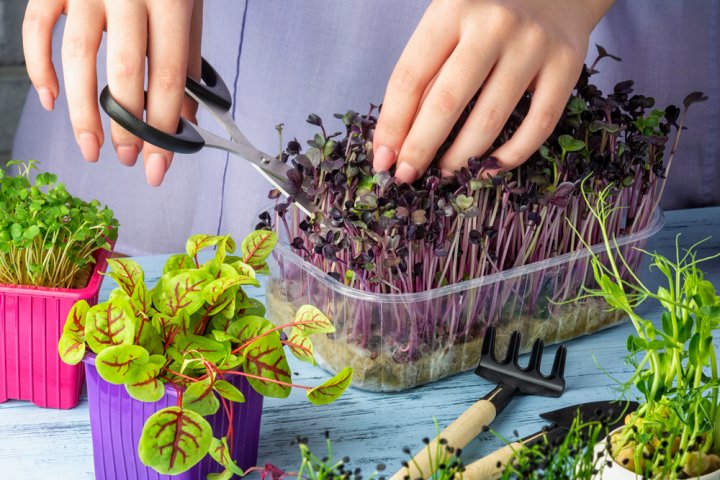
- Harvest: Most of the microgreens are ready for harvest between 10-12 days. Cut them at the base of the stem, rinse, dry and refrigerate.
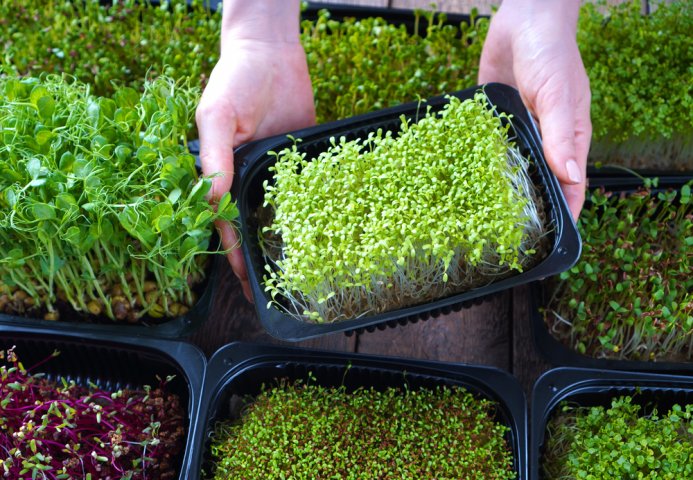
How to Grow Microgreens Indoors?
Microgreens are one of the easiest things to grow indoors. They do not require much expertise and the methodology is quite simple even for beginners. Here are the prerequisites required to grow microgreen indoors:
- Growing trays, they must fit into one another
- A base tray that acts as a saucer to the growing tray
- Saran wrap or a humidity dome
- Sharp scissors
- Spray bottle
- Organic soil
- Organic microgreen seeds
- Cardboard
How to Set It Up:
- Growing Tray: The first step is to check for drain holes in the growing tray for the moisture to drip through. If there are no holes then make them using a sharp scissors or a knife. Then place a base tray below the growing tray so that it holds the dripped moisture. This keeps the place tidy and aids easy maintenance.
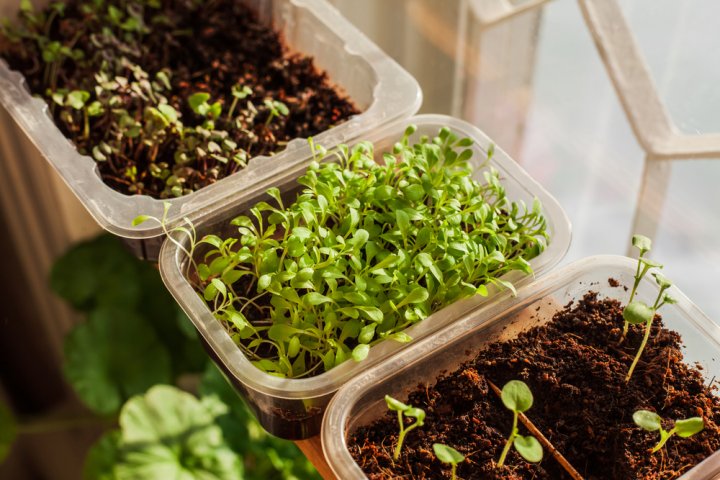
- Soil: Add about 1 inch of moistened soil layer. Ensure it is at level to promote even growth and flatten it if necessary.
- Organic Microgreen Seeds: Sprinkle the microgreen seeds evenly on top of the layer and do not dab them into the soil. If necessary add an extra thin layer of soil on top and sprinkle some water using a spray bottle.
- Saran Wrap: Microgreen seeds require humidity and darkness to sprout. So, cover the tray with saran wrap or a humidity tray or simply place an opaque object on top. Open it every 12-14 hours to mist when dry.
- Sunlight: After their germination, which usually takes about 3-5 days based on the variety of the microgreen seeds, remove the covering and place the growing tray in sunlight. It is vital that they get 4-6 hours of sunlight daily or if there’s low sunlight, then LED grow lights are also a good option. Mist the sprouts twice a day.
- Harvest: It takes about 10-12 days for microgreens to reach the harvesting stage depending on the variety. They are ready for harvest once two leaves are formed. Cut them with a sharp scissors at the bottom of the stem. Their shelf life is up to a week when stored in the refrigerator.
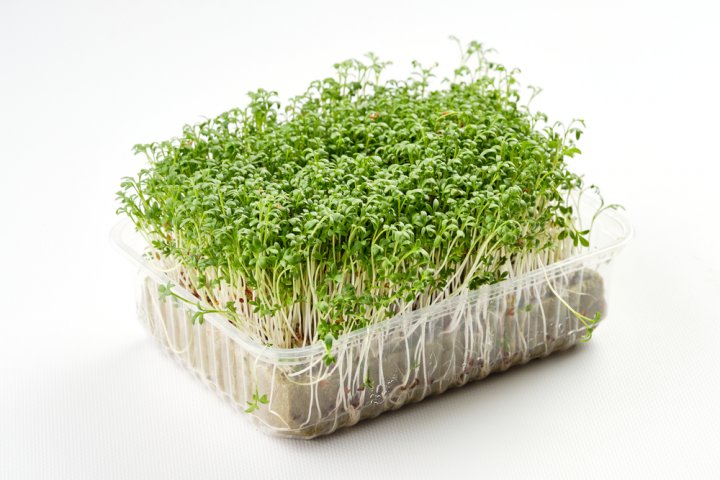
How to Grow Microgreens in a Jar?

There are many people who have been growing sprouts in jars for a long time now and it is actually the best way to grow sprouts as a jar offers humidity that sprouting requires. This often makes you wonder if it is possible to grow microgreens in a jar. Microgreens are the easiest to grow and many of them grow even in jars, all they require is moisture and sunlight. Many microgreens like endive, spinach, broccoli, lettuce, kale, mustard, cabbage, radish greens, peas, parsley, beet greens, arugula, basil, watercress, etc. all grow well in the jar.
When trying to grow microgreens in a jar, it is best to grow them hydroponically in a nutrient rich water source. This is in fact a much faster and a mess-free way to grow microgreens instead of growing them in a soil medium.
Steps to Grow
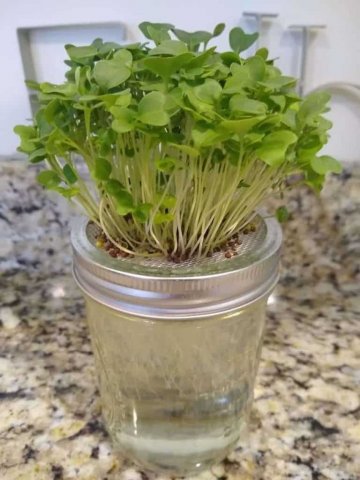
- Mason Jar with a Wide Opening: Always avoid jars with small openings, they do not have enough area to spread the seeds, which in turn grow less microgreens. So, choose a mason jar that has a wide mouth so there’s enough area to spread the seeds on.
- Cut out a Mesh the Same Size as the Lid: This is very important as it holds the seeds in place and prevents them from falling into the water. Cover the opening of the jar with a screen material, cheesecloth or a mesh based on the size of the seeds and the preference. The basic idea is to ensure the seeds don’t fall in. When screen material or cheesecloth is chosen, cut out extra and drape it over the sides of the jar.
- Add in Nutrients to the Water and Pour It into the Jar: While choosing to grow microgreens in water (hydroponically), the important thing to consider is their nutritional requirement. Regular tap water will not contain all the nutrients the seeds need to grow. So, add in the nutrients to the water and mix them so that the seeds grow easily. Although be mindful about the quantity of microgreens to use as this impacts the nutritional value of the water, which is responsible for their growth. Too less will do no good, whereas too much can cause more harm than good. Check the nutrient bag for instructions on the quantity.
- Recommended pH of the Water is Between 5.5 to 6.5: Check and adjust it properly by adding lime juice to increase the pH and phosphoric acid to decrease the pH. Rain water or distilled water are the best choice as they already have the right pH. Then pour this mixture into the jar and ensure it is ¼ inch below the top of the jar.
- Sprinkle the Organic Microgreen Seeds: After adding the water and the nutrient mixture to the jar, cover it with a mesh and screw the ring tightly. Then sprinkle the organic microgreen seeds on top of it. Ensure that they are not on top of each other and spread evenly.
- Spray and Cover the Jar: Using a spray bottle, mist the seeds lightly and close the lid of the jar on top of the seeds.
- Keep the Jar in a Dark Area: Place the jar in a dark area for about 3-5 days, until the sprouts are formed. This is very important and open the lid once a day to mist the seeds and close it back again.
- Open the Lid and Keep It Under Sunlight: Once the sprouts are formed, take them out of the dark area and open the lid. Place the jar under sunlight and they grow into microgreens in a few days.
- Harvest: After 2-3 leaves are formed, they are ready for harvest. Use them freshly or refrigerate them by cutting at the base of the stem.
Microgreens Recipes
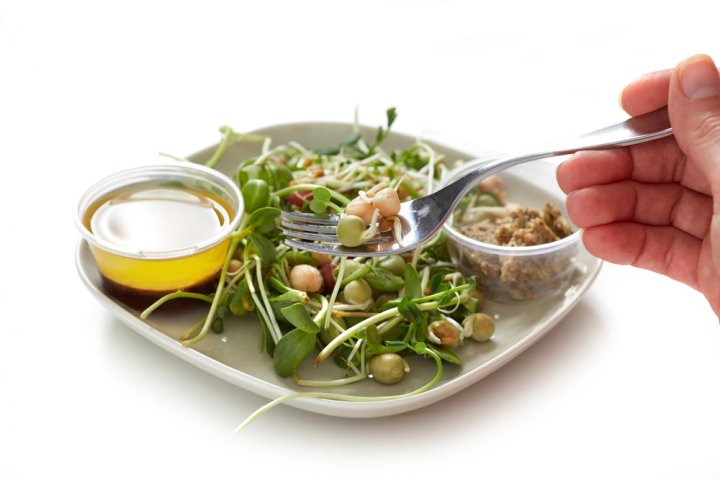
- Pizza Toppings: Pizza is definitely one of the favourite foods of both kids and adults. Adding arugula microgreens on pizza elevates the taste and also makes it healthier. Add microgreens after taking the pizza out of the oven in order to maintain the crunch.
- Spring Salad: Add in any vegetables of your choice and put in a lot of different types microgreens. This makes the salad more versatile, tasty and healthy. This is the best option to try, especially when you get tired of everyday salads.
- Microgreens Sushi: The best way to add in microgreens the most in a dish is in sushi. A vegetable sushi with more microgreens makes it unique from the rest. This also gives it an element of crunchiness and freshness.
- Green Smoothie:, There’s no better way to soak in all the nutrition and health benefits of microgreens than through a smoothie. Add in microgreens of different types and some mature vegetables, then blend them all to form a smoothie. Seasoning can be done as per your preference.
- Omelette with Microgreens: An Omelette is everyone’s favourite, it is the most common breakfast choice in many households. Make it healthy and crunchy with the addition of microgreens as toppings.
-
 समुद्र तट, प्रकृति का जादुई सौंदर्य, अनूठा आकर्षण सब कुछ है - पांडिचेरी यात्रा के दौरान वहाँ क्या देखें, क्या खाएं, कहां खरीदारी करें: पांडिचेरी में घूमने के 10 सर्वश्रेष्ठ स्थान (2020)
-
 Introduce Your Family to the Multiple Benefits of Horse Gram: Check out Simple and Delicious Horse Gram Recipes and Make This Superfood a Part of Your Family's Regular Diet (2021)
-
 चिया बीज का उपयोग करने के लिए शीर्ष 8 विभिन्न प्रकार के अद्भुत तरीके इसके अधिकतम लाभ प्राप्त करने के लिए। चीया बीज के बारे में आमतौर पर पूछे जाने वाले प्रश्न (2021)
-
 What to do When Your BP is Low? Top Home Remedies to Manage Low Blood Pressure and Why You Need to Take Low BP Seriously (2020)
-
 Beauty is Hardly Skin Deep and You Must Follow the Right Diet for Glowing Skin. Try these Healthy Home Remedies and Diet Tips for Glowing Skin in 2020
Make Microgreens a Part of Your Regular Diet
Now that you are aware of the numerous benefits of microgreens and the ease with which they can be grown in the comfort of your home, it is important to make them a part of your regular diet. We hope you would have found this BP Guide interesting and informative. Share your experiences of growing microgreens at home and stay connected with us for more such engaging content.
 Highlight the Best Facets of Your Incomparable Beauty: Discover the Best Face Highlighter Currently Available in India and Everything You Need to Know About Using Face Highlighters for Maximum Effect (2023)
 Forget the Blemishes and Get that Picture Perfect Flawless Radiance on Your Face: Check out the Best Foundations for Oily Skin Currently Available in India and Everything You Need to Know About Makeup Foundations (2023)
 Make Your Presence Felt Wherever You Go: Discover the Best Perfumes Under 2000 for Both Men and Women to Announce Your Arrival and Make Any Occasion Memorable (2023)
 Protect Your Oily Skin from the Harmful Rays of the Sun: Discover the Best Gel Based Sunscreens for Oily Skin and Everything You Need to Know Before Buying One (2023)
 Minor Blemishes and Wrinkles Affecting Your Confidence? Check out the Best BB Creams to Conceal Your Worries and Nourish Your Skin to Restore the Healthy, Radiant and Glowing Complexion Back Again (2023)