
-
 Learning How to Cook Indian Food Can Be Easy! Try These 15 Incredibly Delicious Indian Recipes That Will Make You Want to Cook Instead of Calling for Take Out
-
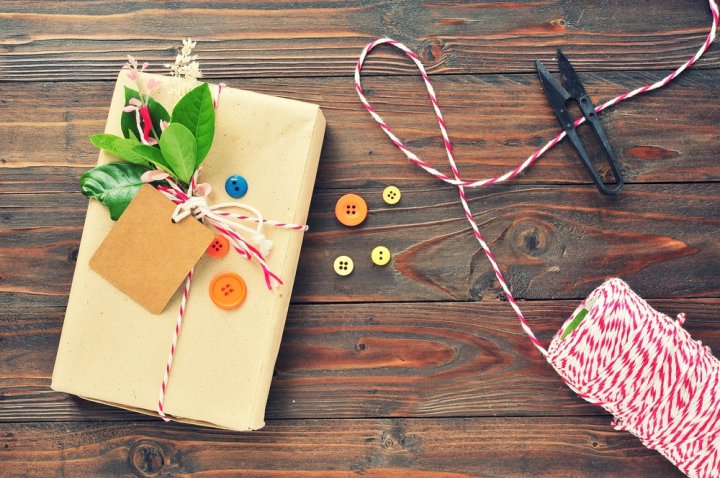
 Give An Extra Special Gift This Time! 10 Unique, Super Easy Handmade Gifts For Birthdays That You Can Make Yourself
-
 Feeling Creative in 2019? Here are Some Amazing Do-It-Yourself Gift Ideas
Important Things to Keep in Mind When Giving Handmade Gifts
Handcrafted with Perfection
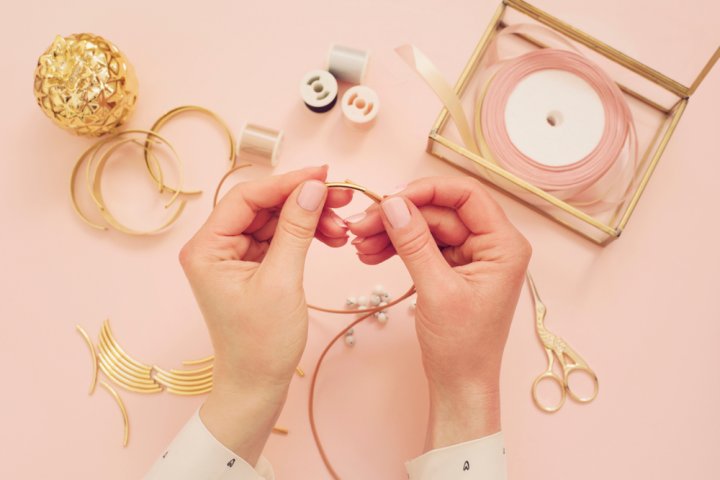
There’s something very unique and expressive about a handmade gift. Anything you make would be one of a kind, and even if you make another piece, it would still differ in so many ways. When you opt for making a gift for your friend, you also choose to think about her interests, preferences for color, taste or fragrance. Your gift would be more expensive than a store-bought purchase, given that you’ve invested your time, and gone through the trouble of coming up with something that’s suitable for your friend’s personality and matches her interests.
Avoid a Handmade Gift if it's Just a Cheap Alternative
When you decide on giving a handmade gift, you are essentially sending a message across that your friend is important to you, so much that you took out time in creating something and it carries your love and affection for her. But, before you do there are some things to keep in mind – make a gift only if believe you can do justice to the idea you have in mind, you have enough time to work on it and you can afford to invest in things required to make it. Homemade gifts can work out cheaper than a store bought present but it shouldn't be the only reason you're making one. It should be something you would be delighted to receive yourself.
Don’t Pass Off an Inferior Quality Gift
Even though your gift is handcrafted and made with great care, it is important that all parameters in terms its finishing and quality are met. What you can make for a child and get away with, isn’t really the same for what you make for an adult. You wouldn’t want to gift something, you wouldn’t like receiving either! So make an extra effort to polish and perfect your creation and make it visually more appealing. In addition to its creation, you can also spend extra time in wrapping the gift in a unique manner.
Unique Handmade Gift Ideas for a Friend
#1 A Bath Bomb Hamper
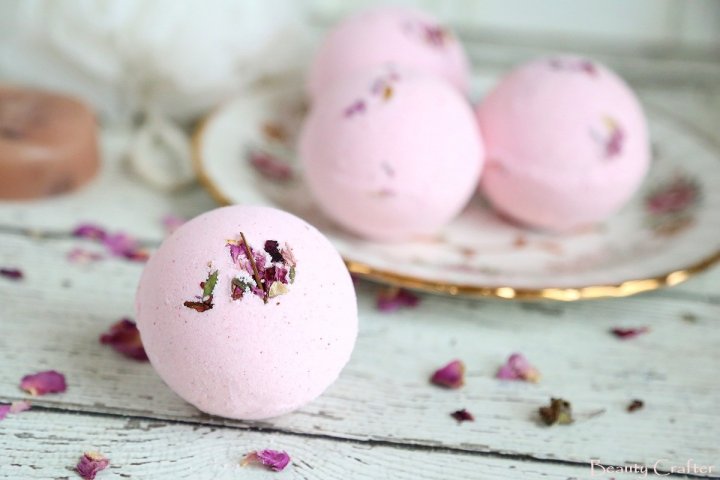
There’s nothing like a warm, bubble bath after a hard day. Bath bombs can be a great gift and gratifying for your friend. With this easy-to-follow tutorial, you can make a batch and customize them all in different colors, shapes, sizes and fragrances within 10 minutes.
Bath Bombs
What you need:- 8 oz baking soda
- 4 oz Epsom salt
- 4 oz corn starch
- 4 oz citric acid
- A large bowl
- A whisk
- Some dried flower petals (optional)
- 2 ½ tablespoons of vegetable or coconut oil
- A tablespoon (tbsp) of water
- 2 teaspoons (tsp) of essential oil of your choice (for fragrance)
- 4-6 drops of food coloring (the more drops you put, the deeper the color)
- A small jar or bowl, and
- 12-18 silicone molds
How to make it:
- In a large bowl, begin with mixing the dry elements (baking soda, Epsom salt, corn starch and citric acid) with a whisk for a lump-free blend.
- Next, mix the wet elements of oil, water, essential oil and the food color separately from the dry elements.
- Now add the wet blend to the dry mix slowly, 1 tsp at a time, stirring it continuously. If it starts getting frothier, then slow the pace down further. Continue whisking till you have the mix as damp sand.
- Now fill the silicone molds with the mix one by one, but quickly to avoid drying it up. Press the mix down into the molds firmly and let it dry for at least a day, and then pop them out of the molds.
You can pack the bath bombs individually in a transparent cellophane cover and then tie a ribbon around each, putting them in a little basket or a designer gift bag and present it to your friend. Please note, most of the ingredients used in making bath bombs can usually be found in your kitchen closet, for the rest, you can simply plan ahead and buy them as and when you need it or make a kit for long time use.
#2 Marble Styled Mug
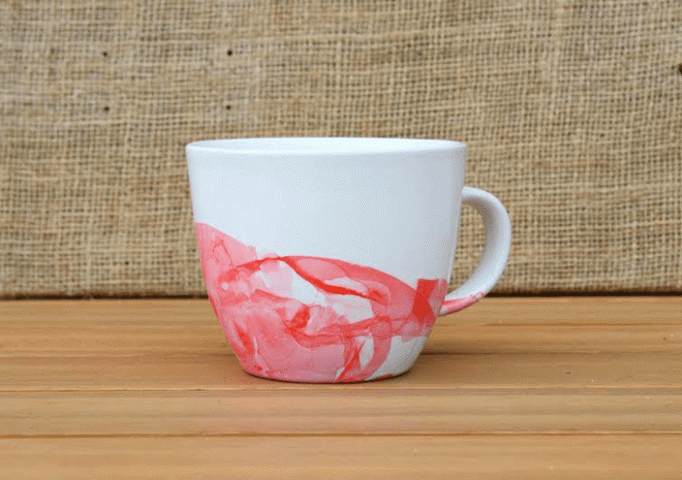
A project which is simple, cheap and quick to make! All you need for this beautiful gift is a plain white mug, which you may find in your kitchen or simply buy it off from amazon.in for Rs.195, a nail enamel (from your existing supplies of polish), a bowl of warm water in plastic or a bowl you can discard after use and some toothpicks.
Designing a beautiful marble styled mug for your friend is a piece of cake with these easy steps to follow.
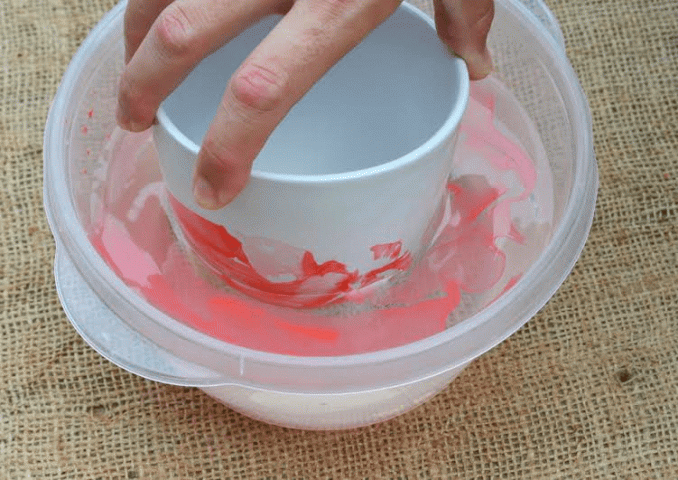
Making the mug:
- Wash your mug in warm water with soap and dry it completely.
- Then with some warm water in a disposable container filled till at least ½ of the cup size, pour some nail polish into it. Quickly swirl the polish in the water with a toothpick, to avoid letting it set and then dip the cup into it.
- While dipping the cup, be sure to do it at an angle to avoid the polish getting stuck at the bottom!
- Keep the mug to dry and then wrap it up nicely for your friend.
#3 String Art Decor
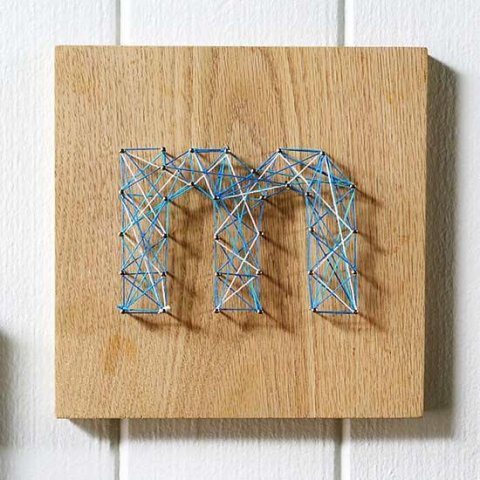
Create a beautiful piece of wall décor with string art, which is basically stringing an arrangement of colored threads between points to form a pattern or a design. From a variety of geometric patterns and different designs, this art form involves some basic tools and materials.
Easy String Art
What you need:- A wooden block
- Printed letters
- Small nails
- A hammer
- Some embroidery threads
- Scissors
- Glue or a double-sided tape
How to make it:
- To create a lovely pop up piece of wall décor, just print a large letter of your choice, perhaps your friend’s name’s first letter. You can also print off a small pattern, a date or any other simple outline.
- Using this pattern for a design, hammer the nails around its outline and remove the pair on completing the process.
- Now, tie a knot around a corner nail to secure one end of the string to the board, then moving from one nail to another, wrap the thread in a random pattern till you’ve reached the end of the design.
- You can mix and match the strings as you go along and as you reach the end just tie a knot on the last nail and voila, your string art décor is ready!
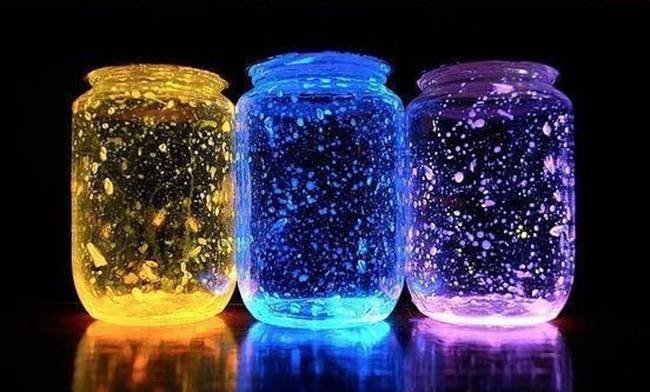
#4 Glow-in-the-Dark Mason Jar
Surprise her with this beautiful ‘glow in the dark’ mason jar which will light up her room in the dark and bring in an aura of magic around her to brighten her spirits anytime!
Glow-in-the-Dark Mason Jars
What you need:- A mason jar or any other glass bottle
- A glow stick
- Glitter and scissors
How to make it:
- To avoid creating a mess, put a newspaper on the surface you will be working on. Open the glass jar and place a spare or old strainer on it.
- Glow sticks come inside a glass tube, when you cut it open from the top or snap it in half, you may end up the glass pieces around you. The sieve can help avoid that.
- Before you handle a glow stick, it would be wise to wear gloves, so that the chemicals from the sticks don’t irritate your skin.
- Snip the top of the glow stick and empty its contents into the jar by turning it upside down.
- If you’re planning to gift more than one jar to your jar, you can use different colors for different jars, one color for each jar.
- You can then add some glitter to the jar to make it even more appealing and then put the lid on the jar, shaking the contents, allowing the liquid from the sticks to coat the glass jar from the inside.
Pack it all up and then wrap it creatively, perhaps with a ribbon or rope, or twine and gift it to your friend in a dark room. The light from the glow sticks lasts only between 2-6 hours or so. So it’s advisable to make the glow jar just before you plan to gift it to your friend with a few additional glow sticks she can use later with the gift. You can buy the jars at pepperfy.com for Rs.89 and glow sticks at amazon.in for Rs.289.
#5 Washi Tape Frame
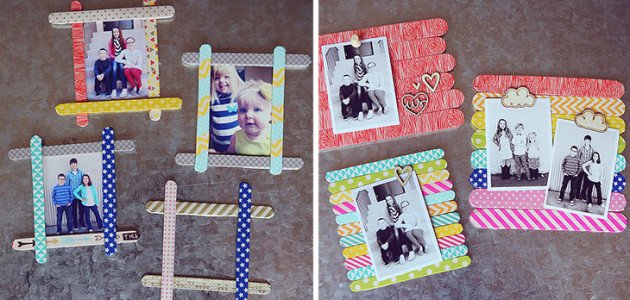
Gift her a set of unique washi tape frames, your friend can adorn her walls with. Easy-to use, pocket friendly and rich with beautiful colors and designs, washi tapes are extremely crafty.
You can make one or join a set of 2 or 3 frames and gift it to your friend. You can buy the craft sticks and washi tape from itsybitsy.in in the range of Rs.30-80 each.
Washi Tape Photo Frame
What you need:- Craft or pop sickle sticks
- Some washi tape
- Scissors
- A glue stick
- Ribbon
How to make it:
- Begin with covering the sticks with washi tape, unroll it, and tear it to a length slightly longer than the stick and place it on the table adhesive side facing up.
- Then put the craft stick on top and fold the tape edge on the other side of the stick. Repeat the step till you have your desired number of sticks ready to make a frame.
- For a pallet style frame – take a plan stick as a base and glue other washi taped sticks on top of it until the length of the plain stick is filled.
- Finish it by putting a ribbon at the back of the frame to hang it.
#6 Terrarium Kit
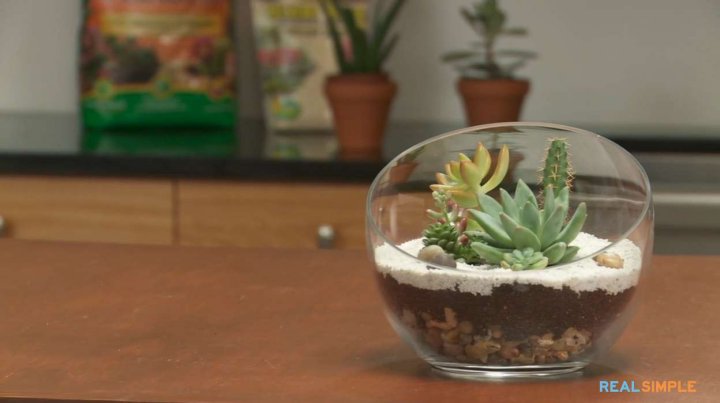
Create a plant terrarium and be instrumental in adding a touch of green in her living space. Terrariums come in all shapes and sizes.
A word of advice – succulents thrive on sunlight, and need to be watered every two weeks or when the soil gets dry. You can get all the materials for your terrarium at a local nursery and creating a beautiful terrarium would take less than 20 minutes with this easy tutoria on realsimple.com.
DIY Terrarium
What you need:- A medium sized glass container with an open top
- 1 to 1½ layer of small rocks
- Potting soil appropriate for succulents
- White sand
- A spoon
How to make it:
- Take the glass container and fill the bottom up with 1 ½ layer of pebbles to collect the draining water.
- Then add a layer of potting soil appropriate for planting succulents, which is deep enough to root, say 2½ inches approximately.
- Now, remove the largest plant from its original container and dust off any extra soil off its roots, and using the end of a spoon, make a hole in the new container big enough for the plant’s roots and nestle it inside the soil, patting it firmly to hold the plant in place.
- Continue planting other succulents moving from the largest to the smallest one, mixing up different shapes, sizes and colors – starting off from the back of the vessel, working all the way forward.
- Plan for approximately 1 plant per inch of container diameter.
- Once you’ve finished planting, add ¼ inch layer of white sand around the plants and a few rocks around them from a décor perspective.
#7 Jewellery Clay Dish

Whether you’re a born artist or not, this unique DIY jewelry dish is an easy feat and a beautiful gift for your friend. You can make one or more! You can buy the 56 gm of oven hardening clay at hndmd.in for Rs.265.
DIY Easy Jewellery Clay Dish
What you need:- Oven hardening clay (Staedtler Fimo Soft Clay)
- Paint, markers or glitter
- A cookie cutter
- A rolling pin
- An oven
How to make it:
- Roll the clay on a flat surface and use a cookie cutter to get your desired shape.
- With your fingertips, gently press all around the edge to give it a subtle lift and then bake it in the oven per your manufacturer’s instruction booklet.
- After the dish is ready, let it cool then, roughly around an hour or so and then embellish or color it as you’d like to.
#8 Quilled Necklace
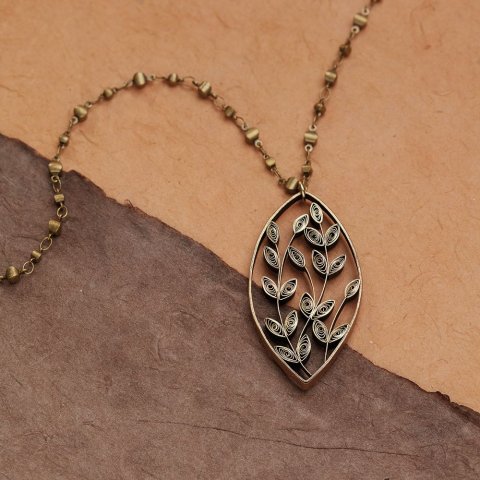
A popular form of paper art, quilling is trending these days not only for crafts or decorations but also in the realm of fashion accessories. Handcrafted, quilled jewelry pieces and accessories are intricate and beautifully unique.
Watch the video below to guide you through the steps. You can buy a complete quilling kit to work with from firstcry.com for just Rs.191.
Quilled Pendant
What you need:- Quilling strips in 3 or 5mm in colors of your choice
- A 6mm jump ring
- A quilling tool
- Craft glue
- Clear varnish
- A memory wire or a cotton or organza cord
How to make it:
- To create the necklace you just need to make some closed coils of different shapes, arrange them together to form a pattern for a pendant.
- Apply some craft glue in between the coils to stick them together and then apply a couple of varnish coatings to the pendant to make it water resistant.
- When it is dry, attach the jump ring on one of the coils and roll it inside a cord to make a lovely neck piece.
#9 A Tea Wreath
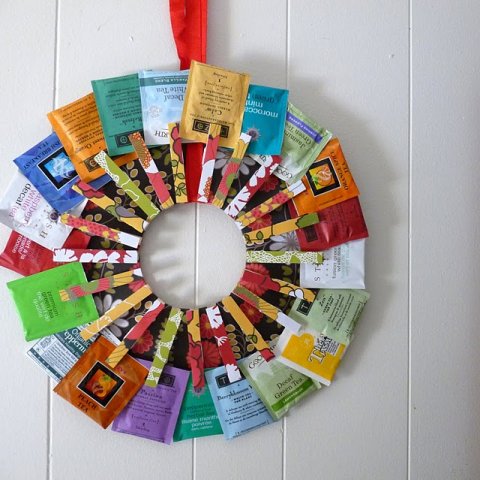
If you friend is a tea fan, she’d love this tea wreath, which she can quickly sieve through from an assortment of tea bags and pick one according to her taste buds or mood! Choose your tea bags at amazon.in for Rs.162 for a pack of 20 bags.
Tea Wreath
What you need:- 2 pieces of cardboard measuring 12 x 12 cm
- Some patterned paper
- Clothespins
- Glue
- A ribbon to hang the wreath
How to make it:
- Begin by cutting the cardboard pieces into 2 circle shapes, with the wreath portion as thick as a clothespin.
- Then cover the circles with differently designed papers, also putting them on the clothespins or painting or covering them with glitter.
- Now glue the pegs to your wreath evenly spaced, with the mouth of the pegs facing outwards.
- You can attach an assortment of tea bags to the wreath now and attach a ribbon at the back for easy hanging.
#10 Survival Kit for Girls

Life is like a roller coaster and we all need to be prepared when the going gets tough. Here’s a fun and caring way of picking up your friend’s waning spirit in times of need. Create an exclusive survival kit for her. With some easy finds and perky one liners, this gift kit is sure to comfort her during distressing times!
Dress it all up with a pretty bow and attach a little note about what the above essentials imply inside the gift box.
The kit includes:
- A rubber band – to stretch beyond her limits
- A gum stick – to remind her to stick with it
- A matchstick – to light a fire when gets burnt out
- A string – to tie things together when they’re falling apart
- An eraser – to wipe off all her mistakes
- Few marbles – to replenish the ones she’s lost
- A penny – to remind her to share her thoughts
- A mini Snicker – to remind her to take time out to laugh
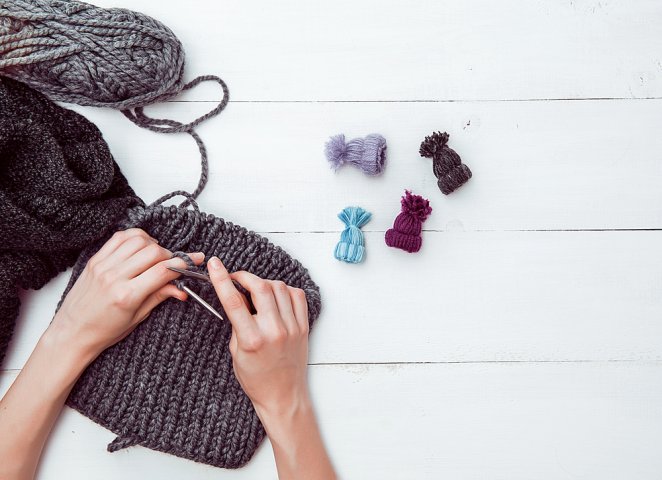
Play to Your Strengths
When looking to create a handmade gift, you first need to brainstorm on what kind of craft you’d be able to work with. Crafts are fun ways of de-stressing and rediscovering your creativity. In choosing a craft you can work on, look for activities that fit your personality and your skills set. Do you like to paint, create with paper or wood, or design? Whatever you like doing, you will find multiple options to choose from. Your choice of craft will have a direct bearing on the gift you create, hence it is important that you get into it heart and soul.
-
 Make a Rakhi for Your Brother this Raksha Bandhan: 9 Simple Handmade Rakhi Ideas You Will Love to Give Your Brother
-
 A Step-by-Step Guide to Making Rakhis: 10 Ideas for Handmade Rakhis, Envelopes and Thalis
-
Give An Extra Special Gift This Time! 10 Unique, Super Easy Handmade Gifts For Birthdays That You Can Make Yourself
-
 Let the Magic of Handmade Gift Permeate Your Love! 10 Easy Handmade Gift for Boyfriend to Show Your Love and Care! (2019)
-
 बच्चों को कुछ भी गिफ्ट व्रैप किया हुवा बहुत पसंद होता है और उसकी मुस्कान जो उपहार पाकर आती है वो अमूल्य है! सभी आयु वर्ग के बच्चों के लिए 10 बहुत विचारशील द उपहार विचार (2019)
Think creatively and improvise
If you want to be a smart crafter you need to learn to improvise and find creative solutions. There is no dearth of great ideas online but it isn't always possible to get your hands on the exact same materials used. Many of the good DIY websites are by bloggers from other countries and you may have a hard time locating the same material, often things that are easily and cheaply available for them are sold at a premium in India. Instead of going strictly by the book, look for alternatives and modify the gift. This will save you money and give you immense creative satisfaction.
 Highlight the Best Facets of Your Incomparable Beauty: Discover the Best Face Highlighter Currently Available in India and Everything You Need to Know About Using Face Highlighters for Maximum Effect (2023)
 Forget the Blemishes and Get that Picture Perfect Flawless Radiance on Your Face: Check out the Best Foundations for Oily Skin Currently Available in India and Everything You Need to Know About Makeup Foundations (2023)
 Make Your Presence Felt Wherever You Go: Discover the Best Perfumes Under 2000 for Both Men and Women to Announce Your Arrival and Make Any Occasion Memorable (2023)
 Protect Your Oily Skin from the Harmful Rays of the Sun: Discover the Best Gel Based Sunscreens for Oily Skin and Everything You Need to Know Before Buying One (2023)
 Minor Blemishes and Wrinkles Affecting Your Confidence? Check out the Best BB Creams to Conceal Your Worries and Nourish Your Skin to Restore the Healthy, Radiant and Glowing Complexion Back Again (2023)