-
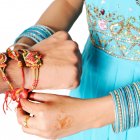
 Gift Your Sibling Something Unique on Raksha Bandhan 2019: Choose from Our 12 Recommendations for Brothers and Sisters to Let Them Know How Much You Care!
-
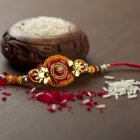 8 Beautiful Rakhis for Brother and 10 Creative Rakhi Gifts for Sister (updated 2019). Plus A Look at the Traditions Surrounding Rakhi
-
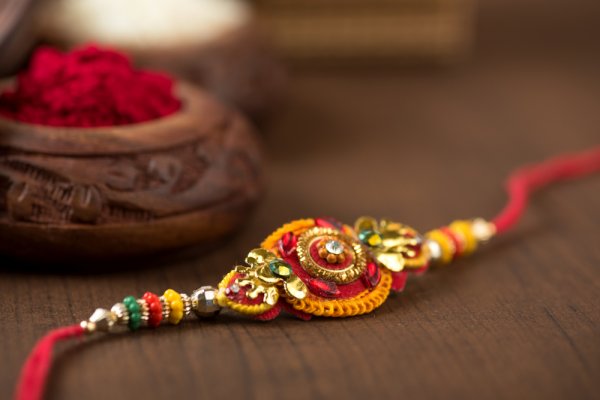
 Best Rakhis for Brother in 2020: 13 Rakhi Gifting Ideas to Celebrate Your Beloved Brother
Handmade Rakhis: Make a One-of-a-Kind Rakhi for Your Brother
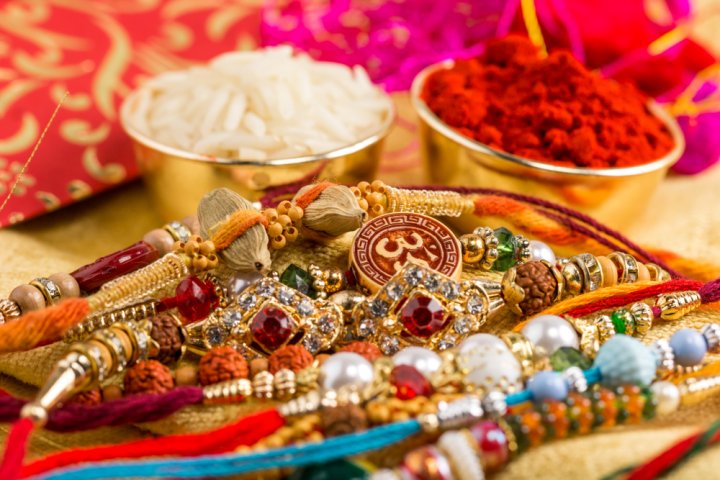
Rakhi is an important day for siblings in India. That's the day sisters tie the sacred thread to their brothers and pray for their health, happiness and well-being. In return brothers promise to protect them for life. It is a day for family celebrations as sweets and gifts are exchanged between the siblings.
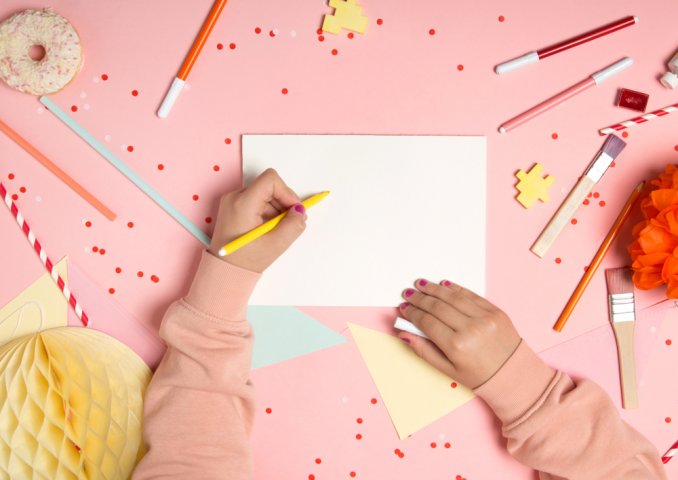
Days before the festival, the market gets filled with gorgeous rakhis of all kinds. Sisters like you spend hours looking for the perfect rakhi to tie their brother. But this year, why not make a handmade rakhi? It may not match up to the jazz of the store-bought rakhi but it will surely be cherished by your brother.
Adds a Personal Touch
A handmade rakhi adds a personal touch to the festival. Making something by hand adds a little bit of you into the rakhi which cannot be matched by store-bought ones. Your brother will appreciate the time and effort put in by you to design and make a rakhi. Indeed rather than the rakhi itself, it is the thought you put into it that makes it special.
Shows Creativity
Rakhis are not very hard to make. It is a great opportunity to show your creativity and make a rakhi using materials you can find in nearby craft stores. All you need is a little bit of time, imagination and creativity. Creating a rakhi is particularly a great idea for young kids. It can spur creativity in young girls and they will get the unique joy of hand crafting something beautiful for their brothers.
4 Tips to Make a Handcrafted Rakhi by Yourself
Keep it Simple
You may be tempted to mimic the glamourous options available in the market but remember the traditional rakhi is just a simple silken or cotton red or yellow thread. So instead of getting stressed about attempting an intricate design, opt for something uncomplicated but colourful and elegant that can be made with easily-available materials.
Look Up Online Guides
It is pretty easy to get tips and guidance on making rakhis today, thanks to the plethora of online guides. Several bloggers share step -by-step guides on making attractive rakhis. Similarly there are several videos hosted on sites like YouTube that give visual instructions on making a rakhi. Go through these resources to get inspiration for your rakhi’s design. Look for those that fall within your skill levels and also your style preferences. Deciding on your design ahead of time is also helpful in planning your purchases at the craft store.
Plan it Out Ahead of Time
Everything handmade takes time, particularly if you are not a very crafty person to begin with. That's why if you decide to make a rakhi this year, start at least a few days before Raksha Bandhan. You will need time to decide on the design, to buy supplies from craft stores and then actually make it. Having some buffer will also ensure that you have the time to buy a rakhi if your attempt at handmade rakhis does not go as expected.
Personalised Handmade Rakhi Ideas to Charm Your Brother
DIY Photo Rakhi
What you need:
- 1 Printed photo
- Thick plain chart paper
- Jewellery wire
- Kundan or beads
- Gold ball chain
- Stone chain
- Woollen or silken thread
- Glue gun
- Fabric glue
Instructions
- 1. Cut out two circles shape out of the chart paper - this will be the central medallion portion of your rakhi.
- 2. Cut out another smaller circular piece - this should fit inside the larger circle you cut earlier
- 3. Now take the photo of your bro and cut out his headshot in a circular shape.
- 4. Use the glue to stick the photo onto the smaller chart paper circle
- 5. Once that has dried, take the gold ball chain, cut out the appropriate length and glue it such that it encircles the headshot
- 6. Take the stone chain and do the same
- 7. Keep add more in any pattern you choose
- 8. Prune the edges so the medallion looks neat
- 9. Now take the thread (make two strands) and cut out a desired length
- 10. Next place the photo medallion so that it is in the middle of the thread and glue it
- 11. Place the other plain chart paper circle on the other side of the thread and glue. Let dry
- 12. Since there is a gap between the two circles, we will use the stone chain to cover it. Cut out the appropriate the length and glue it onto the medallion's open edge
- 13. Now to decorate the thread of the rakhi, add the jewellery beads and pearls in any pattern you wish on both sides
Personalised Name Beads Rakhi
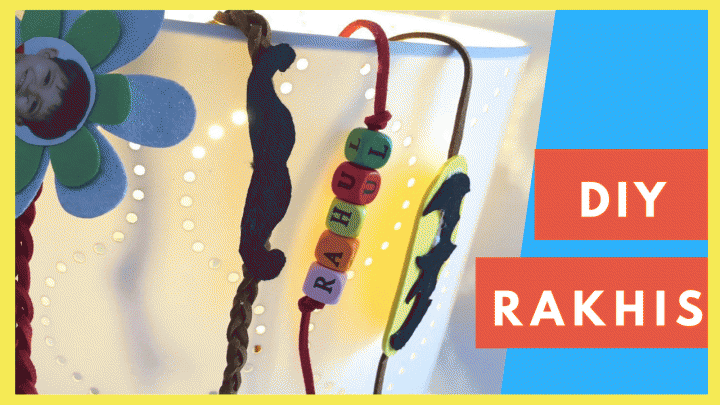
What you need:
- 1 packet of Alphabet beads (available at craft stores)
- Woollen thread or coloured satin cords
- Gold, pearl beads (optional)
Instructions:
- Cut out a multi strand thread of desired length
- String together the alphabet beads to make your brother's name
- Make a knot with the string at both ends to keep the beads in place
- To add some jazz to your rakhi, you can add a few beads on both sides in any pattern you choose and knot it again
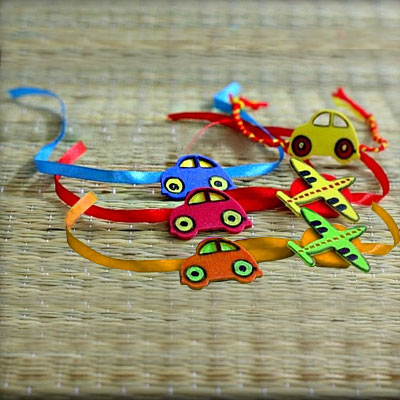
Rakhis Kids Can Make
Cartoon Sticker Rakhi
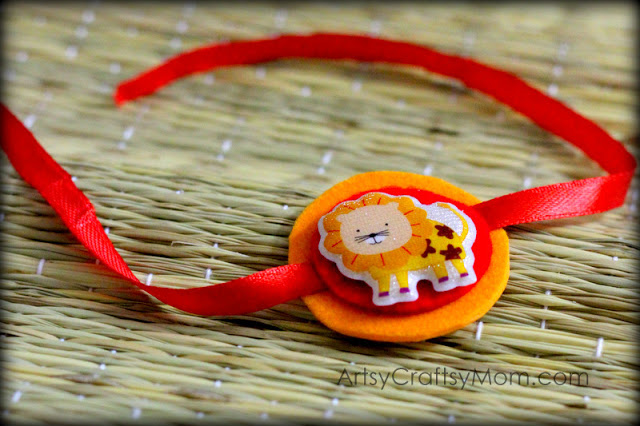
An extremely easy rakhi, these can be made using readymade stickers so you can pick out characters that are loved by the brother.
What you need:
- 2 sheets of felt paper - pick 2 different colours
- Sticker of your choice
- Thin satin ribbon
- fabric glue
- Scissors
Instructions:
- Cut out 2 circles from the 2 felt paper (1 each) - one should be slightly larger than the other.
- Affix the sticker on the smaller felt paper circle
- Now cut the satin ribbon to the desired length. Seal the edges using a thin layer of fabric glue
- Place the felt paper with the sticker on top of the ribbon in the middle
- Keep the larger felt sheet circle on the other side and glue together the thread and the sheet.
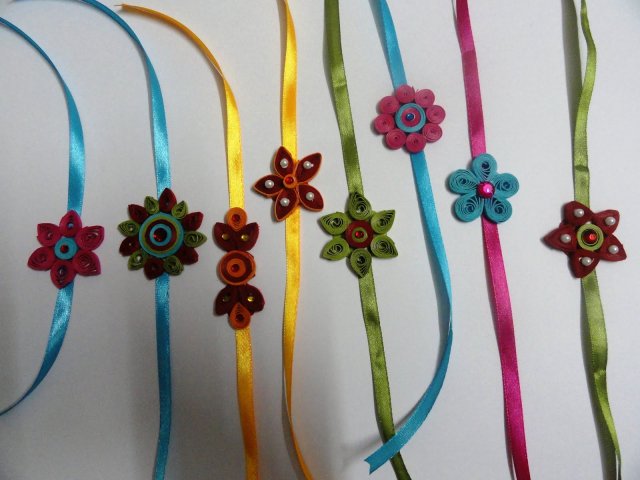
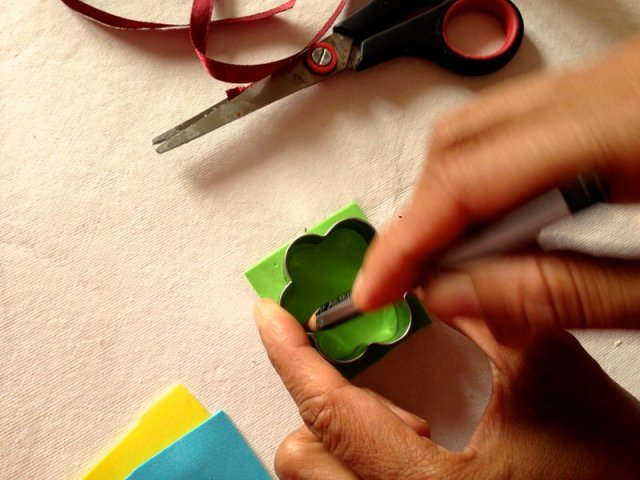
Cute Button Rakhis
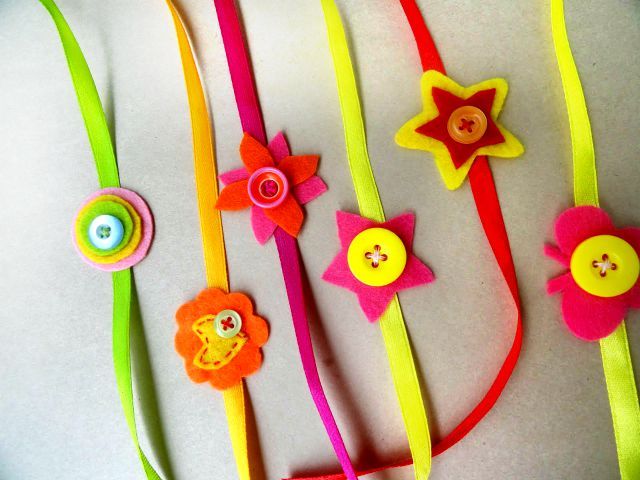
What you need:
- Thin Satin ribbon in the colour of your choice
- Felt paper in any colour
- Fabric glue
- Scissors
- Needle and thread (pick colour contrasting to felt paper)
- 1 large coloured button
Instructions:
- Decide on the design of your rakhi medallion - it can be a flower, star or heart (keep the size to that of a large coin)
- Draw the design with pencil onto the felt paper and cut out the shape
- Thread the needle and stitch the button onto the middle of the felt paper you have cut out
- Next cut the satin thread to the length needed, and seal the edge by applying a thin layer of clear nail polish or fabric glue
- Place the cut felt paper in the middle of the ribbon and glue it.
Simple Sweet Rakhis Anyone Can Make
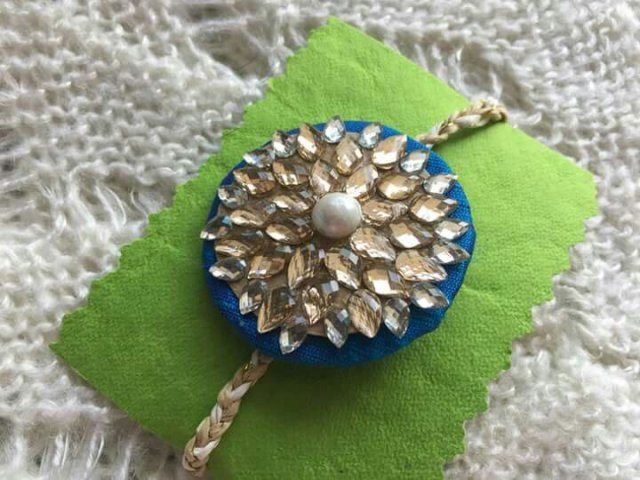
Elegant Thread Rakhi with Embellishment
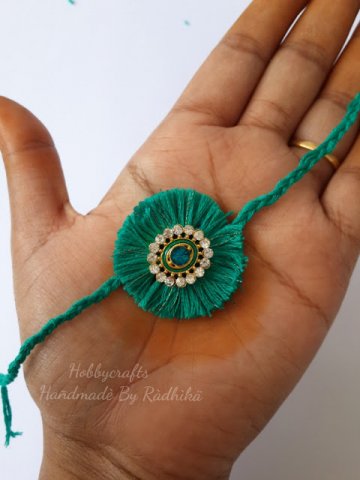
What you need:
- Cotton thread (Anchor brand is suggested)
- Silk thread in same colour
- 1 small embellished stone bead or pendant
- Scissors
Instructions:
- Wrap a fair length of the cotton and silk thread around two fingers. It should form a somewhat thick layer before you stop and cut the thread
- Now cut a small length of the cotton thread and tie it tightly in the middle of the thread bunch (in between fingers) making a knot.
- Remove from your fingers and cut both edges of the thread bunch
- Spread it out fully to make it round(it should look like a pom pom), and trim the edges to remove irregular threads
- Now take the embellished stone bead and secure it to knot in the middle with another length of cotton thread leaving enough on both sides
- Cut out the cotton thread for the length you need for the rakhi and Make a braid. As you braid, add the loose thread you have behind the embellished stone so it gets secured. Another option is to make a braid of desired length and glue to the thread bunch.
- Seal the edges of the braid with a thin layer of glue
Zari Motif Rakhi
This is an extremely simple rakhi design that uses zari motifs that are readily available in tailoring supplies stores. You can choose from traditional designs like peacocks, or geometrical patterns, or even floral patterns.
What you need:
- Any motif of your choice
- Thin gold lace ribbon
- Felt paper
- Glue
- Scissors
Instructions:
- Cut the gold lace to your desired length and seal the edges with fabric glue
- Cut out a circle from the felt paper such that the motif will fit on it.
- Glue the motif onto the middle of the lace
- Now glue the motif onto the felt paper keeping the thread in the middle
Simple DIY Designer Rakhis
Stunning Designer Rakhi for Bhaiya-Bhabhi
Make a beautiful Lumba Rakhi set that you can gift your bhaiya and bhabhi.
What you need:
Instructions:
-
Rakhi
- Cut out a circle in the foam sheet to the size you want the rakhi to be
- Glue the large kundan stone in the middle
- Start encircling the kundan stone with the stone and gold ball chains to make a pattern
- Add the diamond stones around the edges and trim out any excess foam sheet
- Cut out the length of thread you need
- Cut out the glossy white card paper to the same size as the rakhi medallion
- Keep the medallion in the middle of the thread and glue it. On the other side, place the glossy white paper circle and glue
- Lumba
- Cut out a circle of similar size as earlier from the foam sheet. Now cut it into half
- Fold the straight edges to make a cone. Glue it properly and let dry completely
- Now glue the stone chain all around at the bottom edge of the cone
- Start adding diamond stones, gold ball chains and coloured chains one by one in any pattern you choose
- Once you decorate most of the cone, cut the top pointed edge
- Now ensure your decoration goes right to the top.
- Cut out a length of the thread and seal one edge fully with glue. Start adding a few of the pearls and gold beads
- Take the thread through the decorated cone such that the portion of the thread with pearls hangs through the open bottom portion
- Now start adding more pearls and beads such that it sits atop the decorated cone.
- Add a knot in the thread to keep the peals in place and seal the edge of the thread.
Environment-Friendly Upcycled Ganesha and Gota Rakhi
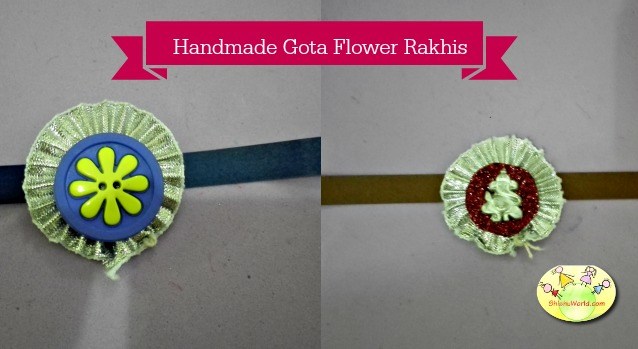
It is not necessary to spend a lot of money in craft stores to make a rakhi yourself. Here is a simple way to reuse existing material you have with just some small purchases.
What you need:
- 1 Gota or zari flower
- Glitter foam sheet in the colour of your choice
- Ganesha embellishments from any wedding invitation
- White glossy paper
- Satin ribbon
- Glue
Instructions:
- Cut out a small circle from the glitter foam sheet. To Make sure your circle will fit into the gota flower let it be a little smaller.
- Cut out a similar circle from the white glossy paper
- Glue the foam sheet circle on top of the gota flower
- Next take the Ganesha embellishments and glue it onto the center part of the foam sheet circle.
- Cut out the length of satin ribbon you need and seal the edges with a thin layer of glue. Take the medallion you have created and glue it onto the middle of the ribbon
- Glue the white paper circle on the other side of the medallion (on the ribbon) to create a backing
Bonus: Beautiful Rose Puja Thali
With a little effort, you can make the puja thali used during the Raksha Bandhan puja to look festive and grand.
What you need
- 1 silver decorative plastic tray or plate
- Few foam or fabric roses of different sizes (available at craft stores)
- Glue
- Glittery foam sheet
Instructions
- Glue the roses at both corners of the tray
- Cut out 2 small circles from the felt paper
- Glue the felt paper circle in the middle - you can keep the diya on it
-
Gift Your Sibling Something Unique on Raksha Bandhan 2019: Choose from Our 12 Recommendations for Brothers and Sisters to Let Them Know How Much You Care!
-
8 Beautiful Rakhis for Brother and 10 Creative Rakhi Gifts for Sister (updated 2019). Plus A Look at the Traditions Surrounding Rakhi
-
Best Rakhis for Brother in 2020: 13 Rakhi Gifting Ideas to Celebrate Your Beloved Brother
-
 खुद ही राखी बनाए इन 8 बेहतरीन राखी विकल्पों के साथ और अपने भाई को हद से ज्यादा खुश करें। राखी पर अपने भाई-बहनों के साथ करने के लिए दिलचस्प गतिविधियों के लिए विचार भी (2020)
-
 10 Perfect Rakhi Gifts for Sister: Cool Gifting Ideas That Will Make Your Sister Happy to Have a Brother Like You (2020)
Trial and error can help you make more complicated rakhis
If you're not content with making a very simple and basic rakhi for your brother, yet you haven't made crafts in a while or are simply not confident enough, a little practice can come to you rescue. The good part about experimenting with rakhis is they can be made with a wide array of inexpensive material, and use very little of each so even if you mess up a few at the beginning, starting all over again will not pinch.
 Highlight the Best Facets of Your Incomparable Beauty: Discover the Best Face Highlighter Currently Available in India and Everything You Need to Know About Using Face Highlighters for Maximum Effect (2023)
 Forget the Blemishes and Get that Picture Perfect Flawless Radiance on Your Face: Check out the Best Foundations for Oily Skin Currently Available in India and Everything You Need to Know About Makeup Foundations (2023)
 Make Your Presence Felt Wherever You Go: Discover the Best Perfumes Under 2000 for Both Men and Women to Announce Your Arrival and Make Any Occasion Memorable (2023)
 Protect Your Oily Skin from the Harmful Rays of the Sun: Discover the Best Gel Based Sunscreens for Oily Skin and Everything You Need to Know Before Buying One (2023)
 Minor Blemishes and Wrinkles Affecting Your Confidence? Check out the Best BB Creams to Conceal Your Worries and Nourish Your Skin to Restore the Healthy, Radiant and Glowing Complexion Back Again (2023)