
-
 Make the Miraculous Neem Oil a Part of Your Daily Life: Discover the Numerous Uses of Neem Oil and How It Can Give You a Radiant Skin, Lustrous Hair and Overall Health and Wellbeing! (2021)
-
 How to Reduce Hair Fall? Here are Some Remedies that You Can Try at Your Home to Revive the Hair Follicles and Regain Your Crowning Glory (2021)
-
 Hair Fall: Causes, Home Remedies and Prevention! 10 Home Remedies for Hair Fall You Can Try Safely at Home!
What Exactly are Microgreens and How are They Different from Sprouts?
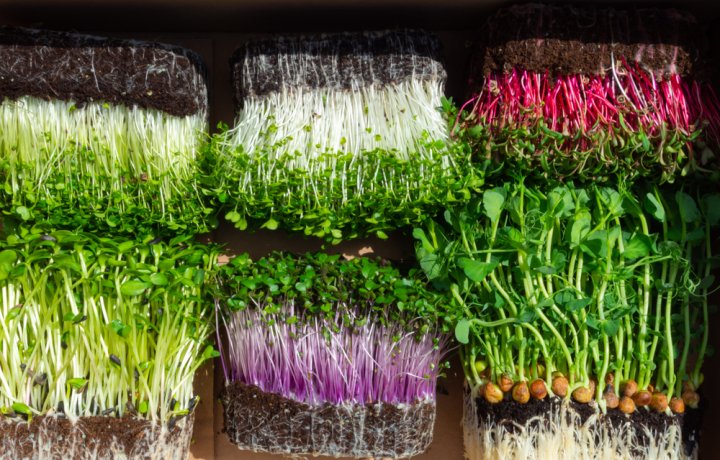
As you might know, microgreens are green vegetables that are harvested when they are still premature and form just the leaves and stems. These are used for various purposes, and with these plants, because you do not take out the root, you do not have to worry about the cleanliness of the seeds. Moreover, microgreens are produced from various vegetables and herbs and their sizes range from 1-3 inches and they take 1-3 weeks to grow properly.
Comparatively, sprouts are very different from microgreens. For instance, these are seeds that have just sprouted and no leaves have yet developed. Also, you eat the whole plant with these, including the roots, and, unlike microgreens, these are grown without any soil in the jar. Sprouts include just lentils and they are grown in a very humid environment and just take 3-7 days to grow. Lastly, unlike with the microgreens, because you eat the roots too, sprouts require you to have a very clean jar, as well as seeds and other items.
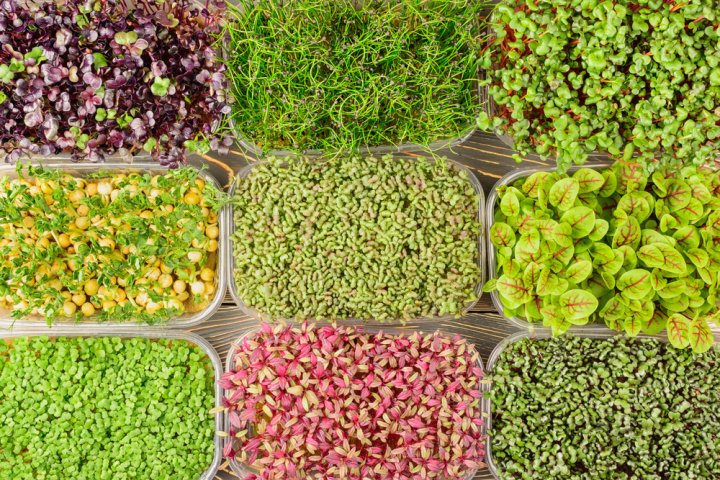
Benefits of Microgreens

As you might know, microgreens can be very beneficial, and some of their most important benefits are as follows:
- Microgreens are very nutritious and help build a balanced diet.
- With fibre and vitamin K contents, microgreens help lower the blood pressure thereby preventing heart disease.
- Because of sulforaphane in them, microgreens like broccoli also have anti-cancer properties.
- Microgreens have anti-inflammatory properties that help improve your immune system and fight various diseases.
- They contain lutein that helps absorb excess light intensity thereby improving your eyesight greatly.
- Microgreens contain fibre that helps reduce constipation.
- The prebiotics within help prevent various digestive ailments by keeping the digestive system in good health.
- Microgreens are beneficial for those of you who want to lower blood cholesterol levels.
- They contain antioxidants that help fight free radicals, keeping your skin young.
- They also help fight health conditions like diabetes.
- Microgreens can be very good for people suffering from Alzheimer's disease.
Steps to Properly Sow the Microgreen Seeds

Choose Your Microgreen
The very first step to growing your microgreens is to choose the right ones. Even though you might think that you just need to get the ones that you like the taste of or those which are nutritious or those that can be grown throughout the year, this is not so. For instance, you will also need to carefully examine the temperatures of the month ahead, the humidity levels, the cloud coverage, wind, etc., and determine the suitable time of year that they should be grown. Normally, the plants requiring low temperatures, low light, and dry air are good for winters while the opposite ones would be well-suited for summers.
However, you will also need to check if high temperatures mean 30-40°C or do the plant requires over 40°C. Also, even though you might think that the summer plants can be grown indoors in winter, most of those require direct sunlight after germination, making it near impossible to grow in winters. Some great microgreens for the Indian environment include mustard, kale, endive, arugula, beet greens, spinach, tatsoi, radish greens, watercress, mizuna, peas, cabbage, basil and lettuce.
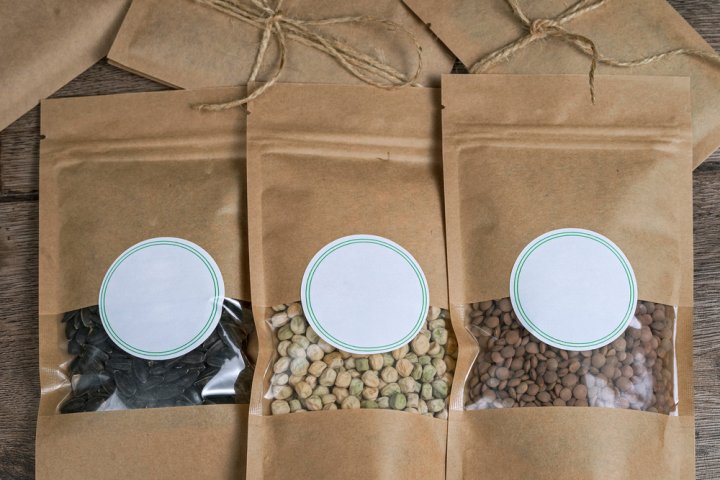
Get the Right Seeds
As we have mentioned before, having clean seeds is not important but getting the right ones with good quality is. So, firstly, make sure that the seeds are untreated or it will be impossible to grow microgreens because, even though the larger plants aren't affected by insecticides, the smaller ones are. Also, you should check the germination rate and get the ones with the highest rate. You should also plan the harvesting date and make sure that this matches with the one on the packet and check the cultivar name to be able to decide the particular types of microgreens that you want. You can use seeds available in your kitchen or you could buy packets from good quality nurseries.
Find the Ideal Location
Now, before moving on to collecting the required items for growing microgreens, determine the location. Here, again, check the requirements of the plant and decide accordingly. Normally, for the summer ones, we would suggest that you plant them on a window sill, if indoor, as it will be able to receive more sunlight. We would also suggest that you choose a place that your house members don't go to a lot. This way, you can make sure that the plant is kept at a constant temperature and isn't mistakenly interfered with too much as well.
Get Educated on Any Special Requirements
If you are using seeds from a nursery, the seed packet may have details on the recommended soil, temperature, humidity, etc. It may also describe any special requirements of that particular plant or the exact time it takes to grow the plant. Other than that, the harvesting method may also be given. Alternatively, you can look up online resources to see any special considerations for your chosen plant.
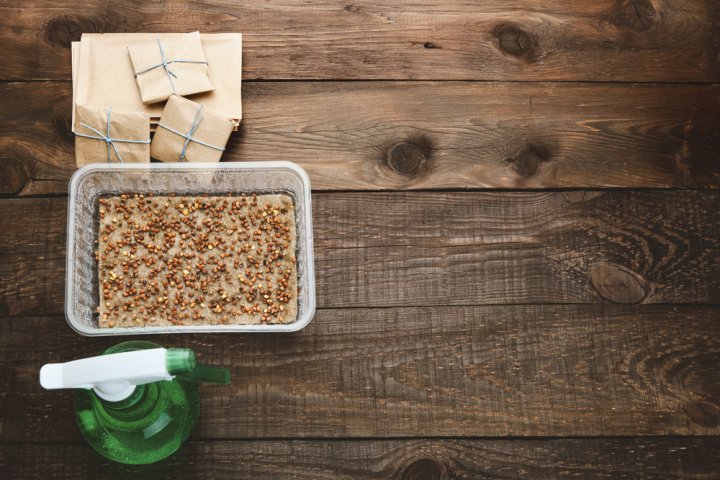
Get the Right Container and Tools
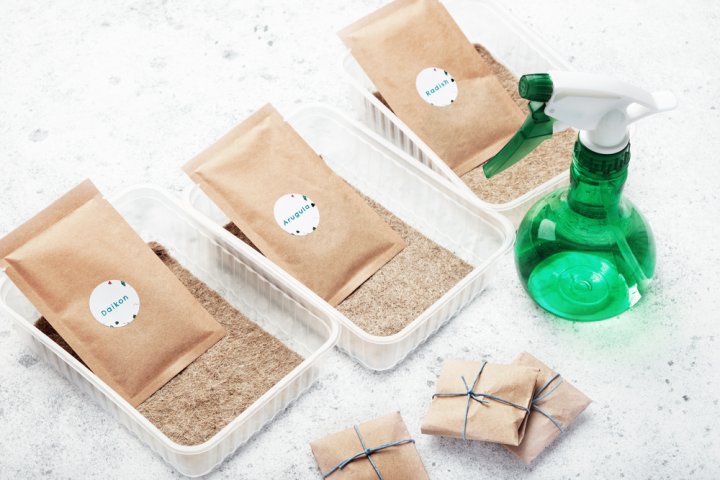
Starting with the actual growing process for the plant, the very first step should be to gather the required items. The very first one of these would be a tray or container (only if you are planting indoors; not required for growing in garden beds). For the size, it depends on if you want to grow these in larger quantities or small ones. Also, check the space required for a particular quantity of seeds and then decide if you need a tray or a closed container and its size.
Next, you will need the seeds and a spray bottle to spray any solutions or water, etc. That brings us to the next item – a seaweed solution to ensure good growth of the plant. You will also be needing a paper towel to line the tray and a pen or plant label that will help you to mark the date and the variety of various plants that you grow. Lastly, you will require a seed raising mix growing medium to grow the plant in.
Method 1: For Planting the Seeds
You will first need to decide if you want to grow your microgreens in a garden bed or a container. The first method is for planting in a garden bed while the second one is for growing in a tray or a container. Follow these steps if you are planting in a garden bed:
- Start by loosening the soil and then raking the soil smooth.
- Now, get the seeds and scatter them to be about ⅛ - ¼ inch apart. You may even refer to the packet for the exact number, but the area in between should be kept little.
- Now, you should cover them with about ⅛ inch soil to make sure that they actually grow and are not completely exposed to the external conditions.
- End it by gently watering the soil to soften them a bit and ensure great growth.
Method 2: For Planting the Seeds
In case you are planning to grow these in a container and the instructions aren't given on the packet, this method would be safe for most of the microgreens:
- Get a container that is at least 2 inches deep and has a large diameter.
- Now, fill it with about 1 inch potting soil or mix, before moving on to flattening it properly, while preventing too hard pressing that may compress it too much. You can do this either with your hands or a small piece of cardboard.
- Next, scatter the seeds evenly on top of the soil with the same difference as mentioned in the first method, and press them gently with your hands.
- End this by covering the seeds with another thin layer of soil and dampening the surface with a mister and covering it with a clear plastic wrap till they sprout up and are ready to be harvested.
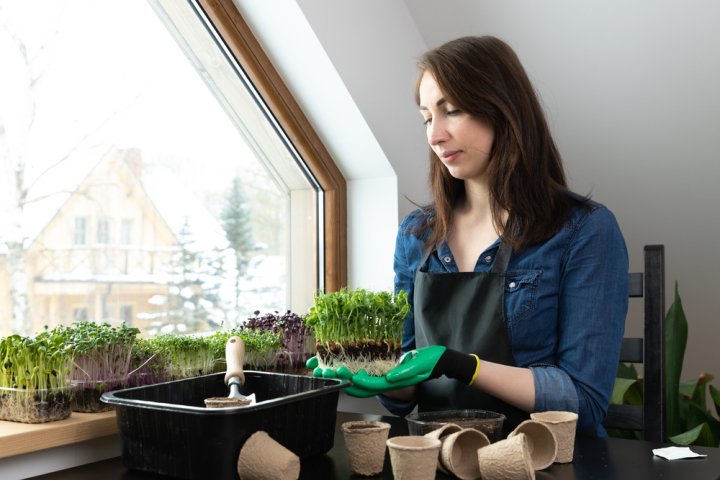
Maintain the Microgreens Well
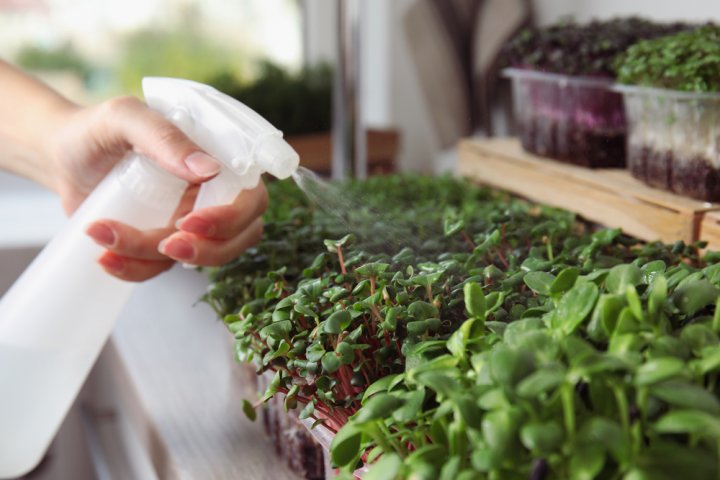
Once you have successfully planted the microgreens, you will also need to make sure that you care for them a lot. Here, you might assume that these do not require much maintenance but some maintaining is still required. Firstly, you will need to check the temperature and humidity at different times on various days and make sure that they are kept right. Also, you will need to lift the tray and mist your seeds a few times every day. You may even add some organic fertiliser every once in a while and make sure that pests are kept at bay.
Moreover, make sure that the microgreens get a little bit of sunlight and at the right time. So, keeping them in dark by putting a dome over the tray for 3-4 days after they have sprouted will help grow healthy and strong microgreens. Once this phase is over, it is time to let them out in the sunlight and let them grow further than just sprouts. Make sure that there is natural air circulation or insert a fan yourself. Continue this till the harvesting period and check for mould every other day, making sure that the plants are in good health.
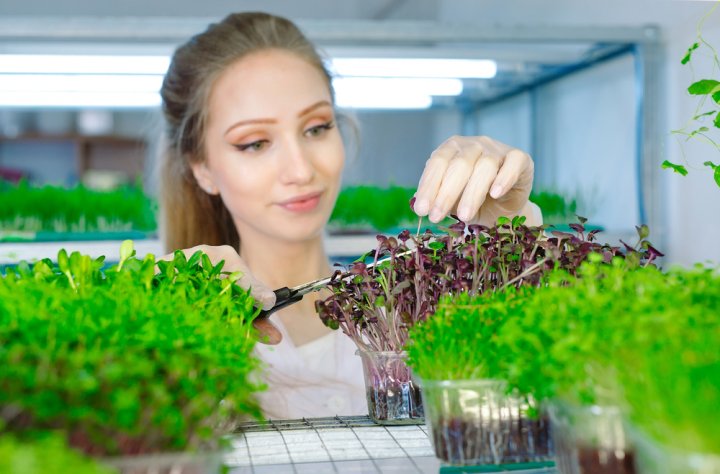
Time to Harvest!
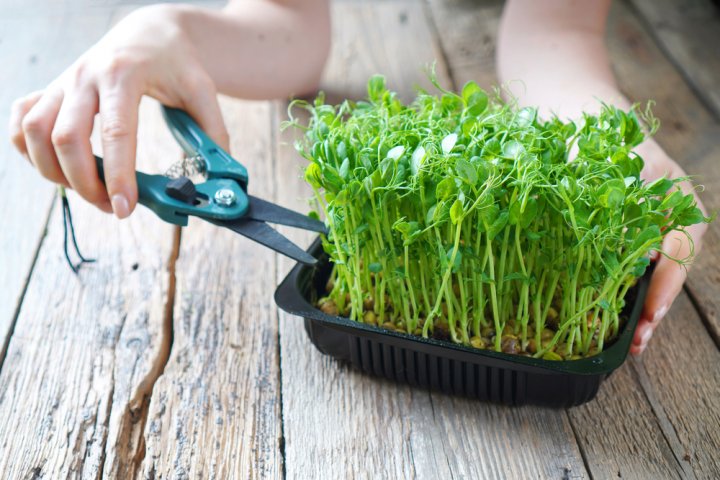
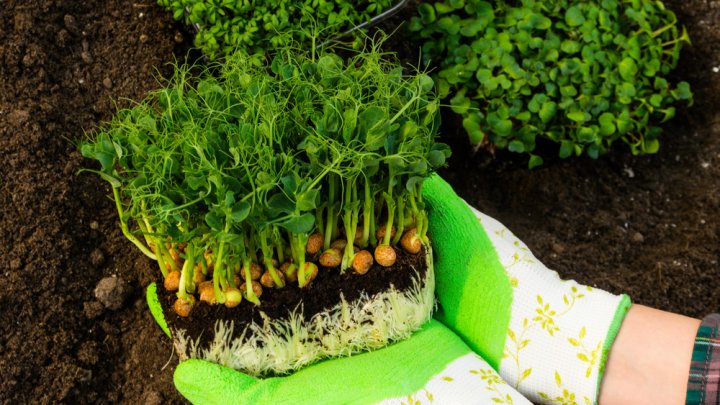
Now that the maintenance period is also over, it is time to harvest. For this, once you examine the plants, you will see seed leaves that don't look like actual leaves but are quite close; this will be around 2 weeks to 18 days after the microgreens have been planted.
For the actual harvesting, start by snipping the microgreens just above the soil level. Here, first try with a couple and check if they have developed enough, and then continue with the rest. Also, when snipping, remember not to pull out the roots at all or they will not turn out well.
Once this is done, you can take out the rest of the soil if you want and replant the microgreens. Also, you will not be able to harvest these again because the plants have not been able to develop properly and they have no way to regrow. A good thing would be that you don't necessarily need to take out the roots and can let them stay within. In fact, these may even be better and will keep the soil healthy too.
Additional Tips for Growing Microgreens
When growing microgreens, we would suggest you keep some additional tips in mind:
- For instance, you should make sure that you do not overdo it. Meaning that you should not let them grow for more than 20 days, or the plants will be fully developed, and then they cannot be called microgreens.
- Also, if possible, you should test with a small quantity before moving on to growing larger amounts. This way, you will be able to judge the exact time required for a particular species and may even decide to give other species a try altogether.
- In case you are growing these in garden beds, we would also suggest that you give breaks between each growing. So, normally, we would suggest giving a break of about 1 month in between as this will help make sure that the soil retains its nutrients over longer periods rather than for just a few harvests.
Ways to Add Microgreens to Your Diet

To conclude, here are some ways you can effectively add microgreens to your diet and make the most of them:
- Firstly, for some microgreens like radishes, you can consume them raw with your meals.
- You can also make salads to add taste to these and mix the ones like sunflower, carrots, radishes, cucumber, and some spices.
- You may even make sandwiches and wraps with microgreens and sauces with cheese or meat for a delicious recipe.
- Another great way would be to add these to pasta with ingredients like cheese, fresh peas, pea shoots, meat, etc. for a quick yet delicious recipe.
- For drinks, you can add microgreens like wheatgrass to smoothies.
- One last way would be to add a layer of microgreens like spinach on top of your food before baking it. This will not only add taste and nutrition but also colour and beauty to your dishes.
-
 समुद्र तट, प्रकृति का जादुई सौंदर्य, अनूठा आकर्षण सब कुछ है - पांडिचेरी यात्रा के दौरान वहाँ क्या देखें, क्या खाएं, कहां खरीदारी करें: पांडिचेरी में घूमने के 10 सर्वश्रेष्ठ स्थान (2020)
-
 चिया बीज का उपयोग करने के लिए शीर्ष 8 विभिन्न प्रकार के अद्भुत तरीके इसके अधिकतम लाभ प्राप्त करने के लिए। चीया बीज के बारे में आमतौर पर पूछे जाने वाले प्रश्न (2021)
-
 What to do When Your BP is Low? Top Home Remedies to Manage Low Blood Pressure and Why You Need to Take Low BP Seriously (2020)
-
 Beauty is Hardly Skin Deep and You Must Follow the Right Diet for Glowing Skin. Try these Healthy Home Remedies and Diet Tips for Glowing Skin in 2020
-
 Mumbai Famous Food: 10 Dishes that Define Mumbai's Lip-smacking Food Culture, Plus Best Places to Try Them!
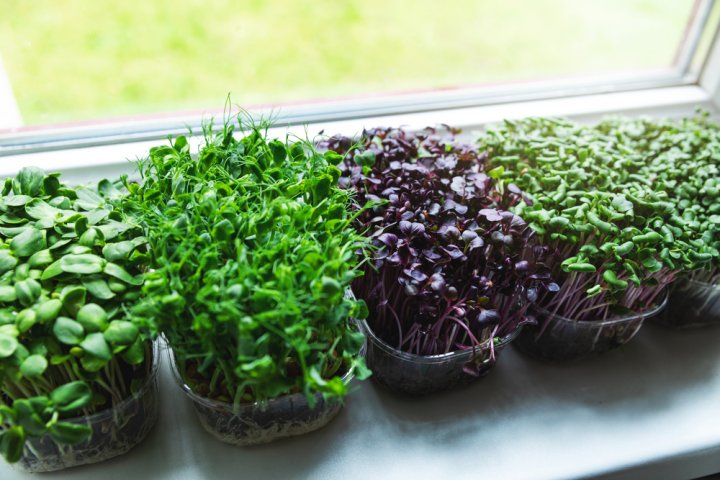
Growing Microgreens at Home is Easy and Convenient
By now you would have realised that growing microgreens in your home, whether indoors or in the garden is simple and convenient. Moreover, you are assured of getting the best quality and completely natural microgreens this way. Share your experiences of growing microgreens at home with us and stay connected for more such engaging content.
 Highlight the Best Facets of Your Incomparable Beauty: Discover the Best Face Highlighter Currently Available in India and Everything You Need to Know About Using Face Highlighters for Maximum Effect (2023)
 Forget the Blemishes and Get that Picture Perfect Flawless Radiance on Your Face: Check out the Best Foundations for Oily Skin Currently Available in India and Everything You Need to Know About Makeup Foundations (2023)
 Make Your Presence Felt Wherever You Go: Discover the Best Perfumes Under 2000 for Both Men and Women to Announce Your Arrival and Make Any Occasion Memorable (2023)
 Protect Your Oily Skin from the Harmful Rays of the Sun: Discover the Best Gel Based Sunscreens for Oily Skin and Everything You Need to Know Before Buying One (2023)
 Minor Blemishes and Wrinkles Affecting Your Confidence? Check out the Best BB Creams to Conceal Your Worries and Nourish Your Skin to Restore the Healthy, Radiant and Glowing Complexion Back Again (2023)