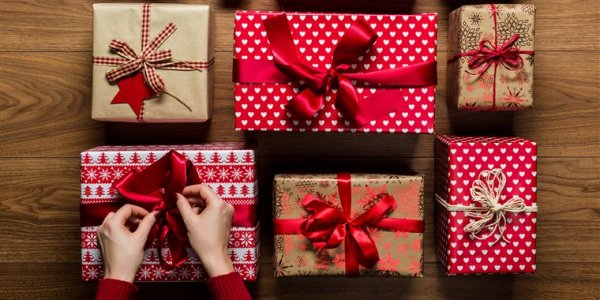


Creating a Personalised Gifting Experience
Gifting is a very special way to convey love, affection and gratitude. But even in gifts, personalised presents always hold a higher position. It shows the regard and adoration towards a person, as you spend time and effort to make something unique, just for them, which makes them feel special. If you have the time and patience, make sure to gift your loved ones something that you have made yourself, and you will never forget the smile which graces their face.
How to Make a Perfect DIY Gift
Just making something random is not enough. You need to construct something exclusive. Something the reciever can relate to, and which evokes memories and love. So here we will give you a few tips to find and give birth to the perfect personalised DIY gift for your beloved friend or relative.
Gifting According to Occasion
A DIY gift is not just a gift. Always keep in mind to gift memories in the form of small tokens of love. It may be photographs, or customised accessories. From a birthday to a farewell, DIY gifts have a wide range of options to choose from. So, put your mind to it and find, what will be the best gift for the given occasion.
Using High-Quality Products

While making a craft gift, make sure you use high quality raw materials. This would ensure a perfect professional finish and also great durability. Choose the right adhesive, threads, papers and fabrics. These all play a great role in how the whole project turns out.
Following Instructions Properly
Do not skip instructions given along with the craft project. And make sure to follow them thoroughly and in correct order. The instructions are usually timed and tried before being put up, and hence it will be easier on the pocket and effort to follow the instructions. However, if you are a pro at DIYs, feel free to improvise.
Feel Free to Ask for Help

If kids are planning to make a DIY, it is advisable that the parents assist them in handling sharp and hot objects. Similarly, if you are not aware of any procedure, or a particular method, feel free to ask for help and assistance, as it will avoid any mishap and make the craft gift project a lot easier.
Making an Early Purchase
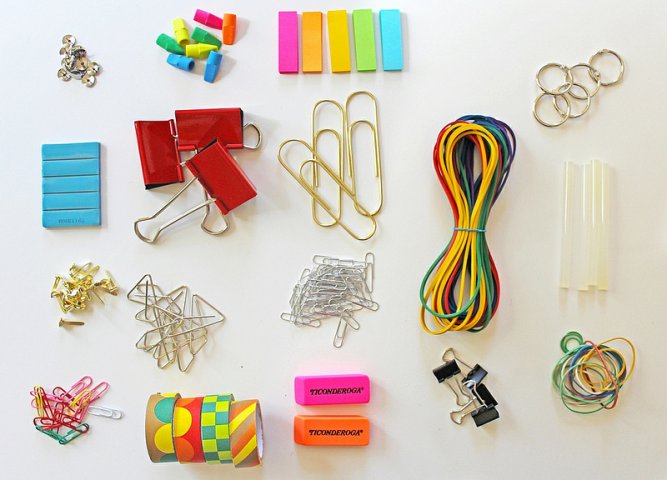
Always make an early purchase. Decide on the craft that you intend to make an make a list of all the requirements. Make sure you have everything listed in a one arm distance before you start. This will help you to cut down cost by buying only the necessary items and also will eliminate random runs for supplies.
10 Amazing Craft Gift Ideas
Here we are giving you, our top ten craft gift ideas, complete with the list of materials required and every step involved in making the gift. Feel free to choose your favorite and we wish you a happy crafting.
A Cute Photo Pendant
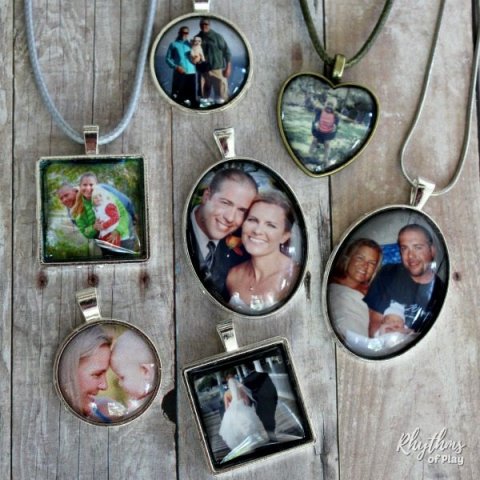
A photo pendant falling on to your heart or attached to a bracelet would always help to keep memories and the sweet moments fresh and flowing. A photo pendant is an easy craft idea, that will become the perfect gift for your loved one. This gift is simply universal and can be gifted to any gender, age and occasion.
Materials Required:
- Diamond Glaze
- Industrial Strength Adhesive
- 1" Clear Glass Pieces; Circular
- 1" Silver Plated Circle Pendant
- Photos printed on to heavy duty paper or cardstock with the desired size.
- X-Acto or any Craft Knife
Procedure:
- Drop a small amount of Diamond Glaze on to the back of the circular glass piece. Spread it around with the tip of the dispenser or a toothpick.
- Press the glass with glaze gently on to the photo to remove bubbles and hold taunt for around 30 seconds.
Note: Pay attention not to shake it around much as it will cause the photo ink to smear. In case of air bubbles or mistakes, wash the glass piece under running water. The diamond glaze being water soluble, will be washed away with the paper. Repeat the same process after cleaning. - Allow the photo to dry overnight.
- After drying, using an X-Acto or craft knife, cut the photo paper and extra dried glaze from around glass piece.
- Add a small amount of industrial adhesive to the inside of pendant and press glass piece with photo into it. This process once dried cannot be undone. Tap the glass piece into pendant for a proper setting.
- Remove any excess glue and paper with the X-Acto or craft knife; that may have pushed out around the edges of the pendant.
- Allow the pendant to dry for 4 hours.
- Place the pendant in any chain, ribbon, or key ring as required.
- Gift wrap in an elegant box and give away to your loved one this very personalised gift.
Arm Knitted Blanket - A Stylish Accessory
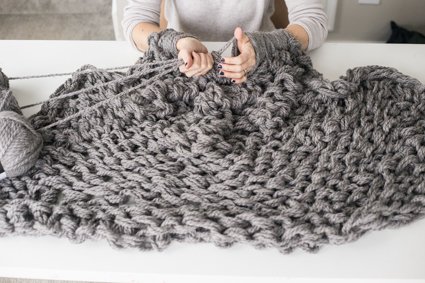
For the loved ones who stay away from us, give a hand knitted cosy and plush blanket cum throw. A gentle reminder of the warmth of your love and memories.
Materials Required:
- 2 Chunky large balls of soft wool. (Do not go for pure wool as they are a bit rough on the skin and use more wool for bigger sized blanket)
- Your Own Hands
Procedure:
- Casting On: Tie a loop in the end of the yarn and slip it over your right hand.
- With the knot under your wrist and palm facing towards you, lay the yarn from the back of your hand, over to the front of your palm.
- With your left hand, go through the loop under your wrist, ensuring the yarn near the ball is on the right side of your left wrist.
- Grab the yarn length and pull back through the loop; your left hand had come through, allowing the loop to slide off your right hand while doing so.
- The loop you have just made, place it over your right wrist to create two stitches. Continue steps 1 to 4 until you have cast on 16 stitches on your right arm.
- First Row: To create your first row, wrap the yarn around the front of your right thumb and make a fist to hold the yarn.
- Take the next stitch along.
- Pass it over your fist and the yarn you are holding.
- Pass the loop that is in your right fist over to the left hand to create your first stitch of that row.
- Continue steps 1 – 4 on this row until all the loops are on your left arm and you have completed this row.
- Continue knitting your blanket repeating the same steps for each new row, by passing the yarn from left to right and back again until you come to the end of your yarn.
- Casting Off: To finish the blanket and cast off, start by grabbing the yarn length in the same fist that has all the stitches on.
- Make 1 stitch in the same way you had on previous rows.
- Make a second stitch in the same way you had on previous rows.
- Then pass the first stitch over the top of the second stitch and slide off your hand leaving one stitch behind.
- Repeat steps 3 – 5 until all stitches are off your arm and you are left with one loop. To finish, pull the remaining yarn through this loop and tie it off.
Note: Leave plenty of yarn before casting off to make loose stitches. - Wrap up and gift away this fluffy throw in a huge box.
Photo Wall Hanging - For a Hint of Nostalgia
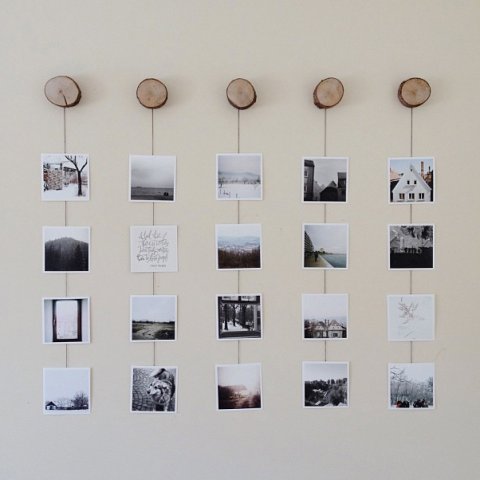
Moments are captured in photographs. Make a customised photo wall hanging with all the lovely memories. This is indeed a gift that is perfect for every occasion and for all ages.
Materials Required:
- 4″ printed photo squares preferably with white border -21 in no.
- A pair of scissors
- 36″ wooden dowel rod
- Hot glue gun
- Macramé cord
- Cotton twine
- Clear elastic bands.
- Masking tape
Procedure:
- Start by cutting lengths of cotton twine to make tassels. Wind five loops of 10″ length. This should be folded in half to complete, so the finished tassels are equally five inches long. To make three cords per row of photos, you need to make 21 sets of loop tassels.
- Cut the thicker macramé cord to the varying lengths laid out and attach the twine tassels to the ends, using clear elastic bands. Wrap the twine onto the cord using the bands backwards so that they get flipped upside-down and the elastic stays out of sight. Cut the loops at the bottom to finish the tassels.
- Balance the entire wooden dowel rod on two chairs so you have easy access to stick the tassels. Measure out and hot-glue each cord to the dowel rod so that they are evenly spaced.
- Stagger the photos onto the cords, attaching from the back with masking tape so that they can be removed in the future and replaced. Arrange the photos in a grid or other shape as per preference.
- Pack neatly in a long slender box, so as to keep the photographs from folding. Gift wrap. And you are good to go.
Hand Painted Coffee Mug
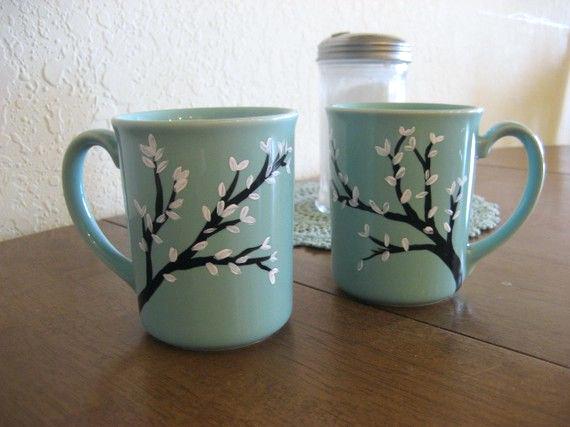
For the groggy morning riser and a coffee addict, gift a custom-made personalised coffee mug. This is a perfect gift for students and colleagues. All you need is a little creativity to get this going.
Materials Required:
- Plain Mug (Preferably White)
- Ceramic Pens (As per design)
Procedure:
- Apply the intended design using the pens on the clean surface of the mug. Wipe before drying, in case of mistakes.
- After the desired design is made, place the mug into a non-preheated oven and bake at 375 degrees for 40 minutes. After so, turn the oven off and leave the mug inside to cool slowly. This cooling process prevents any cracking.
- Once the cup is baked and cooled. Wrap it up in a nice gift box or enjoy a refreshing cup of coffee.
Laptop Sleeve - A Protection for your Gadget
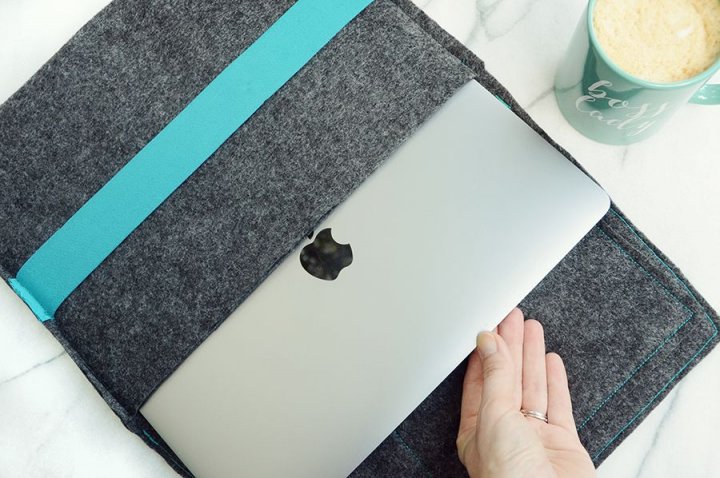
For the laptop and technology savvy, make a personalised gift that is useful and easy to carry along. It’s a memoir of love amidst all the hassle.
Materials Required:
- Half a metre of felt fabric, wool, or any preferred material.
- Small Velcro pieces
- Sewing machine or needle and thread.
Procedure:
- Start by laying the laptop on the length of felt or fabric. Cut a piece of felt or fabric, that is about an inch and a half wider than the computer. That is; the fabric has an 3/4-inch excess on all sides of your laptop.
- Double up the felt or fabric to make the sleeve more cushiony.
- Cut 2 more pieces that are the same width but are around 6-7 inches longer. This shall create your closing flap.
- Pin all 4 pieces together. Keep the two smaller ones in front and the two bigger in back. Round the corners if required.
- Sew with small seam allowance on all the way around the outside of the case. A part of this will have you sewing through 4 layers and another through just 2.
- Sew across just the two layers that go across the middle while being extremely careful to not sew in the rest.
- Trim all the excess away; around the sleeve to give it a nice, straight, clean finish.
- Take your Velcro pieces and place them out where you want them. Mark the places, two on the flap and two on the sleeve. Stitch them in.
- Put in your Laptop or wrap away with a ribbon tied across for a personalised gift.
A Cute Apron - For the Love of Kitchen
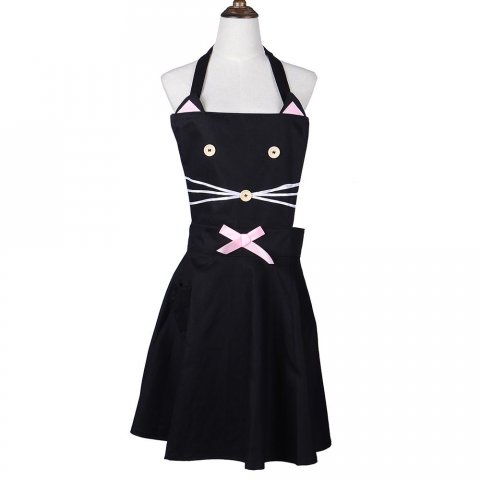
This is the perfect gift for all the moms, wives and cooking enthusiasts out there. A little imagination and a cute bow will give you the perfect apron to run around in the kitchen and during chores.
Materials Required:
- 1 metre of two coordinating fabrics; one for the front and one as lining.
- Wide ribbon for the bow
- Sewing machine or needle and thread.
Procedure:
- Fold the fabrics into half.
- Cut
1. Across the top of the chest it -11 inches
2. From chest to the bottom of the apron - 24 inches
3. The curve at the bottom - 24 inches
4. The bottom of the armpits - 13 inches from the top
5. 2 pieces of 38″ x 5″ (for the straps to the back)
6. 1 piece of 21″ x 5″ (for the neck)
Note: Half the measurements for the top and bottom (1 and 3) as the fabric is folded in half. - For the ruffle, cut a half circle. To do so, fold the fabric and cut a quarter circle on the fold. Cut a 6-inch-wide piece. The centre cut of your circle need to be 24 inches. Hence while folded cut it 12 inches.
- To make the neck and straps, fold the fabric lengthwise and sew up the long side and one of the short sides. Angle the short side of the straps. Turn inside out and press flat.
- Grab the two ruffle pieces; front and back-and sew them together. Sew down one short side and across the bottom of the circle. Do not sew up the other short side.
- Take the two large apron pieces and lay the main fabric piece out with the right side facing up. Begin to pin the ruffle around the bottom edge leaving half inch from the edge.
- The correct side of the ruffle should be touching the correct side of the apron. While you add the ruffle, pin the back of your fabric on top to create a sandwich with: main fabric, ruffle and lining fabric with all of the right sides facing in.
- Keep raw edges together so as the raw edge of the ruffle along the bottom of the apron. As it is going to fold in on itself a little creating a perfect line.
- Cut off extra ruffle in the end with about one inch more than you need. Fold the extra inward and sew it shut. Finish off by pinning the ruffle in place.
- Pin the back straps in place on either side of the apron. The straps will go inside the apron sandwich created with just a little excess sticking out.
- Place the neck strap at the top of the apron close to the outer edges, leaving about 1/2-inch space.
- Sew the apron, all the way around leaving only about a 4-inch opening near the bottom on one side to turn it right inside out.
- Press flat after turning over and sew the opening shut. Hand stitch on a cute little bow and your personalised apron is done. Feel free to gift, or keep this piece to yourself.
Aromatherapy Candles - Feel the Freshness
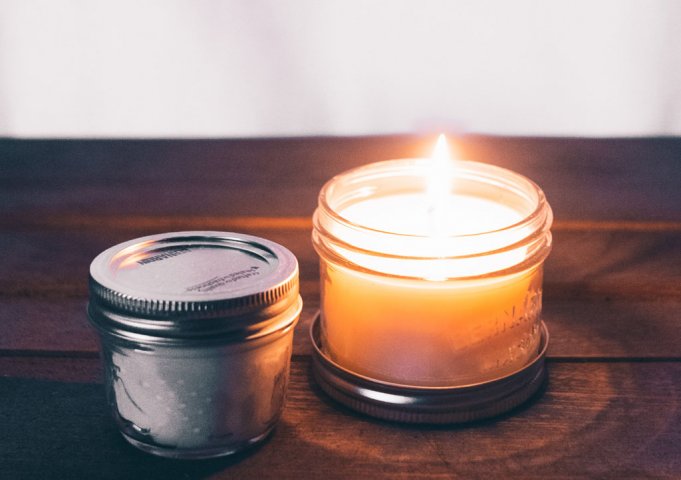
Gift a feeling of freshness and relaxation each day to your loved ones. Aromatherapy candles help unwind, relax and also have therapeutic benefits. Make a batch for your loved one this gifting season.
Materials Required:
- Cotton wicks
- Clean pan to melt the oils
- Wooden spoon
- Pot
- Organic Beeswax
- Essential oils
- Containers for candle
- Pencil or chopstick
Procedure:
- Create a double boiler for the wax by placing water into a pot and bring it to a boil.
- Place beeswax into a clean pan and place into the water until it melts.
- As the wax melts, cut wicks to fit into your desired container and tape it around pencil or chopstick.
- When wax has melted, take it out of the water and stir in your favorite essential oils. Vary the amount of essential oil you use depending on the scent strength of the oil.
- Pour the wax into prepared containers and allow it to cool and set. Make a batch as required and gift away to your special ones or enjoy them yourself.
Stencil-Dyed Scarves - To Make a Style Statement
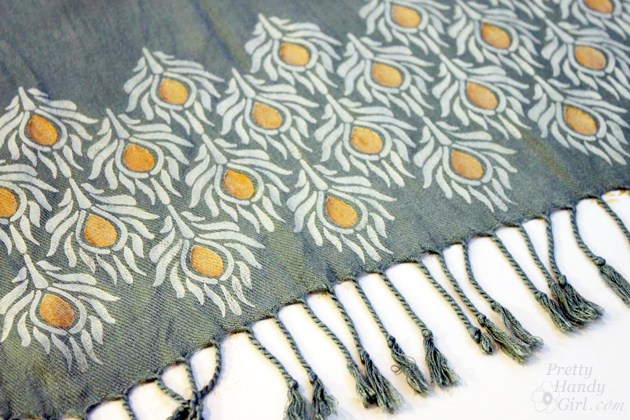
A thoughtful gift indeed. A scarf that has been personally designed will always be a unique piece and will also help to stay away from the sun and cold. Statement scarves can be used as accessories too.
Materials Required:
- Scarves
- Fabric paint
- Stencil roller
- Baby wipes
- Painter’s Tape
- Stiff board or foam board
- Stencils
Procedure:
- Use colored scarves or dye the scarf to required color and iron to remove all wrinkles.
- Tape one end of the scarf to the stiff board with painter’s tape and ensure that the fabric is held taut.
- Tape the stencil onto your scarf and if there are any areas on the stencil that you wish to eliminate, tape over them too.
- Roll your paint roller into the fabric paint and roll of any excess paint until it is nearly dry. Then roll the paint over the stencil. Roll over it multiple times as required to build up enough depth of the paint colour.
- Lift the stencil and position it next to the printed area. Line up the stencil properly and adjust the masked parts for opposite sides.
- Roll your paint onto the stencil until you have the desired coverage. After so, remove the stencil.
- Let the paint dry. Repeat the same with the other end of your scarf. Also paint on patterns if needed.
- Roll it up neatly and wrap a ribbon around it with a small note to make an adorable gift.
Happy Face Flower Pot
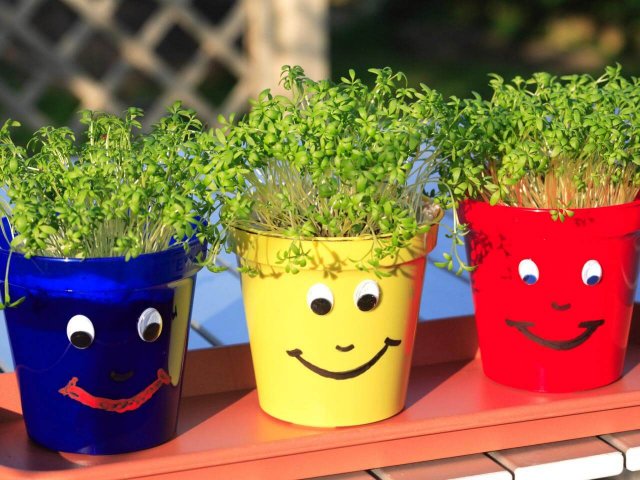
For the plant and nature lover, gift a happy faced flowerpot. Gifting a living plant is seemed very thoughtful, and it will also encourage the person to take care of the plant. An amazing gift with some fresh air!
Materials Required:
- Spray Primer
- Terracotta pots
- White spray paint (or any light colors)
- Permanent Markers
- Acrylic paint
Procedure:
- Cover the pot with primer, it helps with coverage.
- Spray paint the terracotta pots in white (or other colors), several coats may be needed.
- Draw the face; eyes, mouth and lashes, with permanent markers, better to do so after a few trials on paper.
- Use acrylic paint to give definition to the face, like blush to the cheeks.
- Plant in a cactus or any indoor plant and gift away this beauty.
Dream Catcher - Great Motivational Support
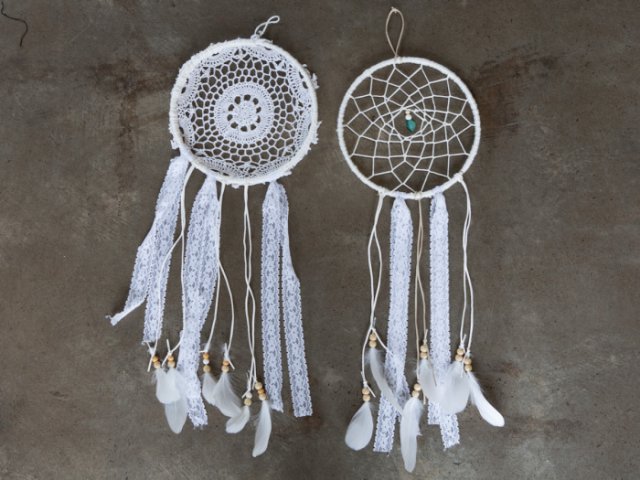
For the dreamers and optimistic ones, gift this unique personalised dream catcher. A token of appreciation and acknowledgement that you are by their side in every endeavor and dream.
Materials Required:
- 21cm wooden hoop
- 8cm wooden or metal craft ring
- Craft feathers (seven large and 20 small)
- Wooden beads of various sizes
- Silk threads in complementary hues
- A pair of scissors
- Craft glue
Procedure:
- Cover the Hoop: Cover the whole wooden hoop by winding the thread around it. Continue winding the thread till you have covered at least a third of the hoop.
- Use colored threads to wind and cover the rest of the hoop.
- Cover the smaller ring using the same method.
- Join the hoop to the ring: Place the ring inside the large hoop and wind the thread from the ring up and around the hoop and back around the ring. Then wind it back around the hoop and tie a double knot.
- Use thread from the hoop and begin to join the hoop and the ring together by winding in. Continue all the way around the hoop, till no big holes are left and it looks satisfactory.
- Adding fringe: Cut colored silk thread in length of 80 cm to make the fringe.
- Tie one thread on at a time, opening with the color that will come in the center. Fold the thread in half and pull it under the bottom of the hoop. Pull the knot tight so it is at the bottom of the hoop and the thread hangs downwards.
- Add additional colors to the left and right of these threads. Make sure the threads stay parallel and untangled.
- Make a triangle, out of a piece of paper. Comb through the fringes and trim the edges in the shape of this triangle.
- Attaching feathers: Arrange the large feathers according to size, with the longest one in the center, and attach them to the fringes using glue.
- Similarly, add beads on to smaller feathers, and through the ends poking out attach then to the fringes in same arrangement.
- Make a hanging loop by threading a larger bead and placing it at the top of the large hoop.
- Neatly pack the dreamcatcher in a slender box and gift away to the dreamers you know.
-
 Stumped Trying to Find Your Husband a Present? Find Inspiration in These 10 Quirky and Pretty Cool Birthday Gift Ideas for Husbands (2020)
-
 A Complete Guide to Selecting the Best Gift to Give the Best Guy Friend and 10 Gifts for Him (2019)
-
 10 Unique Gifts for Boyfriend that Accentuate His Lifestyle, Captivate Him and Bring Him Closer to You
-
 10 Cute and Small Ideas for a Creative Gift for Boyfriend (2018)
-
 Go the Extra Mile By Personalizing Gifts for Loved Ones: 10 Ideal Gift Ideas for Personalized Gifts for Friends and Family (2019)
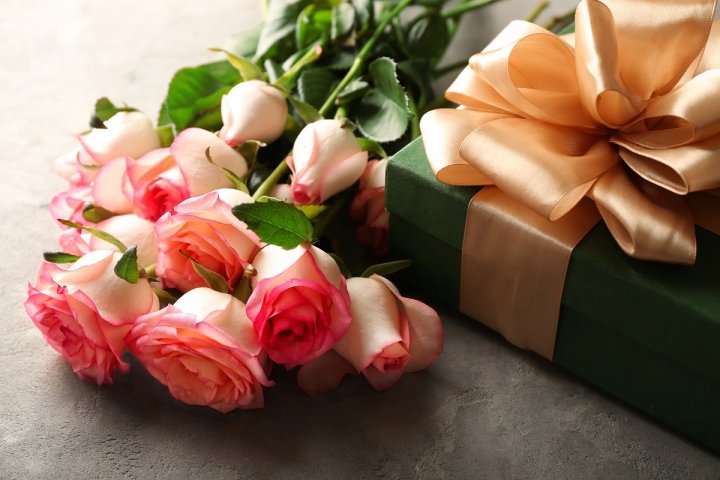
Make any Occasion Memorable by Presenting these DIY Gifts in 2019
With some of the best and easiest to make gifts to choose from, you can ensure that the occasion is entrenched in the heart of the reciever, be it your spouse, friend, family, or any other relative. These gifts will surely add a spark to your bonding. Go ahead and take a pick!
 Highlight the Best Facets of Your Incomparable Beauty: Discover the Best Face Highlighter Currently Available in India and Everything You Need to Know About Using Face Highlighters for Maximum Effect (2023)
 Forget the Blemishes and Get that Picture Perfect Flawless Radiance on Your Face: Check out the Best Foundations for Oily Skin Currently Available in India and Everything You Need to Know About Makeup Foundations (2023)
 Make Your Presence Felt Wherever You Go: Discover the Best Perfumes Under 2000 for Both Men and Women to Announce Your Arrival and Make Any Occasion Memorable (2023)
 Protect Your Oily Skin from the Harmful Rays of the Sun: Discover the Best Gel Based Sunscreens for Oily Skin and Everything You Need to Know Before Buying One (2023)
 Minor Blemishes and Wrinkles Affecting Your Confidence? Check out the Best BB Creams to Conceal Your Worries and Nourish Your Skin to Restore the Healthy, Radiant and Glowing Complexion Back Again (2023)