
-
 Celebrate Makar Sankranti the Traditional Way: What to Do and How to Do It Plus 10 Great Gifts to Give Family and Friends (2019)
-
 Video Calling is the New Normal in Everyone's Life. Top Easy-to-Use Video Calling Apps that Deliver a Seamless Video Calling Experience (2020)
-
 Embark on a Journey to Discover India. Your Guide to the Best Places to Visit in India in Every Season (2020)
Best Handmade Gifts for Friendship Day
Friendship Itself Is a Beautiful Gift

Those who have true friends are indeed fortunate. Friends are not those who were there in your good times rather those who hold you up during your worst ones. Friendship is not always about giving solutions, it is about listening, it is about being there and helping to relieve their burdens. With true friends by our side, we feel like we can overcome any obstacle. Friendship is indeed the most beautiful gift a human can have.
Related articles

There Is Nothing More Special than a Handmade Gift
Yes, we are serious! Nothing is more special than a handmade gift for a true friend, here we are not talking about some greedy aunt who sees handmade gifts as being cheap, out of style & crap, until it's sold in a mall under handloom segment, with a hefty price tag. We belong to a culture which treasures and pass down the handmade gifts to generations. If the recipients understand that the giver had specifically kept them in mind when the gift was made, they will appreciate it for sure. Although not everyone feels that way, your true friend is not like everyone else, (s)he is special, isn't it?
Is It That Difficult to Make a Gift Yourself?

No, it's not, unless you have decided upon some irrational target. Making a gift yourself does not need any speciality, it requires a perfect selection of ingredients which are needed to prepare the gift which are within your own capabilities, considering both time and skill factors. The other important thing is the availability of raw materials, However, the second point is no more relevant in today's world of online stores.
Related articles

Things to Keep in Mind Before Selecting an Idea for Making a Gift Yourself
It Should Be within Your Capability

Before selecting a target gift to be made by hand, you must first assess the skills required for making the same. For example, any craftwork requires a high level of artistic skill, if you lack such skill, your output will not match the required standard. So to avoid disappointments at a later stage, it is advised to assess both, the skill required in making the gift as well as your own skill level, while selecting the target gift.
Only the Final Output Matters
Although in true friendship feelings matter much more than the gift itself but for avoiding embarrassment before other friends, who might have brought costly gifts, the final look of your handmade gift should not be less than that of any professional's. No one will ask you, how much hard work and time you have devoted for the gift, only the final look of your gift will be seen. So it will always be better to spend more time on finishing of the product rather than on its actual preparation. Once again, intelligent selection of the target gift is very important, taking into consideration the level of skill required and the time available with you. As a rule of thumb, keep 50% time for preparation and 50% for the finishing of gift.
Related articles

Keep Aside Enough Time to Get It Done

Since you intend to gift your handmade craft on friendship day, you have enough time for planning and preparation in advance. While planning the time schedule, the most important thing to be kept in mind is the availability of the raw materials. After selecting the target gift, search for the raw materials required in your local market or online stores, if it is not available in your local market or you prefer to buy it online, add one week extra to your time schedule.
10 Best DIY Ideas for Making Gifts for Friendship Day Yourself
Indoor Terrarium
A terrarium is a tiny living garden that you grow in a glass jar. All you need is a glass jar, some gravel, garden soil and a couple of pretty but tiny plants. Things you require are:
- Glass Jar: You can use any old glass jar, left unused at your home or you can also buy a stylish terrarium glass jar at amazon.in.
- Small stones & pebbles: You can use any tiny stone and pebbles available in your garden, but the purchased stones and pebbles will give your craft a professional look. So it is advised to buy some pebble & stones from a nearby nursery or place an order online at etsy.com.
- Activated Charcoal: A very tiny layer of activated charcoal will be required to keep the water fresh and fight off any bacterial growth in the terrarium. You can buy some activated charcoal stone or powder from the nearby nursery or online. Though on the online store you will only get it in bulk. If you don't get charcoal, leave it, it won't make much difference.
- Potting Soil: Potting soil will act as an important layer for your terrarium. Any type of soil can be used, although there are special mixes available if you’re planting cacti or succulents. You can buy some potting soil from ugaoo.com.
- Plants: It won't be a terrarium without the plants. Pick out a few of your favourite tiny sized plants to use in your terrarium from your own garden. Air plants, succulents and mini-cacti are all viable options. You can also buy some good plants from ugaoo.com.
- Final Decoration: You can finally decorate your terrarium with moss, miniatures or any other decorative piece as per your creativity.
How to make
- Start by setting a centimetre-thick layer of gravel that will act as a water reservoir and protect your mini garden from rot. Add a thin layer of charcoal as extra protection from stagnant water and top it with a cm thick layer of garden soil. The thickness of soil depends upon the type of plants you use in your terrarium. Finally, add moss, plants, shells, corals, insects or anything that you like. Here is your beautiful gift ready!
Related articles

Cadbury Gems Dispenser Machine
If your friend has a sweet tooth, this is an ideal handmade gift for your friend. It's very easy to make. All the materials needed are easily available in your house. nothing is required to be purchased from the market except Cadbury Gems.
Material Required
- Cardboard
- Glue gun/Gluesticks/Fevicol
- Candy sticks/long wooden sticks
- Cardboard cutter/pen knife cutter
- Rubber bands
Making the Dispenser
- Step 1: Cut cardboard pieces of given shape and glue together to form a funnel and add wooden sticks at top two sides as shown in the video.
- Step 2: Cut pieces of dimensions as shown in the video and glue together as shown. Glue funnel at the top of the structure.
- Step 3: Create the dispenser tray with cardboard and wooden sticks, as shown in the video.
- Step 4: Attach the dispenser tray to the main structure with wooden sticks and cut off excess stick from the sides.
- Step 5: Cut the server pieces and glue at the bottom of the funnel and dispenser tray.
- Step 6: Add the gems container at the top.
- Step 7: Finish the structure by adding outer covers, gems stickers and your designs.
Gel Wax Candles
Gel candles are nowadays become very popular both for decoration and gifting purpose. The transparent nature of the gel used in these candles makes it suitable to have any colour or decorative objects placed in them that are retrievable once the gel candle is lit and melts. These are arguably the easiest candles to make at home and very suitable for gifting on friendship day.
Material Required
- Sufficient quantity of candle gel wax to make the number of candles you desire. You can order gel was from flipkart.com at Rs. 230 only.
- Candle wicks, any candle wick or thick threads will do the task.
- Proper candle container for pouring the melted gel. You can use any clear drinking glass or small bowl for the purpose.
- A kitchen kettle or other non-stick heating method.
- Coloured sand and seashells for embedding in the gel wax. Here use your imagination for the decoration of your candle. Just keep in mind not to use flammable things for embedding inside the gel for decoration. You can also use the scents of your choice.
Making the Candle
- Step 1: Cut the gel wax into smaller pieces and place enough of those to fit inside your chosen container into a non-stick pot. A good kitchen kettle also works well for this task.
- Step 2: Start to melt the gel. Stir with a spoon made of metal, don't use Wooden spoons as it will cause unnecessary bubbles in the gel.
- Step 3: While your gel wax is melting, arrange the other items in your candle container glass. First set the wick in the container straight with the help of pencils etc. Then set a layer of coloured sand over it, you can place seashells or other decorative items also.
- Step 4: Once your gel-wax starts boiling, pour it into your candle container. Be careful to pour very slowly or it will leave unnecessary air bubbles inside your candle.
And it's done. Simple as that.
Related articles
Stenciled Scarf
Stencilled scarves are also very easy and very less time consuming DIY gift items to make at your home. These scarves will certainly be liked by your friend, as you can design and print them according to the likings of your friend and you can also personalise the scarf by using letter stencils if you like.
Material Required
How to print
- Step 1: At first wash the stole and after drying press it properly.
- Step 2: Fix the stencil at the required place of the stole using adhesive tapes.
- Step 3: Paint over the stencil, using a paintbrush and acrylic colour of your choice.
- Step 4: Let the colours dry. After drying remove the stencil.
And it's done. A beautiful gift for your beautiful friend.
Open-When Letters
If you want to be with your friend whenever he or she needs you, this is probably the best gift you can give to him or her. Open when letters are very simple yet very creative to make. The toughest part is to write down the best advice for your friends in different situations.
Material Required
- Some good quality paper envelopes.
- Some good papers for writing.
- Few good pens.
- Lots of creative thinking.
The concept involved in this DIY is to prepare one envelope containing some good advice for your friends for any particular situation. Like a joke when your friend is sad, so the envelope labelled as "open when you are sad" may contain a letter with nice jokes. Isn't it easy and cute? For more details, watch the complete video.
Related articles

Homemade CD with Favourite Songs of Your Friend or a Playlist
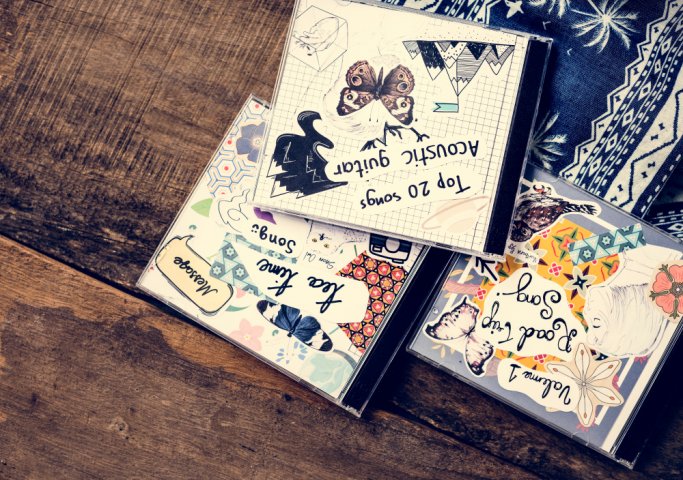
If your friend is a music lover, this is perhaps the best DIY gift idea for you. Simply make a music CD of favourite songs from your friend's playlist. Design and print a personalised cover for the CD and gift in a CD Jewel Box, which you can easily get from the local market.
Material Required
- Blank CD/DVD
- A Computer/Laptop to burn CD
- CD Jewel Case
- Lots of downloading, creating playlists and burning favourite songs.
- Printer to print the cover of the CD
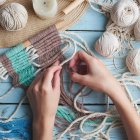
Arm Knit Scarf
Next on this list is this stylish arm knitted scarf. Arm knitted scarves are fashionable and trending. You can always buy an arm knitted scarf online from etsy.com or any other online store. But it will be a great gift for your friend on this friendship day if you make it yourself. The full method of knitting this scarf is shown by SimplyMagie in her tutorial.
Material Required
- For making an arm knit scarf the most important material you need is Bulky Wool Yarn. You can purchase this super bulky wool yarn from amazon.in at a price of Rs. 380 only.
Related articles

Pull-Out Photo Box
Photos are, to this date, the best way to preserve the precious moments. Of course, you and your friend have had some very good time together and perhaps you have photographs of those beautiful moments with you. Then this handmade Pull Out Photo Box will be one of the best gifts to be made by you for your friend on this friendship day.
Material Required
- Any good small size cardboard box. If you want to go fancy then you can use any old small jewellery box of your mom or you can buy one of these jewellery boxes from amazon.in at Rs. 499.
- Good quality printed scrapbook paper, which you can easily get from your local store.
- Glue
- Ribbon
How to Make
- Step 1: Get the inner length and width of your box.
- Step 2: Cut a long strip of scrapbook paper. The width of this strip should be the inner length of your box and length should be in multiple of the width of the box as per the numbers of photos to be pasted. Suppose the length of the jewel box is 4 inches and width is 2 inches and you want to paste 10 photos, then the strip should be 4 inches wide and 20 inches long.
- Step 3: Fold the scrapbook paper according to the width of the box, creasing it to get a precise line. At the next mark, fold and crease the scrapbook paper in the opposite direction. Continue the folds for remaining paper accordingly.
- Step 4: Position the folded scrapbook paper on a flat surface with the topmost fold facing you. Cut the printed images of your choice or some good friendship quotes, keeping it a little smaller than the folded area, then paste all on each scrapbook paper square and adhere with strong glue. Allow it to dry.
- Step 5: Fit your folded scrapbook paper in the box. If you’d like, hot-glue the back side of the bottom square to the inside bottom of the box, and let dry. Finally, use hot glue to adhere to a loop of ribbon to the top back edge of the top square and let dry.
That's it, you have done it.
Stash Book
Haven't you always wanted to have a book hollowed inside so that you can keep your secret things in it? You were not the only kid who wanted to have a Stash Book, a book hollowed inside to hide small things. This little idea has been used in so many detective movies and stories that stash books have become a legendary handcraft. It is a perfect gift for such a friend who likes to keep secrets.
Material Required
- White glue. You can easily get one in a nearby stationery store or order online from amazon.in at Rs. 100.
- A new penknife, similar to mone available at amazon.in at Rs. 143 or box cutter.
- Small size brush to apply glue solution.
- Pencil/pen
- Ruler or another rigid straight edge
- A thick unused book with a hardcover.
How to Make
- Step 1: Leave a few pages intact at the front side, mark the page from where you want to cut out.
- Step 2: Holding all the remaining pages together, brush the edges with the white glue - enough to soak in pretty well, but not too drippy.
- Step 3: Allow this to dry, but use a spacer so the first couple pages and the front cover don't get stuck.
- Step 4: Go to the first glued page. Draw out an inch border around the edge on all four sides.
- Step 5: Using your ruler and knife/box cutter cut out along the inside of the line. Try to make the cut as vertical as possible, or else try to tilt so the hole will narrow as you go down.
- Step 6: Continue cutting down through the layers. The longer you spend on it, the smoother and straighter the inside edges of your book will be.
- Step 7: When you get to the back of the book, and through the last page, stop. Clean the cutout area.
- Step 8: Next, brush the glue on the inside edges of the pages. You can also apply a second coat of glue on the outer edges. Let it dry completely under some weight.
- Step 9: Fill up the hollow space with whatever secret things you want to gift your friend and gift him.
Related articles

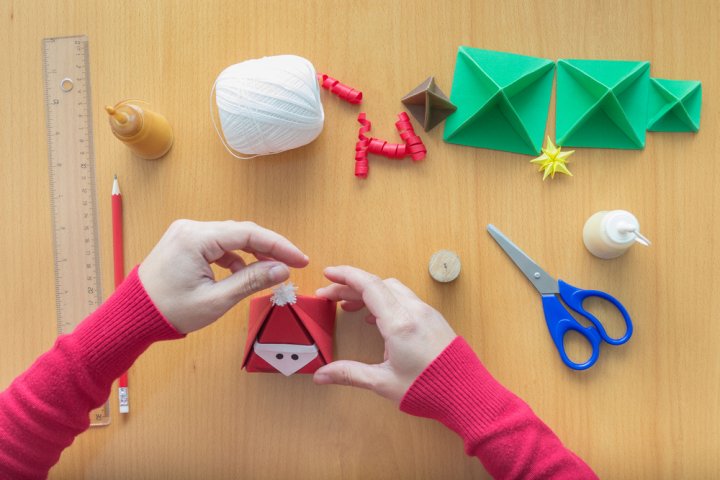
Money Origami Heart
Last on this list is this cute little origami heart made of a dollar bill. You can obviously use any rupee note. This little gift is not only cute but it can be useful at times. Gift this origami heart to your friend and ask him to keep it in his purse. Being folded in heart shape it would not be easily spent and could last in his purse for years at the same time this cash can also be used on exigencies. Above mentioned video is a nice tutorial on how to make an origami heart from a note by JustOrigami, which you can follow along.
-
Video Calling is the New Normal in Everyone's Life. Top Easy-to-Use Video Calling Apps that Deliver a Seamless Video Calling Experience (2020)
-
Embark on a Journey to Discover India. Your Guide to the Best Places to Visit in India in Every Season (2020)
-
 Lose Yourself in the Wild Beauty of River Ganges the Right Way by Camping at Rishikesh: 10 Campsites for an Adventurous Camping Experience!
-
 क्या आप वही पुराने घिसे-पिटे उपहार लेकर शादी में जा रहे हैं? उन्हें छोड़िये और इन १० मस्त शादी के गिफ्ट में से चुनिए जो ख़ास जोड़ों के लिए चुने गए हैं (२०१९)
-
 Return Gifts for Birthday and Kids' Party Planning: 10 Great Gift Ideas Under Rs 100 and Rs 200 & Awesome Party Hacks
Get Creative & Think of Your Own Ideas
There's no limit to creativity and imagination. With these awesome ideas for friendship day gifts, we hope you're able to think of hundreds of more ideas like these now. Take your notepad and start putting your creative imagination to words to create the best gift ever for your amazing friends!
 Highlight the Best Facets of Your Incomparable Beauty: Discover the Best Face Highlighter Currently Available in India and Everything You Need to Know About Using Face Highlighters for Maximum Effect (2023)
 Forget the Blemishes and Get that Picture Perfect Flawless Radiance on Your Face: Check out the Best Foundations for Oily Skin Currently Available in India and Everything You Need to Know About Makeup Foundations (2023)
 Make Your Presence Felt Wherever You Go: Discover the Best Perfumes Under 2000 for Both Men and Women to Announce Your Arrival and Make Any Occasion Memorable (2023)
 Protect Your Oily Skin from the Harmful Rays of the Sun: Discover the Best Gel Based Sunscreens for Oily Skin and Everything You Need to Know Before Buying One (2023)
 Minor Blemishes and Wrinkles Affecting Your Confidence? Check out the Best BB Creams to Conceal Your Worries and Nourish Your Skin to Restore the Healthy, Radiant and Glowing Complexion Back Again (2023)