-
 How to Make Cake at Homes: Tips & Tricks + 6 Easy-to-Make Cake Recipes that You Can Prepare Right in Your Kitchen! (2020)
-
 Wondering How to Make a Cake at Home? 8 Simple, Step-by-Step Recipes for Baking a Cake without an Oven Plus Tips and Tricks for Making Your Cake Perfect, Just Like You! (2020)
-
 Wondering How to Make a Chocolate Cake? Check out 6 Great Recipes to Make Every Type of Chocolate Cake at Home and Delight Your Family (2020)
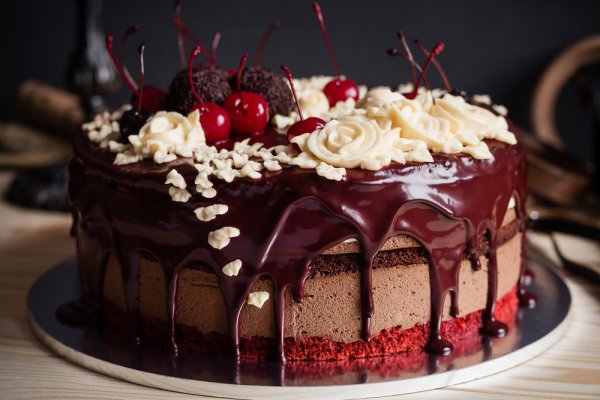
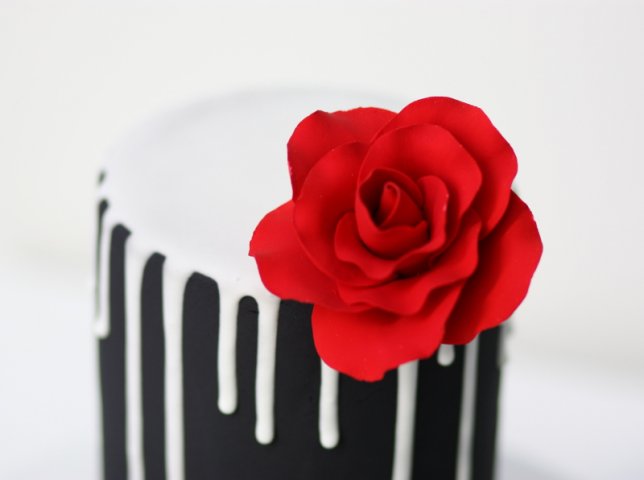
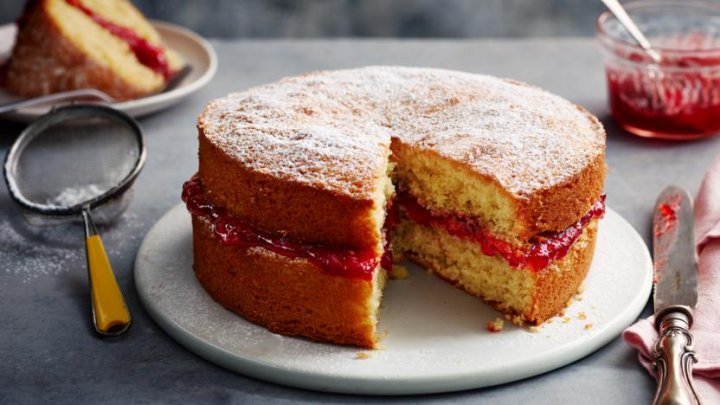
What is a Drip Cake?
A drip cake or dripping cake originates from Great Britain. It is considered as a traditional bread where any regular cake is baked in the oven and then dripping effect is used in the frosting to give it the look that it is known for. The drip icing used for creating the illusion of something being dripped around the cake can be prepared in various forms. Current generation especially kids love such cakes and hence you can find various recipes of the same online.
There are a number of variations available in drip cake and over time, people have started to experiment with it even more. If you are wondering how to make a drip cake then don’t worry as we are going to explain it in the further sections here.
Various Types of Drip Cakes to Make
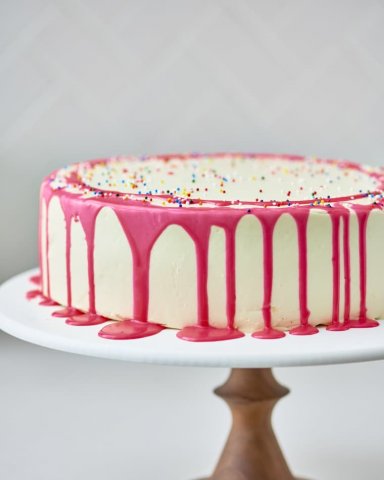
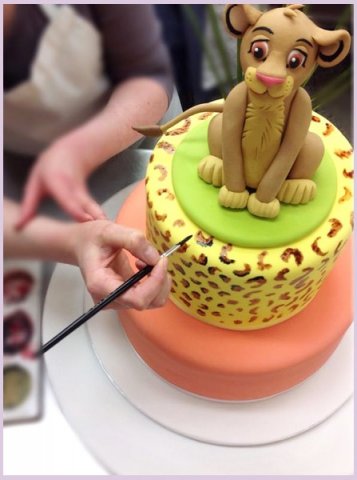
Rainbow Drip Cake
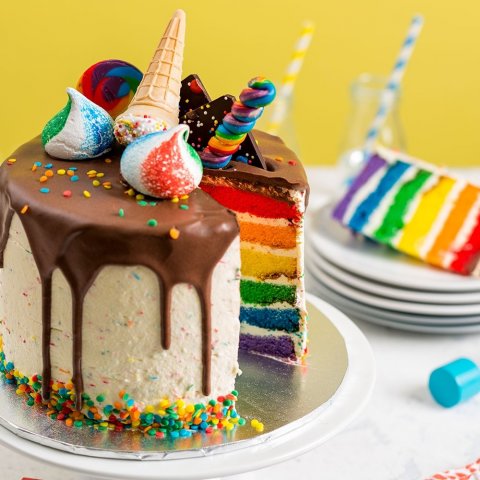
Rainbow drip cake is one of the most loved types of drip cakes these days. You can spot them on birthday parties of kids as they just love the popping colours of this cake. You can find various versions of this cake too but basically, it is a magic of food colouring to be precise. Of course, it requires quite some patience, but these cakes are definitely yum in taste.
Reverse Drip Cake
Reverse drip cakes are exactly what you think they are. These cakes look as if they are defying gravity and the dripping effect goes from bottom to top which is quite intriguing. It definitely needs quite a technique to prepare them and they look fun to eat too.
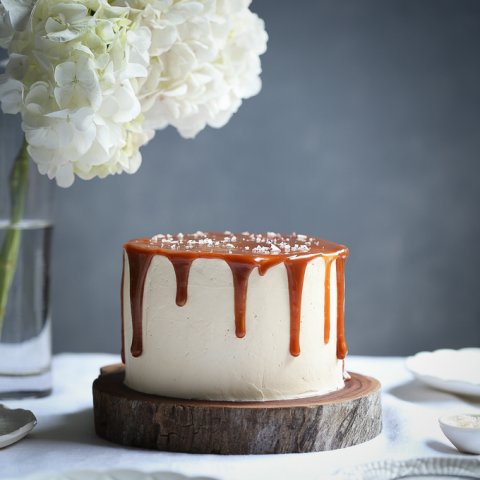
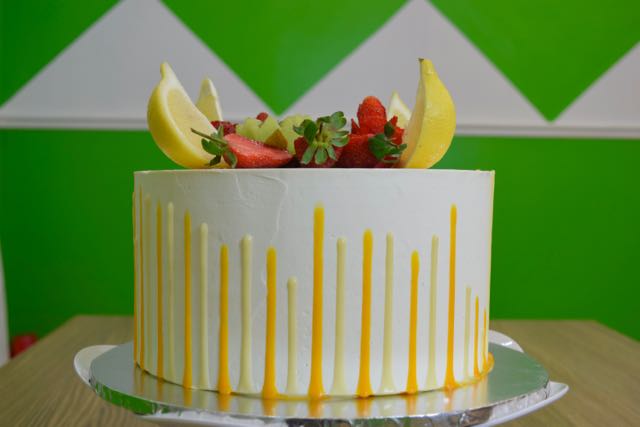
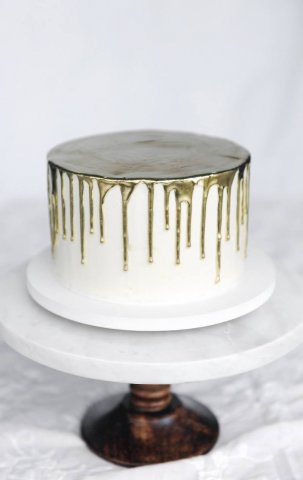
Gold Drip Cake
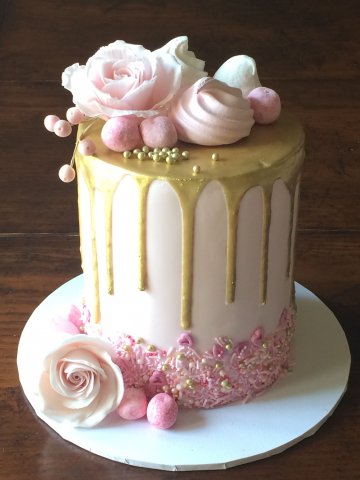
Gold drip cakes are mostly used in weddings and of course as the name suggests, they look quite fancy too. In these types of cake, the basic cake can be prepared using whichever flavour and colour you want. However, it is the dripping icing which is golden in colour and looks quite unique and tempting. A combination of white cake and gold dripping is quite popular these days.
Royal Icing Drip Cake
Royal icing drip cake looks like usual drip cakes but they require more time and patience for creation. Royal icing is quite different from the usual icing as it is thick in texture but it is definitely quite delicious too. These types of icings are used on fondant cake as these cakes require something thick for creating the dripping effect.
Various Drip Icing Options for Drip Cakes
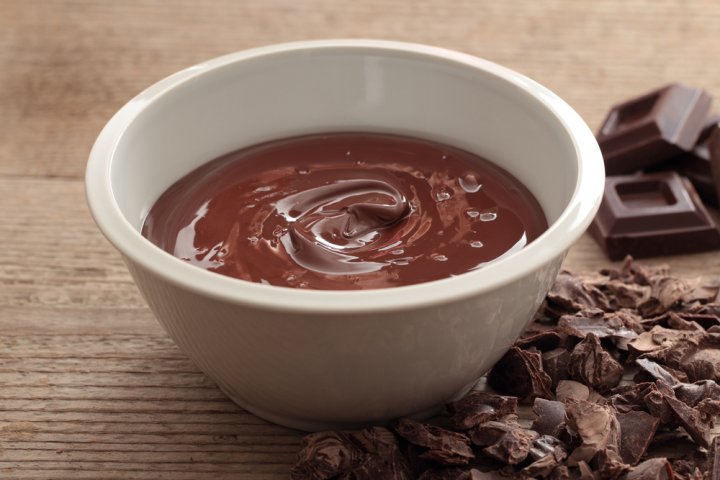
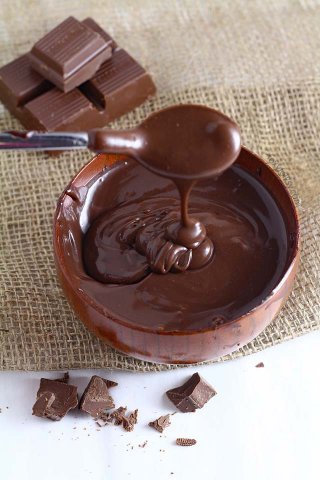
Chocolate Ganache with Cream
Chocolate ganache is the most common type of drip icing used for drip cakes. All you have to do is take equal parts of chocolate and cream and melt them together in a microwave. After 1 minute of a microwave, they will melt properly. You can mix them and add some food colouring for additional effects. Chocolate ganache is ready to use and it is mostly used for buttercream frosting.
Royal Icing
Royal icing is one of the most popular dripping cake recipe used for preparing drip icing for fondant cakes.
- For this, you need 170gm of icing sugar.
- 1 egg white and 1 teaspoon fresh lemon juice.
- Beat them in an electric mixer for at least 7 minutes.
- Now, it is ready to be poured over fondant cake.
- Make sure to let the icing set for at least 12 hours on the cake before serving.
Water Ganache
This is a completely new concept as people generally think that ganache is prepared with heavy cream alone. But now, you can make a chocolate ganache with water too.
- So, all you have to do is take 170 gm of white chocolate and only 30 ml of water.
- Microwave it and mix it well and your water chocolate ganache is ready.
- Make sure to cool it down before using it as drip icing.
Fresh Fruit Glaze
For this you need
- 3 cups of desired fruit
- ¼ cup granulated sugar
- 1 tablespoon heavy cream
- 1 ¼ cup powdered sugar.
-
- Making it:
- Pour fruit and granulated sugar in a saucepan and stir on medium heat. Once the sugar melts, crush the fruit too and sieve the mix.
- Now, heat it again and reduce it.
- Finally add remaining ingredients and give it a mix and your fresh fruit glaze is ready.
Melted Chocolate
In the process of learning how to make a drip cake, the easiest way to prepare drip icing for it is through melted chocolate. It requires no preparation and only a simple trick. All you have to do is put squares of brown or white chocolate in a piping bag and seal it properly. Now, put this piping bag in a recently boiled water and once it is melted you can use it for drip icing.
Chocolate Sauce
Chocolate sauce is easily available in market but if you want to make it on your own then here is the recipe.
- Put ¾ cup sugar, 1 ½ tbsp all purpose flour, and ½ cup cocoa powder in a bowl and whisk.
- Heat 1 ¼ cup milk, 2 tbsp butter and few drops of vanilla extract together.
- Mix dry ingredients into wet and heat them for 6 minutes on low heat.
- Your chocolate sauce it ready.
Chocolate Glaze
Chocolate glaze is more satiny and shiny in texture and hence great for fancy drip cakes
- Melt ¾ cup chocolate chips
- 3 tbsp butter
- 1 tbsp light corn syrup together through double boiler method.
- Once melted completely, add vanilla essence.
- You can use hot chocolate glaze directly over the cake as it will create nice dripping effect at this time.
Two Simple Drip Cakes Recipes to Try at Home
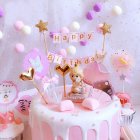
Funfetti Drip Cake
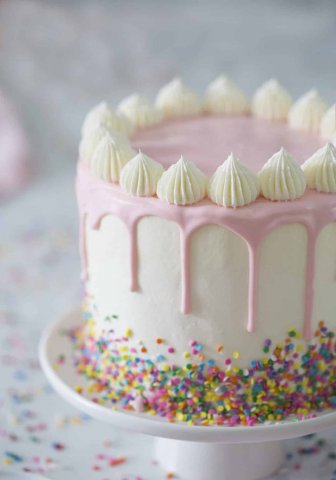
If you want to make a drip cake for your kids then this recipe is the perfect answer for you. The mix of pink drip cake icing on top of white cake with amazing sprinkles makes this funfetti cake just perfect for the kids. If you want to learn making it from the scratch then the recipe is provided right below in details.
What You Need
- 1 2/3 cup all-purpose flour
- 1 cup granulated sugar and 1 pinch kosher salt
- 1 tsp baking powder
- 1/4 tsp baking soda
- 3/4 cup unsalted butter on room temperature
- 3 egg whites and 3 tsp vanilla extract
- 1/2 cup sour cream
- 1/2 cup milk
- 1/2 cup sprinkles
- 3 tablespoon heavy cream
- 2 tbsp white chocolate chips
- 1/2 cup candy melts
- 5 larger egg whites
- 1 1/3 cups sugar and 1/3 cup water
- 1 pinch kosher salt and 2 tsp vanilla extract
- 2 cups unsalted butter
- 2 dashes cream of tartar
- 1 tsp milk, 3 tsp vanilla
- 445gm unsalted butter
- 900gm confectioners sugar
- 1 drop pink food coloring
- 1/3 cup sprinkles
For Cake
For Ganache
For Italian Buttercream
For American Buttercream
How to Make It
- Preheat oven to 340° F. Take three 6 inch pans and coat their inside with butter and flour.
- Now, sift all the dry ingredients in a dry bowl and all the wet ingredients in a medium sized bowl.
- Now, mix wet ingredients into dry and combine well. Make sure to add sprinkles at the very end.
- Pour the mix into pans and bake for about 30-35 minutes and your cakes are done.
- For Italian buttercream, beat egg whites with electric mixer along with a dash of salt, 1/3 cup sugar and 2 dashes of cream of tartar. Beat until the mix becomes soft.
- Take a medium saucepan and add 1 cup of sugar with 1/3 cup of water and cook on low heat. Stir until sugar melts completely and then add it to mixer and beat it until it comes to room temperature.
- Switch to paddle attachment and start mixing butter at room temperature along with vanilla. Mix it well and then transfer it to piping bag.
- For American or Funfetti buttercream, beat butter until fluffy. Now add sugar, milk, vanilla and mix well and then divide into 2 parts.
- Add pink food coloring to 1 part and eventually add sprinkles in both parts. Transfer them into 4 piping bags.
- For the ganache, chop up the candy melts and transfer it to a bowl. Melt white chocolate, cream and candy melts together until smooth.
- Make sure that it melts completely and then mix them together. Add a drop of pink food coloring and finally transfer it to a piping bag.
- For the assembly, use pink and white piping bags alternatively and after smoothening it, let it chill for 10 minutes.
- Pipe the Italian Buttercream outside the cake and smooth out and chill for 10 min.
- Add confetti sprinkles on bottom of the cake and ganache on top of the cake. Make sure to create drip look with ganache.
- Pipe out dollops of Italian buttercream on top to finish it.
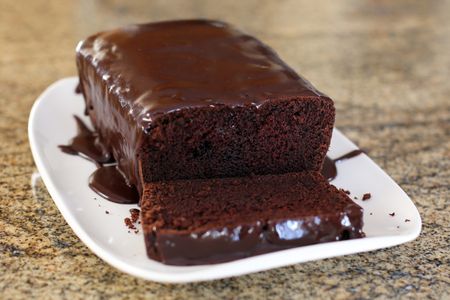
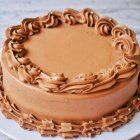
Chocolate Drip Cake
If you are wondering that how to make a drip cake with simpler recipe which involves chocolates too then this one is for you. It is easy to make and everyone will love it.
What You Need
- 175gm butter, 175gm plain chocolate
- 200gm sugar
- 200gm of dark chocolate and 200ml of double cream
- 1 tsp vanilla extract
- 3 eggs and 75gm plain flour
- 200gm white chocolate
How to Make It
- Preheat the oven to 180° C. Line one 20 cm round baking tin with baking paper.
- Take a pan and melt butter and chocolate on low heat. Add sugar and vanilla and leave it aside to cool down.
- Whisk eggs in that bowl and then add flour and whisk to mix it well. Finally bake it for 25 minutes and cake should be done.
- Now, till the cake cools down, prepare ganache by adding dark chocolate and cream together.
- Cut out the top of the cake to make it even. Now, pour the ganache over the cake and spread it out evenly.
- Now, put pieces of white chocolate in a piping bag and then place it into recently boiled water. Once it melts, pour it over the cake to create the dripping effect. And you are done.
Important Things to Consider While Making the Drip Cake
So, we have explained it in a quite detailed manner how to make a drip cake along with various types of frostings and icings for it. However, as this cake is quite tricky to make, you are going to need some tips handy in order to achieve perfection while making the cake. So, make sure that you keep these things in mind while making a drip cake.
Right Kind of Dripping for Respective Cakes
Not all drip cakes are same and hence you need a different kind of drip icings for different kind of cakes. The cakes with buttercream as their frosting needs to have ganache or glaze as the dripping icing. On the contrary, the cakes which have fondant on top of them needs to have royal icing as the dripping icing. These little things are really important for a drip cake to be perfect.
Consistency of the Drip
The consistency of the drip is the uttermost concern when it comes to making the drip cakes. It cannot be too thin otherwise it will cover the entire cake and won’t make a dripping effect. Or it cannot be too thick or it won’t drip as needed. Keep the consistency somewhere in-between or you can check the consistency of the dripping effect, before applying it on the cake.
Right Temperature
If you want to learn how to make a drip cake perfectly, then you need to know about the technicalities involved in it. For example, a just baked cake should never be used right away. You must let it cool down for quite some time before applying the frosting. However, when you are using melted chocolate for drip icing then it needs to be a bit warm.
Start with Single Layer Cakes
If you are completely new to the concept of making drip cakes then starting with multiple layers can be a struggle. You need to make additional frostings for binding these layers together. So, always start with a simple cake . Once you achieve perfect dripping on this cake then you can increase the height of the cake in the next attempt.
-
 10 ऐसे केक जिनको देखकर और खाकर आपके बच्चे और मेहमान हमेशा आपको याद करेंगे ! लेटेस्ट केक रेसिपीज आपकी बेटी के जन्मदिन के लिए ।(2020)
-
How to Make Cake at Homes: Tips & Tricks + 6 Easy-to-Make Cake Recipes that You Can Prepare Right in Your Kitchen! (2020)
-
Wondering How to Make a Cake at Home? 8 Simple, Step-by-Step Recipes for Baking a Cake without an Oven Plus Tips and Tricks for Making Your Cake Perfect, Just Like You! (2020)
-
 यहां 6 आसान और स्वादिष्ट केक रेसिपी हैं, जो आपको अपने घर पर जरूर बनाने चाहिए। घर पर केक बनाने के लिए जरूरी सामान(2020)
-
Wondering How to Make a Chocolate Cake? Check out 6 Great Recipes to Make Every Type of Chocolate Cake at Home and Delight Your Family (2020)
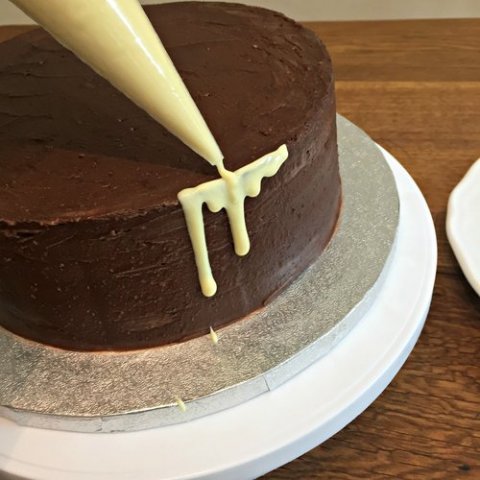
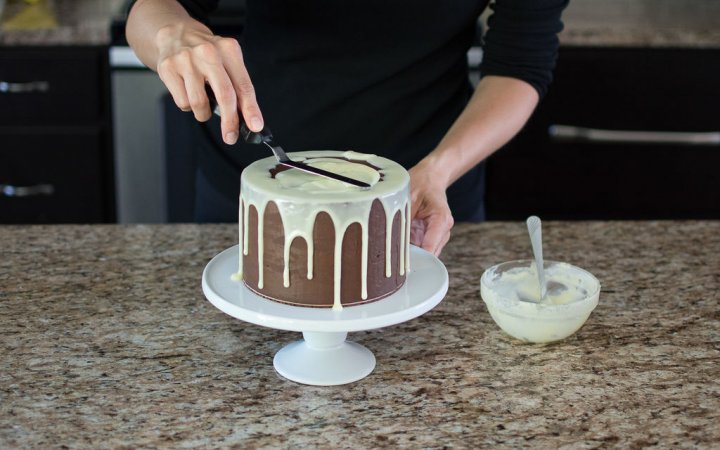
Drip The Sides Before Filling In The Top
When you first start caking, don't dump dripping over the top of the cake and let drip run down the sides naturally. If you’ve ever tried that before, you’ll know it doesn’t end up looking good. You’ll have a lot more control over the appearance if you start by dripping the sides until they’re aesthetically pleasing before filling in the top of the cake. Try not to add too much to the top when filling it in, because if you add any more to the drips you’ve created, it will make them travel farther than you’d like. Instead, try to use just a little and spread it so that it just touches where your drips begin. Also, try not to touch the drips at all during the decorating or boxing-up process.
 Highlight the Best Facets of Your Incomparable Beauty: Discover the Best Face Highlighter Currently Available in India and Everything You Need to Know About Using Face Highlighters for Maximum Effect (2023)
 Forget the Blemishes and Get that Picture Perfect Flawless Radiance on Your Face: Check out the Best Foundations for Oily Skin Currently Available in India and Everything You Need to Know About Makeup Foundations (2023)
 Make Your Presence Felt Wherever You Go: Discover the Best Perfumes Under 2000 for Both Men and Women to Announce Your Arrival and Make Any Occasion Memorable (2023)
 Protect Your Oily Skin from the Harmful Rays of the Sun: Discover the Best Gel Based Sunscreens for Oily Skin and Everything You Need to Know Before Buying One (2023)
 Minor Blemishes and Wrinkles Affecting Your Confidence? Check out the Best BB Creams to Conceal Your Worries and Nourish Your Skin to Restore the Healthy, Radiant and Glowing Complexion Back Again (2023)