-
 खरीदें 10 सुन्दर कढ़ाई की हुई साड़ीयान जो देखने वाले के होश उड़ा देंगे (2019): और पड़ें भारत कि कढ़ाई की विविध विरासत के बारे में और खुद से साड़ी पर कड़ाई करने के टिप्स
-
 Transform Your Wardrobe with the Latest Sarees! 10 Exquisite Sarees with Work That Will Make You Look Like You Stepped Out of a Photo Shoot!
-
 Revive Your Wardrobe This Summer with These Saree Essentials. Here are 10 Gorgeous Sarees with Images to Inspire Your 2019 Makeover
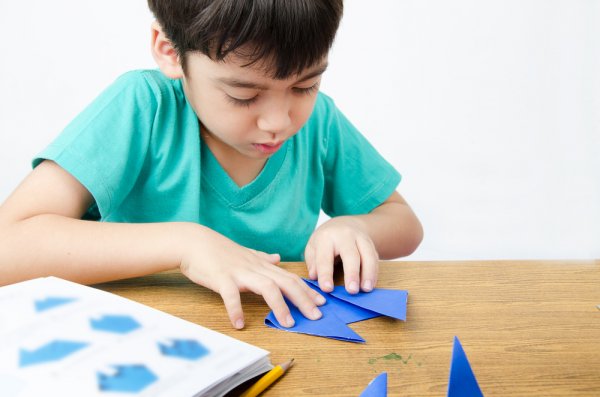
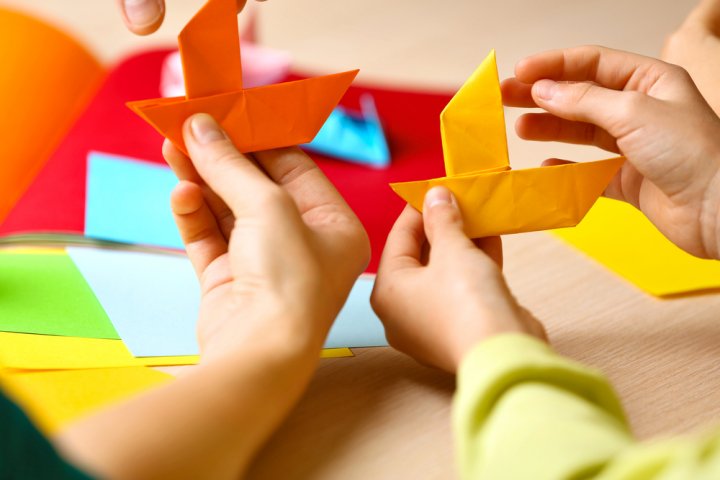
Origami: Crafting Objects Using Paper
Paper folding is the easiest thing anybody can do with their hands. If you fold the paper following a pattern, you can end up creating a replica of different objects. This creative art is called origami which is a Japanese word where "ori" means folding and "kami" means paper which together means folding paper. This art form has been prevalent in Japan since 1600 and has gradually become popular throughout the world, especially among children.
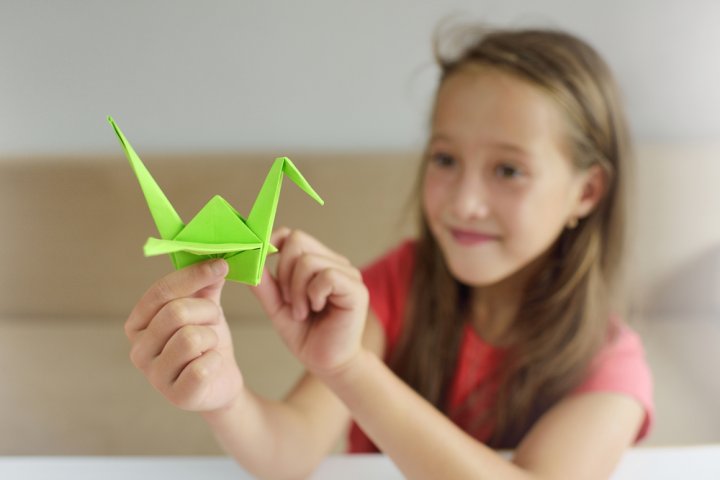
The art of origami started with the creation of animals like neko (cat), sakana (fish), kame (turtle), tatsu (dragon), tsuru (crane), usage (rabbit) and chocho (butterfly) which depicted the culture and ethnicity of Japan. The most popular origami animal is tsuru, because according to Japanese belief, 1,000 origami tsuru brings long life, luck, happiness and peace.
It is a form of art where a single paper is folded multiple times to create an object. There are a variety of folding techniques: reverse fold, basic fold also known as mountain and valley fold, sink fold and crimp fold. The three basic origami bases are waterbombed base, preliminary base and bird base. The blending of these bases and folds lead to the creation of exquisite artwork. The Japanese traditionally used a paper called Washi for origami which is stronger than normal paper. Presently, the popular form of paper used for this craft is called kami while the foil-backed paper is used for complex origami structures.
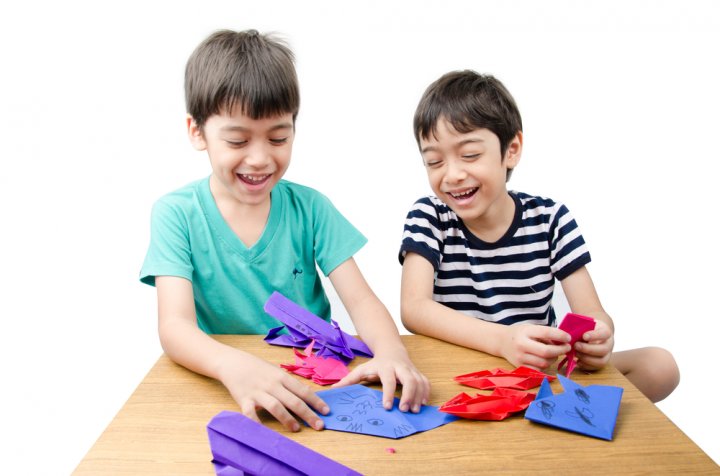
Origami teaches different techniques to a child using the concept of play. The children develop their language, social skills, motor skills and cognitive capability as both the hemispheres of the brain are actively used while practising origami. The right hemisphere of the brain is responsible for creativity while the left hemisphere is used for logical thinking. They also become socially active and learn to adapt themselves with friends and build a strong relationships.
Benefits of the Process
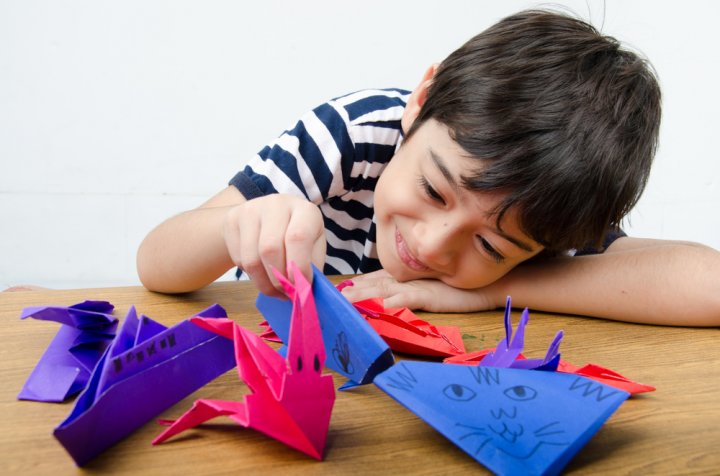
Origami induces the thinking process in an individual. A child has to use their fingers skilfully for creating the object which aids in their mental development. The children acquiring the ability to move their fingers efficiently exhibit good rhythm and show progress in different types of sports.
The fingertips are home to our peripheral nerves and hence are termed as the second brain of our body. Thus using the fingers transmits signals to the brain and the brain gets trained effectively and exclusively augmenting the concentration level of a child. When a child creates a beautiful object from a single piece of paper, it drastically motivates their imaginative and creative ability. Different papers of various colours are used for making an object. So the same object looks different in different forms of colour which improves their perspective about colours. Children deal with different shapes while folding the paper which imparts the knowledge of geometry and also gains spatial awareness while folding different sides of the paper.
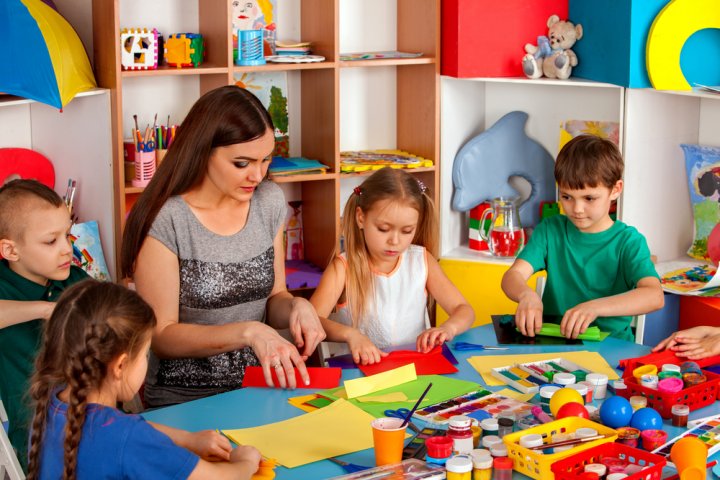
Creative Therapy
Apart from origami is an art form, it has been used as a creative therapy by the occupational therapists and teachers recently. The therapy given through origami is beneficial to stroke victims, aged people, children with attention deficit disorder and individuals undergoing rehabilitation due to accidents. Children with ADHD have been found to increase their attention, concentration, focus and patience through this therapy. The children tend to calm down from their erratic behaviour after creating origami figures. This therapy helps a person to relax and reduce the stress in life and motor skills of stroke patients have been found to improve considerably.
Reusing Paper

Global warming has been a cause of concern throughout the world. Based on this environmental issue, people have become aware of saving the planet by planting more trees, reusing and recycling natural resources. Thus it is the duty of every individual to reduce the use of virgin commodities and reuse the existing materials. A considerable amount of energy is required to make a finished product from the raw materials, which can be saved by our effort of reusing the material.
Additionally by reusing things you can reduce the production of waste since discarding of waste has also posed a threat for us as most of the waste is not bio-degradable. The landfills have become a source of groundwater pollution in many areas. In the case of producing paper from trees, the factories release toxic gases and water into the environment. If we reuse paper, the production demand gets decreased, thereby reducing environmental pollution to a certain extent. Reusing paper is economical for your family as it cuts the cost of purchasing paper items. Thus origami should be practised using paper from old magazines, newspaper and storybooks. The colours and designs on the paper can be carefully chosen which will add extra beauty to the finally created object.
Enhancing Social Skills
Origami does not require any special skills. It can be carried out by anyone, by simply following the patterns and rules. People lacking artistic ability can also become a master of the art. Thus their self-esteem gets boosted, each time they accomplish a figure using a paper. A child learns that a paper folded in an improper way can again be refolded into a proper pattern. Hence it is a message for the child that any mistake was done in life can be corrected with time. This knowledge imparts social skills and he learns to interact with society. Origami enhances the concentration, coordination and the ability to follow directions, which increases the patience of a child.
Convenient Art Form
Origami is considered a simple and convenient form of art and craft as it requires a simple sheet of paper that is folded in various techniques to obtain a sculpture. It can be practised anywhere and everywhere without any investments. You can build a variety of useful objects using the old paper from your household or institutions. Different kinds of paper can be used keeping in mind that the paper should be lightweight, easily foldable, square in shape and free of folds and creases. However, you do require intermediate skill for generating more complex structures and you will require considerable time to master the art.
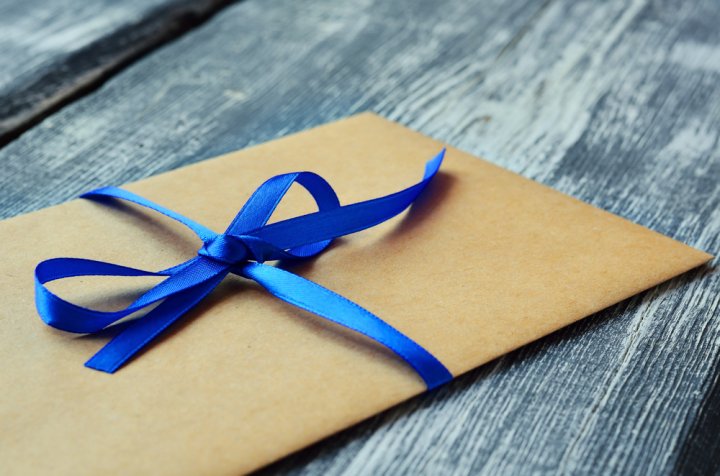
Methods to Make Different Types of Paper Envelopes
Envelopes are a requirement in every household and institution. You may wish your friends and relatives using electronic media on different occasions, but sending a card to mark the occasion makes you very special. You demonstrate your affection and intimacy through various heart-warming messages and drawings on the card. You are now in need of unique and stylish envelopes to send your card to the person you adore because the envelope gives the first impression of the card within it to the receiver. Do you know there are different kinds of envelopes? If you are in search of a special and beautiful envelope to send your card, try making one amongst the following. Just follow the step-by-step instructions and you will be the owner of a fabulous envelope.
Pouch Envelope
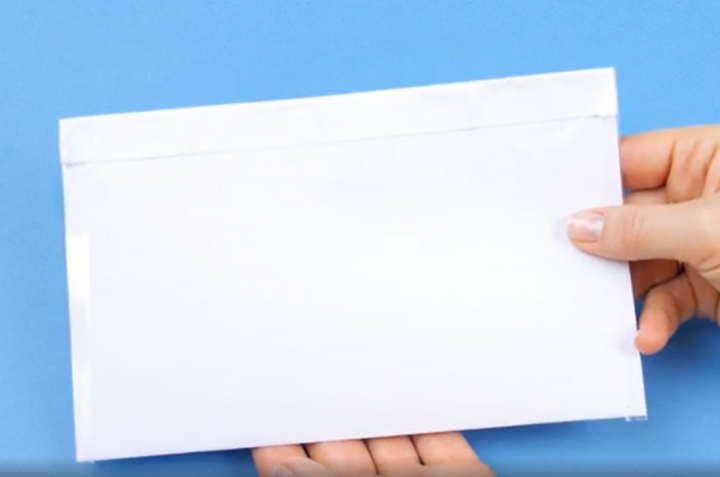
A pouch envelope is widely used for sending official documents. You can make this envelope colourful, for sending different types of cards or invitations. Make each envelope unique by choosing different kinds of paper.
Materials Required:
- A glossy paper from an old magazine (8.5 x 11 inches)
- Sealing tape
Procedure:
- The paper should be folded to form a rectangle of half the size of the paper.
- The two open edges should be closed using a tape, while keeping the top edge open.
- A flap of ½ inch should be made at the open end by folding the end.
- Your envelope is ready. Put the letter inside the envelope and close down the flap.
Taped Envelope
You can use this beautiful taped envelope for inviting your friends to your birthday party. It looks pretty and informal as you make it from newspaper or books. You can choose the page according to the look you want to impart.
Materials Required:
- A rectangular piece of paper (8.5 x 11 inch) from an old newspaper or a book
- Sealing tape
Procedure:
- The paper should be folded in the middle along the length of the rectangle.
- The edges of the paper should be matched and the fold should be pressed by trailing with a finger to form a crease.
- The top left corner should be folded towards the centre crease so that it forms a triangle.
- Similarly the top right corner should be folded to form another triangle and the edges of both the triangles should be at the same level.
- The folds should be pressed by trailing your finger. Thus two triangles are formed which are placed on top of the rectangle.
- The paper should be folded on both the edges below the triangle by 1 inch towards the centre crease.
- The lower edge of the paper below the triangle should be folded in such a way that it meets the edges of both the triangles.
- Both the sides of the triangle should be closed with a tape. The triangular flap should be folded over their bases. Thus your envelope is ready.
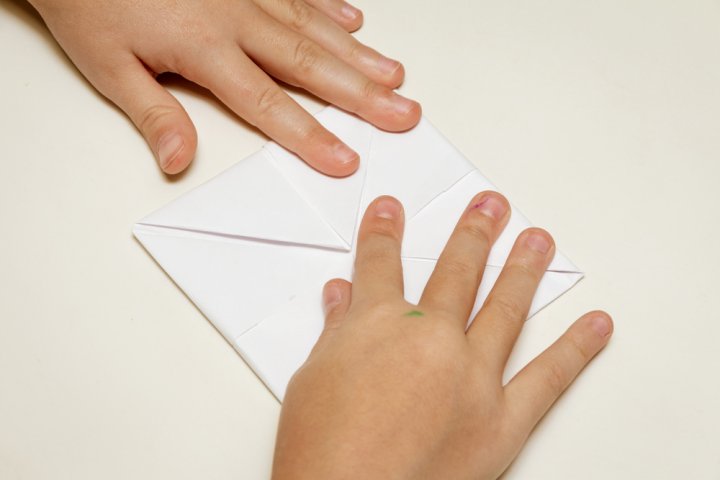
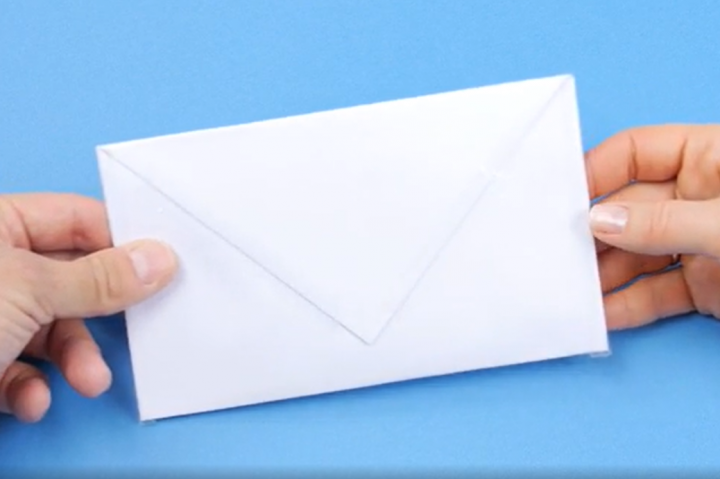
Square Origami Envelope
This square envelope is used for sending acknowledgement notes, apology notes and invitations for parties.
Materials Required:
- A coloured square paper from an old magazine or book
Procedure:
- The paper should be placed such that the coloured side is facing down.
- The paper should be folded in the middle such that it forms a triangle.
- The top corner of the first layer should be folded out in order to reach the base of the triangle.
- The right corner should be folded to one third to the left over the previously folded layer. Similarly the left corner should be folded to the right.
- Thus the bottom of the paper becomes a square.The flaps on the top are folded outward to form two small triangles which should be pressed with your fingers to form a crease.
- The folds on top are unfolded and flattened so that it forms a square or squash fold. The top should be folded so that it reaches the bottom of the paper to form a flap.
- The top corner of the flap should be inserted into the pocket of the squash fold and the envelope is ready.
Five Petal Pentagon Envelope
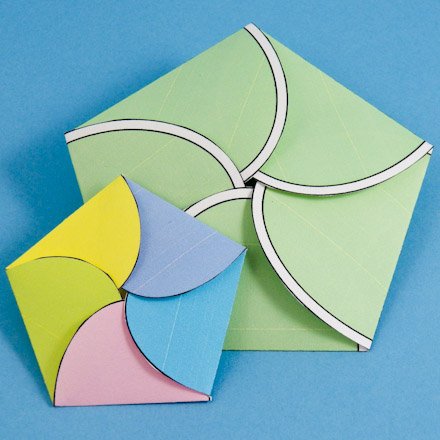
This is a beautiful envelope you can make to send your letters or cards to your near and dear ones. The best part is you can add your favourite colours to the petals and make it even better.
Materials Required:
- A paper from a magazine with a blank page on one side or a simple white paper
- Crayons
- Scissors
Procedure:
- The blank side of the paper should be taken.
- A pattern of five overlapping petals should be drawn from the centre of the paper.
- You can colour the patterns with your choice of colours.
- A pentagon should be traced by drawing a line around the middle of each petal.
- The outline of the coloured petals should be cut with a scissors.
- Each of the petals should be folded in the middle along the traced pentagon, in such a way that one flap is tucked below the other.
- Your envelope is ready for use. You can obtain different patterns depending on which way you fold the petals: anticlockwise or clockwise.
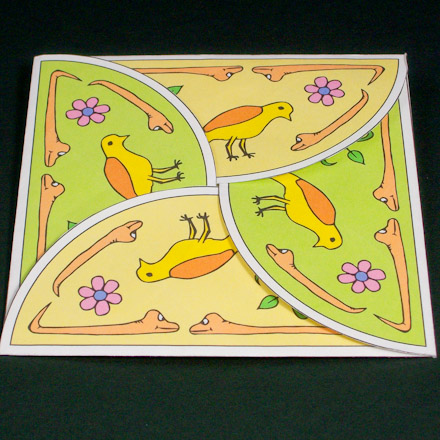
Square Petal Envelope
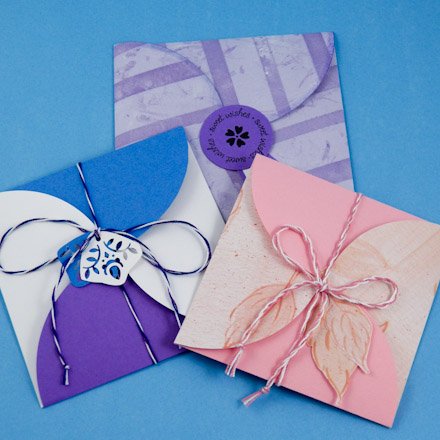
This is a beautiful envelope which you can design differently according to your taste of colours and figures. You can draw your friend’s favourite stuff within the circle, which will make it very special for your friend.
Materials Required:
- A white paper from an old book
- Crayons
- Glue
- Coloured ribbon
- Scissors
Procedure:
- You should draw four circles of 4 inch radius on the white paper.
- Two of the circles should be coloured with colour pencils. You can also draw within the circles.
- You should cut out the four circles with a scissors.
- Each of the circle should be folded in half to form a crease and then unfolded. Next, you should stack the circles one above the other, such that one coloured circle is placed over a white circle in an alternate manner.
- The circles should be pulled out considering an imaginary centre in such a way that the crease forms a square.
- The side of the last circle should overlap that of the first circle. You will notice the shape of a pinwheel at the centre of the square.
- The overlapping edges should be stuck with glue and the overlapping side on the reverse should also be glued.
- The circles should be folded along the crease.
- The envelope should be tied with a coloured ribbon.
Half Moon Petal Envelope
This envelope looks fabulous with its intricately designed petals in the shape of a half moon. You can draw anything as per your imagination, tuck a card and send it to your friend.
Materials Required:
- A square white paper from an old book
- Scissors
Procedure:
- You should draw a square with the corners placed at the centre of each of the four edges.
- A semi circle is drawn on all the sides of the square made, such that the circumference of the semi circle meets the edge of the square paper.
- The pattern should be coloured according to your choice. Any images and figures of your choice can also be drawn on the pattern.
- The outline of the pattern is cut with a scissors.
- Each of the semi circle should be folded over the side of the square which was drawn. The flaps are folded either clockwise or anti-clockwise.
- The last flap should be tucked below the first flap. The envelope is thus ready.
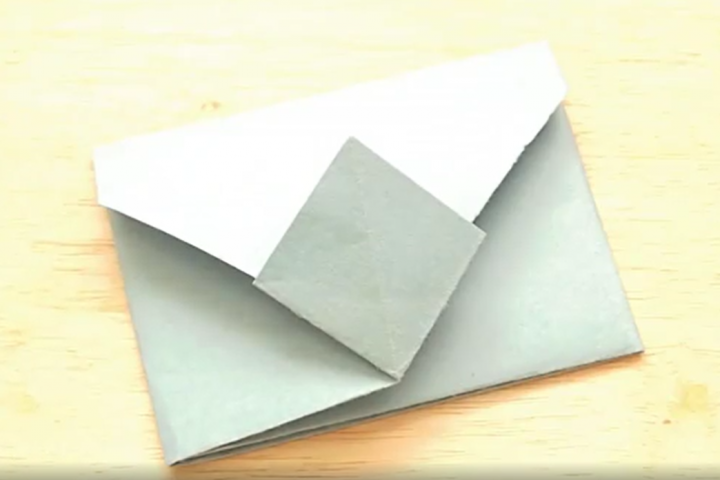
Contour Flap Envelope
You can make a designer contour flap envelope by selecting a beautiful paper from a magazine and send a heart touching letter to your friend using it.
Materials Required:
- A square paper (18 x 18 cm) from a glossy magazine or an old story book
- Another paper (15 x 10 cm)
- Scissors
- Glue
Procedure:
- A line should be drawn across the diagonal of the square paper.
- A point at a distance of 8.5 cm should be marked along the diagonal from one corner.
- The corner should be folded at the measured point and creased with the finger to form a triangle.
- Similarly the opposite corner should also be folded in such a way that the tip of the corner reaches the crease.
- Both the triangles are creased to form two flaps. The flaps should be unfolded and again folded one above the other. It takes the shape of a rectangle with two triangles at both the ends.
- A length of 2.5 cm is marked on all sides from the edges. Both the triangles at the ends are folded inwards at the marked point to form a crease.
- All the flaps are unfolded. It can be noticed that four small triangles are formed at the four corners of the creased rectangle. These small triangles are cut away from the paper.
- The lower flap across the length of the rectangle is folded inwards.
- The top portion of the folded flap is again folded outwards such that the corner touches the edge of the rectangle. This flap should be cut off.
- Length of 1 cm should be cut off from the edge of each flap except the top flap.
- Another paper (15 cm x 10 cm) should be taken which is folded at both the corners along the breadth to form a triangle. The flaps are cut off along the crease.
- This paper is glued to the original paper with the triangle facing the upper triangle of the paper at the bottom.
- The corners of the triangles on the paper at the bottom are trimmed off. Each of the flaps are glued along the edges except the upper flap and your envelope is ready.
Window Envelope
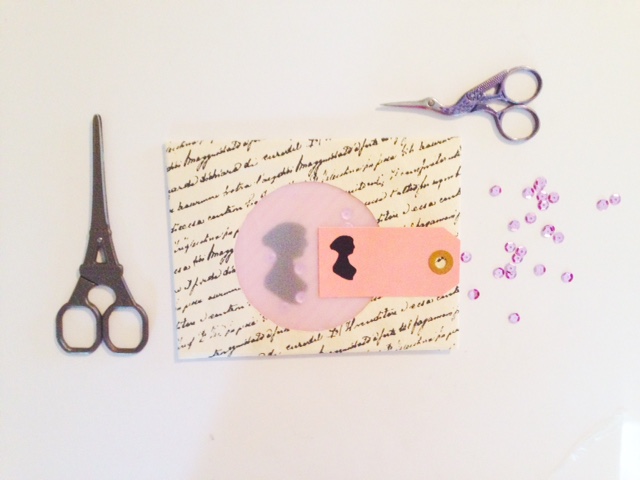
These envelopes are generally used for official purposes. The letter placed inside can be viewed through the window. A velum sheet is placed on the window. You can also use these envelopes casually to send cute messages to your friends along with a card. The message will remain transparent before your friend opens the envelope to read your card.
Materials Required:
- A page from an old magazine or newspaper
- A velum sheet
- A pair of scissors
Procedure:
- A rectangle (4.2 x 6.5 inch) should be traced on top of the paper.
- You should cut off the rectangle and make a pouch envelope out of it.
- All the flaps should be opened and a circle of 1 inch radius is drawn at the centre, which should be cut off.
- A velum sheet should be cut and glued on top of the circle along both the edges of the rectangle keeping the top open.
String-Tie Envelope
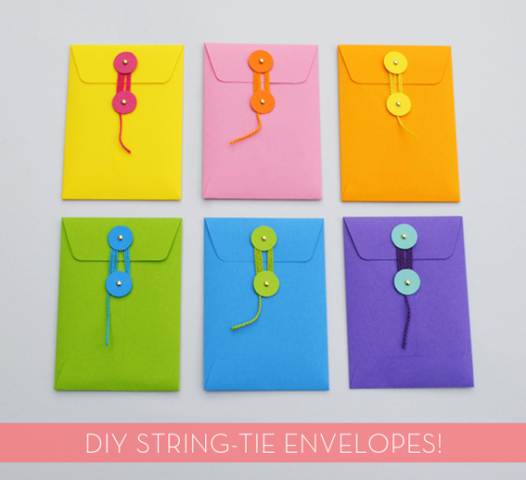
This envelope can be decorated extravagantly by using cute strings of your choice for tying. You can also add flower buds along the string to bring a glamorous look.
Materials Required:
- A5 size paper from a magazine
- Cardboard
- Scissors
- Colourful strings
- Glue
Procedure:
- You should fold both the ends lengthwise such that one edge overlaps the other and make a crease with your fingers and glue the folded edges.
- You should cut out a circle of 1 inch radius from the cardboard and pin it at the centre of the glued edges.
- You should fold 1.5 inch from the bottom and crease it and glue it.
- Next, 2.5 inch length should be folded from the top inwards and creased.
- Another cardboard should be pinned on the outer side of the upper flap.
- Both the cardboard circles are wound together with a beautiful string.
Lined Envelope

An envelope liner always enhances the beauty of the envelope by adding a special flair to it. You can use any colourful paper with different designs and motifs from old books and newspapers to use as a liner.
Materials Required:
- Coloured paper from an old magazine
- One paper from an old book or a newspaper
- Glue
Procedure:
- You should make the flaps for a pouch envelope using the coloured paper from the old magazine.
- Another paper from an old book is taken.
- After opening all the flaps of the pouch envelope, the paper from the book should be cut in size of the coloured envelope leaving 2 cm away from the edges.
- The paper should be pasted on the coloured envelope and the three flaps of the envelope should be glued. Thus the lined envelope is ready.
Top Notch: Save Money, Time, Environment
This being the digital era people have almost stopped posting personal letters, except certain official documents the traditional way. However, the use of envelopes is still prevalent for different kinds of cards like wedding invitation cards, thank you cards, etc. Making your own envelope using used paper is both creative and economical. Additionally, the used paper can be reused whereby we can save our environment in our own simple way. Discover your creativity through different envelopes!
-
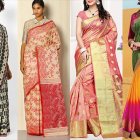
 When There's Such a Mind Boggling Variety of Saree Designs, How Do You Pick One for Yourself or as a Gift? Here are 10 Gorgeous Sarees in Unique Designs for Different Occasions (2019)
-
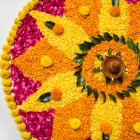 10 Exquisite Pongal Rangoli Designs to Celebrate the Harvest Festival With and Why You Should Practice This Ancient Art (2020)
-
 If You Want a Knockout Saree, Jaipuris are the Answer: 10 Beautiful Jaipuri Sarees That Display the Stunning Beauty of Rajasthan
-
 The Secrets to Dressing Smart! 3 Traditional Saree Types You Didn't Know Existed + 9 Striking Sarees That Take the Humble Drape to the Next Level (2019)
-
 Looking for the Most Incredible Gift Wrap Ideas to Take Your Gifts to the Next Level? We Give You 10 Easy and Pocket Friendly Ideas of Gift Wrapping
Unique Homemade Envelopes Leave a Lasting Impression
The envelope is often considered as important as its content. Consequently, if you start making beautiful paper envelopes following the steps detailed above, there is no way that your friends and loved ones will not be impressed by your creativity and thoughtfulness. We hope you would have loved this BP Guide. Stay connected with us.
 Highlight the Best Facets of Your Incomparable Beauty: Discover the Best Face Highlighter Currently Available in India and Everything You Need to Know About Using Face Highlighters for Maximum Effect (2023)
 Forget the Blemishes and Get that Picture Perfect Flawless Radiance on Your Face: Check out the Best Foundations for Oily Skin Currently Available in India and Everything You Need to Know About Makeup Foundations (2023)
 Make Your Presence Felt Wherever You Go: Discover the Best Perfumes Under 2000 for Both Men and Women to Announce Your Arrival and Make Any Occasion Memorable (2023)
 Protect Your Oily Skin from the Harmful Rays of the Sun: Discover the Best Gel Based Sunscreens for Oily Skin and Everything You Need to Know Before Buying One (2023)
 Minor Blemishes and Wrinkles Affecting Your Confidence? Check out the Best BB Creams to Conceal Your Worries and Nourish Your Skin to Restore the Healthy, Radiant and Glowing Complexion Back Again (2023)