-
 How to Make Cake at Homes: Tips & Tricks + 6 Easy-to-Make Cake Recipes that You Can Prepare Right in Your Kitchen! (2020)
-
 Wondering How to Make a Cake at Home? 8 Simple, Step-by-Step Recipes for Baking a Cake without an Oven Plus Tips and Tricks for Making Your Cake Perfect, Just Like You! (2020)
-
 यहां 6 आसान और स्वादिष्ट केक रेसिपी हैं, जो आपको अपने घर पर जरूर बनाने चाहिए। घर पर केक बनाने के लिए जरूरी सामान(2020)
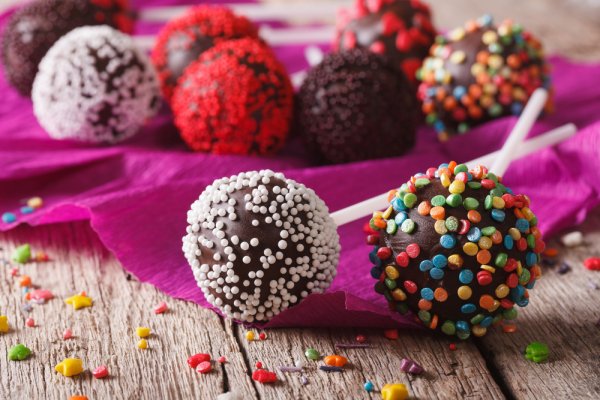
Exciting Facts about Cake Pops
For the all lovers of baking out there, you have just landed on the right page. We will be discussing one of the most loved desserts of children and adults: the delicious cake pops. But what are cake pops? They are little round pieces of cake coated with icing or coating soft sugary fondant.
It is a different form of cake that's styled as a lollipop. Using a few simple ingredients like cake crumbs, icing and chocolate, you can design some of the most beautiful cake pops. The cake pop started gaining momentum between 2009 and 2011. It caught the attention of people due to its new and innovative design.
Cake pops initially started to do something innovative from leftover cake crumbs . The idea was to bring the stale cake into use. Slowly it became popular when the bakers started making it from scratch. Bakers also came up with this idea of adding the sticks to the cake balls to make them look like a lollipop. That is how this delightful creation came into existence. These cake pops are versatile and can be designed in your own unique way. They are the go to dessert for all your events today. From Christmas eve to Thanksgiving dinners, they are always a part of every festivity possible.
Anatomy of a cake pop:
- The base is simple cake mix which is made using a simple processor
- The next step is the binding. Frosting, cream cheese and ganache
- Cool the roll and your basic balls are ready
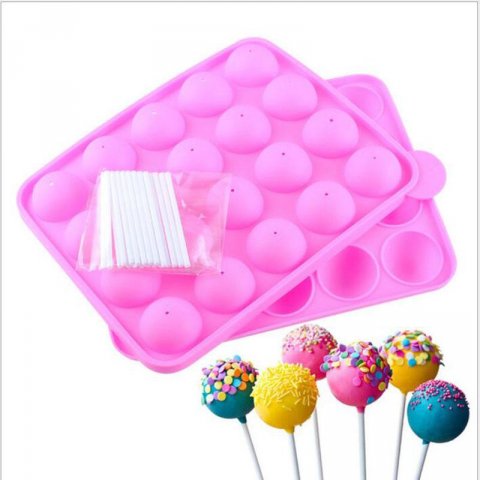
- We then attach the lollipop sticks and dip them in some nice chocolate coating or candy wafers
- Decorate it with sprinkles, candies and cookies crumbles
Nutritional Facts for a Single Serving of Cake Pops

The calories for the cake pops are around 221 per serving. The fat percentage is around 11 % of constitute, cholesterol is around 11 % , total carbohydrate is 12%, , vitamins is 4%, iron , protein and calcium is 6 % of the constitutes.
Also if you think you need to be a professional baker to bake this sweet mouth-fills, you are absolutely wrong. You can do it easily with a few recipes and a few tips from us. All you need is the basic tolls and ingredients. Try the following recipes and do let us know how awesome the serving was.
3 Delicious Cake Pop Recipes for Budding Bakers
While cake pops are a delicious treat for any occasion, baking them is no rocket-science either. Follow these simple recipes to make mouth-watering cake pops from the convenience of your home!
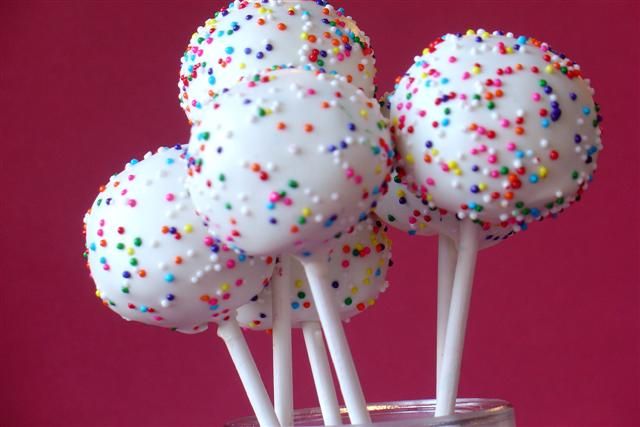
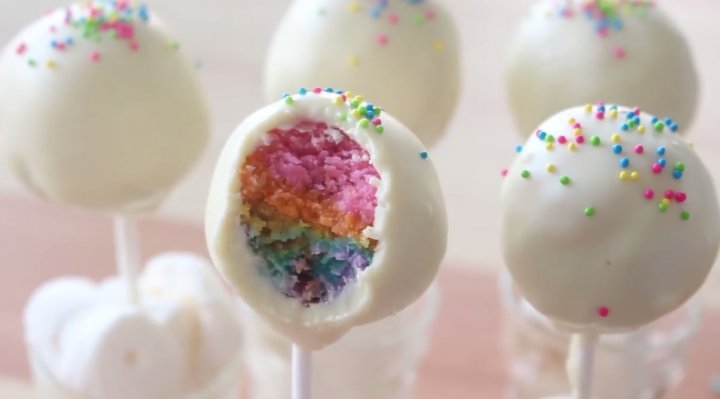
Vanilla Cake Pops
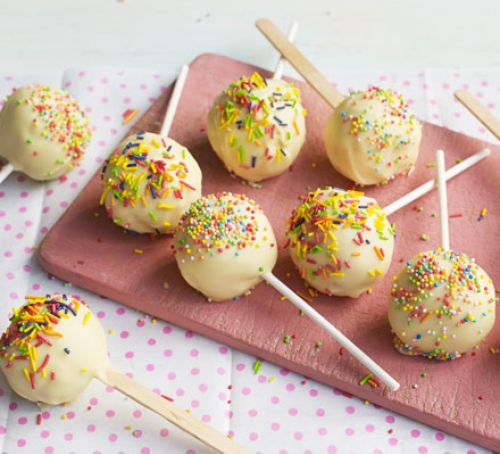
You have a birthday party at home for kids. Special occasions deserve special treats. We will be discussing in detail, a beautiful recipe for baking homemade cake pops. Vanilla cake pops are easy to make and they are preferred sweets for Christmas too. Our ingredients can make around 24 cake pops.
Ingredients:
- Baked white cake (12 cupcakes – vanilla )
- 1 tbsp softened butter
- 2oz cream cheese at room temperature
- Powdered Sugar (1 1/4 cups )
- Vanilla (1 tbsp)
- Milk (as needed)
- White Chocolate
Procedure:
- We start by preparing the cake crumbs. You can take 12 cupcakes and crumble them using a mixer.
- Use the grinder for 30 seconds and you will have the smoothest of cake ball mixture.
- Mix together butter, cream cheese, powdered sugar and vanilla in a bowl. If the frosting remains too stiff, you can add a few drops of milk.
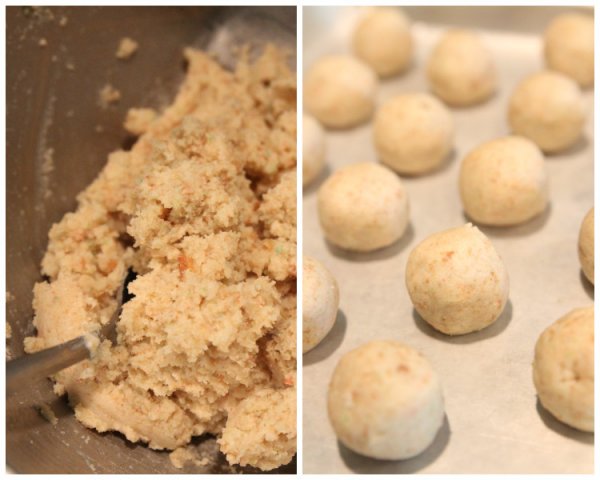
- Once you can see the needed moisture add the crumbled cake and mix thoroughly.
- Then scoop the mixture into balls and to go a little festive, you can add sprinkles in different colors. Using the palm of your hands make even balls.
- Then you can keep it in the freezer for 10 minutes.
- Remove the balls very slowly from the freezer and make sure the balls are smooth.
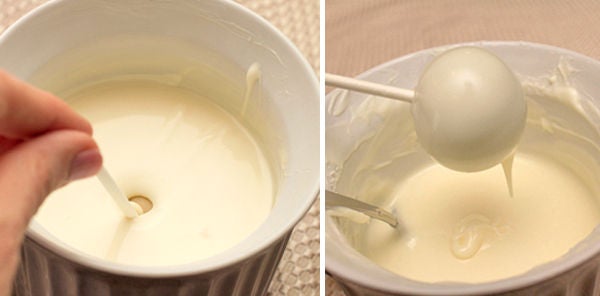
- You can melt the white chocolate next and drizzle on the top of the balls.
- Store in the freezer until you are ready to eat. Alternatively, you can use some cake mix to make the cake base.
Red Velvet Cake Pops

Red Velvet is the favorite of almost every person who has a sweet tooth. Little bites of amazing red velvet infused with cream cheese are the perfect sweet treats for festivities and house parties. With beautiful hard crisp outer shell and infused flavors and colors in the middle, this cake pop can be stored for over 18 months.
Ingredients:
-
Cake:
- Sifted Flour (1 ¼ cups)
- Baking Powder (1/4tbsp)
- Salt (1/4 tbsp)
- Cocoa powder
- Unsalted Butter (1/4cup)
- Granulated Sugar (3/4 cup)
- Vanilla extract (1/2 spoon )
- 1 egg at room temperature
- Buttermilk (1/2 cup)
- Red food coloring (3/4 tbsp)
- Distilled Vinegar (1/2 tbsp)
- Baking Soda (1/2 tbsp ) Cream Cheese Frosting
- Unsalted Butter (2 tbsp)
- Cream Cheese (4 ounces)
- 1 cup powdered sugar
- Pure Vanilla extract
- Lollipop sticks
- Candy melts (1 pound)
- Shortening (1/2 tbsp)
Other Ingredients :
Procedure:
-
Cake:
- We will start by baking a red velvet cake for the filling of the cake pop.
- Before start preparing the batter, preheat the oven to 180 degree C. Grease the pan with butter and then place the oven rack in the center.
- Sift flour, baking powder, cocoa and salt in a large bowl.
- Then in separate bowl beat butter until creamy and then add powdered sugar into it and beat unless fluffy and light.
- On the other side mix the red food coloring in butter milk and add it to the butter mixture.
- Then finally add the batter of flour to the last. Then create a mixture of vinegar and baking soda and fold them quickly into the batter.
- Add the batter into the pan and even the top of the batter using a spatula.
- Bake the batter for approximately 25 minutes.
- To check if the cake is baked or not, press the center of the cake to see if springs back.
- Place a wire rack on the top of the pan and invert the pan. Finally peel off the parchment paper and let the cake sit for few minutes.
- Add the cream cheese and butter into the bowl and beat it using an electric mixer.
- Then we add the powdered sugar to the mixture and beat it again.
- Finally add the vanilla extract and beat it until smooth and fluffy.
- Take a large bowl and crumble the red velvet cake into small crumbs and then slowly add the frosting to the mixture. But ensure that they are not soggy because of the frosting.
- Then you start making balls with the mixture and place it on the parchment paper.
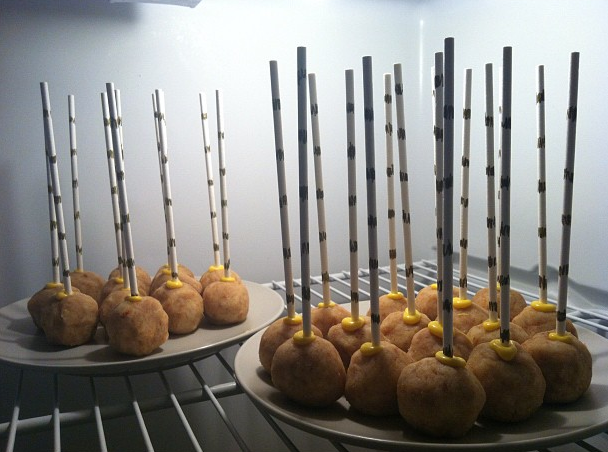
- After the cake balls are firms insert the lollipop sticks.
- Then cover the baking sheet with plastic wraps and store it in the refrigerator for 2-3 hours. Defrost the cake overnight before dipping it into candy melts.
- Start by melting the candy coating using a microwave oven for about 30 seconds. Keep the melting candy coating in a deep bowl to allow basic submerging of the cake pops on them.
- To decorate the cake pop, you can use edible pearls, candy sprinkles, chocolate jimmies or crushed cookies. The process will make you cook around 25 cake pops.
Cream Cheese Frosting
Cake Pops:
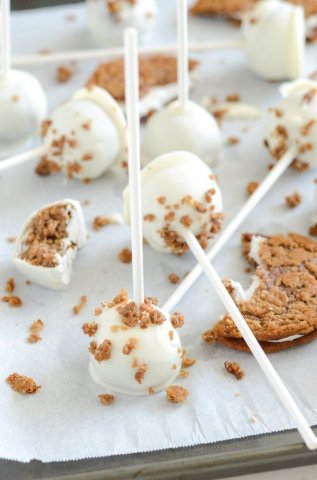
Oreo Cake Pops
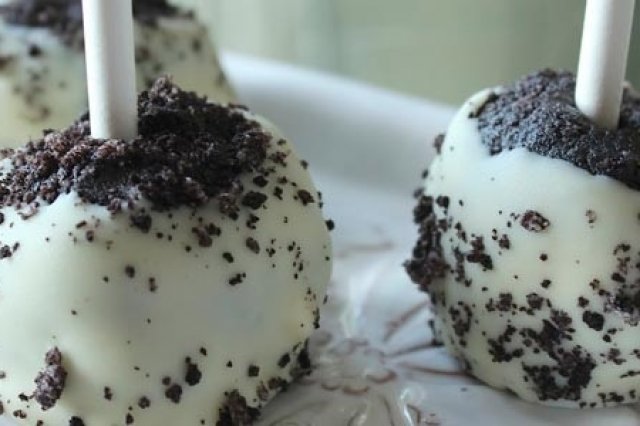
Perfect for your valentine’s day dinner date, Oreo is the best way to bring out the love between you and your partner. The total recipe takes around 3 hours, but it is worth every minute of the wait.
Ingredients:
- 1 package of Oreos
- 2/3g of cream Cheese
- Candy Wafer Melts (white chocolate)
- Sprinkles
- Lollipop sticks
Procedure:
- To start with the process, take the pack the oreas and crumble it using a food processor. In case your blender is not powerful, blend the cookies in small batches.
- Alternatively, if you want to do it manually add the cookies in a plastic bag and crush it using a hard stick.
- Then combine the mixture and cream cheese in a large bowl.
- Use a electric beater to mix the mixture together.
- Then form dough from the mixture and store it in the refrigerator for about 30 minutes.
- Now grease your palm and roll out small balls of 1.2 inches. It should yield you with 25 cake pops.
- Now melt the candy wafers and dip the cake pop into the candy melt.
- Insert lollipop sticks and keep in the freezer for storage. For decoration you can use multicolor sprinkles or cookie crumbles or chocolate wafers.
Do and Dont's while Baking a Cake Pop
Although baking is no rocket science, there a few careful tips which can definitely help you in your next baking. Our list of Do & Don’ts will help you tackle these adorable mouthfuls. For beginners we would recommend to stay close to basic shapes and not go for complicated shapes.
For the Cake Filling
When you are working with dough you need to take the following factors into consideration:
- Use a small cookie scoop to make even and smooth portions.
- Don’t make small cake balls or too large cake balls. There is a huge probability that they will fall apart
- Don’t keep the prepared dough exposed to the air. Keep your dough wrapped up in plastic, if not being used.
For the Coating
For the coating we would suggest the following tips:
- While using candy coating makes sure the melt is smooth. You can alternatively choose to mix it up with corn syrup to make candy clay.
- We do not recommend the use of chocolate bars, pure chocolate bricks. As they possess a high risk of discoloring once cooled.
- Use paramount crystals for decoration purposes.
- Also don’t use any type of greasy material for thin coating material. Also we do not suggest the use of oil based dyes. Using these options will alter the texture and color of your candy. Rather than dyeing your coating, you could simply go and but a colored coated.
Essential Tool Tips
How do we select the tools for baking or dipping the pops?
- To melt candy or for other mixing purposes, we recommend a small silicon or microwave safe plastic. Further, use of any ceramic or glass bowls or containers should be avoided at any cost. They are prone to quick absorption of heat and cold. We need to let the process happen on its own.
- Using a microwave or a chocolate melting point to melt the candy wafers.
- While melting the candy, try not to expose the candy coating to water or any steam.
- Refrigeration of the cake balls is necessary before you dip them into any candy melt or wafers. Maintaining the room temperature is a prominent choice.
- Do not dip cold cake pops on any warm candy coating otherwise there will be possibility of cracks.
- Use of sprinkles or any type of nonpareils is a good option. They stick quite easily and look beautiful when it comes to Christmas or other festivities.
- Test candies to decorate pops. Test a cake pop with a few sprinkles and set them using a refrigerator. Further checks show how it reacts under room temperature.
- You can choose to model your cake pops in different forms of tulips, rose’s etc using modeling chocolate.
Storing the Pops
How do you want to store the pop?
- Airtight containers are a must when you want to store the cake pops. Using this option will make the condensation set on the plastic rather than on the cake pops.
- Wrapping or covering them with a plastic to prevent any dotting
- Uncoated cake balls need freezing.
-
How to Make Cake at Homes: Tips & Tricks + 6 Easy-to-Make Cake Recipes that You Can Prepare Right in Your Kitchen! (2020)
-
Wondering How to Make a Cake at Home? 8 Simple, Step-by-Step Recipes for Baking a Cake without an Oven Plus Tips and Tricks for Making Your Cake Perfect, Just Like You! (2020)
-
यहां 6 आसान और स्वादिष्ट केक रेसिपी हैं, जो आपको अपने घर पर जरूर बनाने चाहिए। घर पर केक बनाने के लिए जरूरी सामान(2020)
-
 इन 5 प्रकार के अद्भुत चॉकलेट केक को अपने घर पर बहुत आसानी से बनाएं। आप उन्हें प्यार करेंगे। विभिन्न प्रकार के चॉकलेट केक की जानकारी।(2020)
-
 Wondering How to Make a Chocolate Cake? Check out 6 Great Recipes to Make Every Type of Chocolate Cake at Home and Delight Your Family (2020)
Try Your Hand at These Amazing Cake Pops in 2019
Whether you have just started baking, or you are an experienced baker, you would love to try out these amazing cake-pop recipes. So, light up every occasion with these delicious cake-pops. Make sure to follow the do's and don't's thoroughly.
 Highlight the Best Facets of Your Incomparable Beauty: Discover the Best Face Highlighter Currently Available in India and Everything You Need to Know About Using Face Highlighters for Maximum Effect (2023)
 Forget the Blemishes and Get that Picture Perfect Flawless Radiance on Your Face: Check out the Best Foundations for Oily Skin Currently Available in India and Everything You Need to Know About Makeup Foundations (2023)
 Make Your Presence Felt Wherever You Go: Discover the Best Perfumes Under 2000 for Both Men and Women to Announce Your Arrival and Make Any Occasion Memorable (2023)
 Protect Your Oily Skin from the Harmful Rays of the Sun: Discover the Best Gel Based Sunscreens for Oily Skin and Everything You Need to Know Before Buying One (2023)
 Minor Blemishes and Wrinkles Affecting Your Confidence? Check out the Best BB Creams to Conceal Your Worries and Nourish Your Skin to Restore the Healthy, Radiant and Glowing Complexion Back Again (2023)