

Why Make Gadgets at Home?

Gadgets are an integral part of our daily routine now and we can’t imagine our lives without the help of various gadgets. Right from the start of the day when your alarm clock or mobile alarm wakes you up before which your air conditioned was turned off by the automatic timer, then you may ask Alexa or Siri about the latest news, weather forecast for the day or to play your favorite song. Your fitness tracker keeps track of everything from your heart rate, blood pressure to the number of calories burnt during your workout till the time you go to bed and ask your phone to set up the alarm for next day morning. Google Maps let you decide the route to your office with the least traffic and you receive your calls on the Bluetooth connected to your car while driving.
The mobile phone has replaced many devices from our lives and is becoming the new television, music player, camera, hotspot device, calculator, watch, stopwatch, radio and many more objects. Purchasing a new gadget is easy, but they are costly at times or you don’t get too much customization options. Making your own gadgets takes care of both the problems and also gives you a creative satisfaction. Not only kids or science students, but people in general can also try making cool gadgets at home.
Six Cool Gadgets to Make at Home for Personal Fun
There are various cool gadgets that can be made at home, few of them are quite easy to assemble and use; whereas some gadgets are quite complex and it needs special skills and knowledge to make them. We have researched and picked few cool gadgets to make at home which are not too complicated and are definitely useful in some or the other way in your daily life.
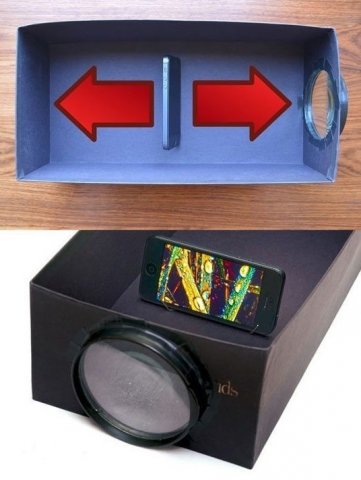
DIY Homemade Smartphone Projector
Things required for this DIY project are:
- A cardboard box ( a shoe box is just fine)
- A magnifying glass
- Electric tape
- U shaped paper clips
- Paper cutter
- A pencil and a smartphone
How to make it:
- First of all, keep the magnifying glass on the smaller side of the cardboard box and mark shape of the glass with the pencil. Cut a circle a little shorter (2 mm) than the magnifying glass, then cut the handle of the glass and fix it into the circle made in the cardboard box with the help of the electric tape. Unfold the U shaped paper clip so as to make a stand for the phone as shown in the figure and fix it in the middle of the box. Play a video on your smartphone with front part facing the glass and see the enhanced reflection on the front wall. Your DIY Homemade Smartphone Projector is ready for use. For best results, play the video in a dark or lightly lit room and cover the box with the box lid.
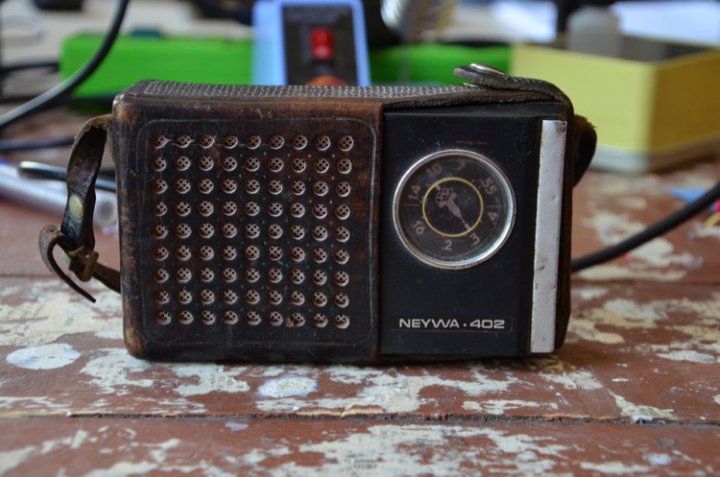
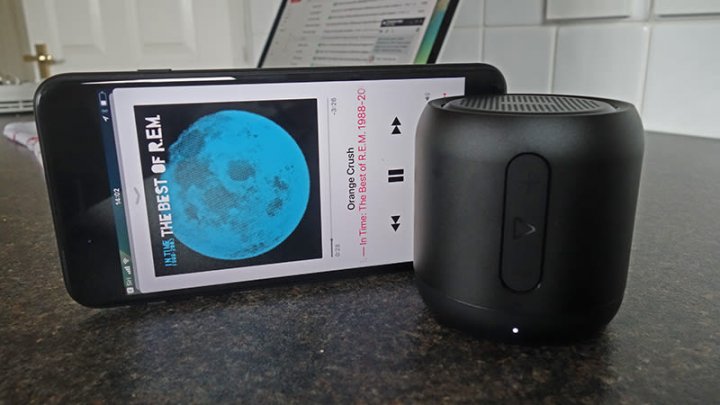
Modern Bluetooth Speaker from an Antique Portable Radio
The bare minimum items required are:
- A working Bluetooth Speaker with good battery life
- A portable antique radio (you can search online, if unable to find one at the store room of your home), and
- A soldering iron
How to make it:
- First of all, open the radio chassis and remove all the components except the on/off switch and the loudspeaker. Open the Bluetooth Speaker; remove the Bluetooth Transmitter, rechargeable battery and USB cable for charging. Now connect the wires of the original loudspeaker of the radio to the contact of the Bluetooth Transmitter with the help of the soldering iron. Now keep the Bluetooth Transmitter so that the USB cable exit is on the side of the battery compartment of the antique radio as we will place the folded cable in the place meant to keep batteries in the old radio frame. You can check the detailed tutorial here https://www.youtube.com/watch?v=gFqyZKsirfY&feature=emb_logo.
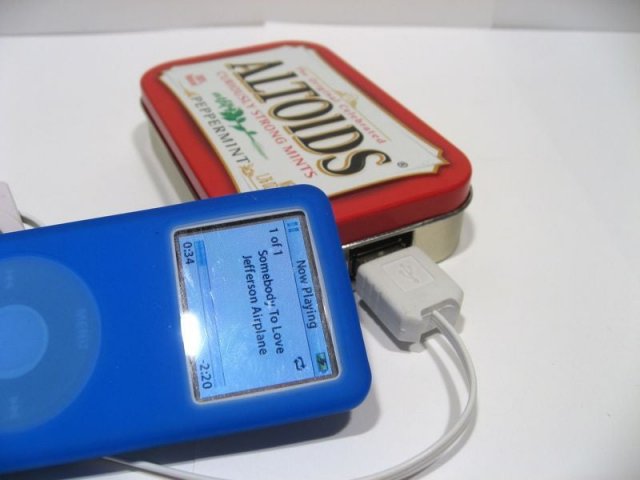
Solar-Powered USB Charger
Objects which are required for this project:
- USB Charging circuit
- Solar Panel (4V or greater)
- AA Battery holder
- AA rechargeable batteries
- 1N914 Diode
- Altoid Tin, and
- Thin wires
- The tools required are:
- Soldering iron
- Solder
- Ttin snips
- Melt glue gun
- Electric tape
- Buy a DC to USB converter circuit (you will easily get it online)
- AA rechargeable batteries of 1000 mAh (two are sufficient, but you can use two sets in parallel and get up to 4000 mAh of power
How to make it:
- Benefit of rechargeable battery is that you can replace them when they are discharged or when there is no sunlight available. Now solder the diode to the solar panel by considering the black bar as the negative point and the other one as the positive and tape it up for safety. Now connect the battery pack wires with the solar wires soldering all the negative wires (black) with the positive wires (red). Now prepare the charger and solder the red wires to the positive point on the charger and the black wires to the negative one. Now cut a rectangular tin box on one side so that it has enough space for the USB port and put some electrical tape on the surface of the tin. Now use the glue gun and fix everything in place inside the tin box and you can now start using this Solar Powered USB Charger.
Your Own Smart Speaker
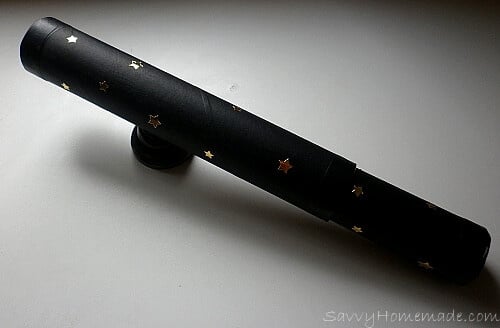
Homemade Telescope
Things you are going to need for this DIY project:
- One Large Convex Lens
- One Smaller Concave Lens
- A set of Cardboard tubes in which one can fit inside the other
- A piece of thick cardboard
- A paper knife
- Glue
- Electrical Tape
- Black Paint, and
- A few stickers
How to make it:
- First of all, mark a circle equal to the smaller tube onto the piece of cardboard. Now place the small lens on the centre of this circle and draw a mark around this lens too. Now cut the outer circle out of the cardboard and then cut out the inner circle from the circular piece. Remember that the flat side of the concave lens should be facing outside (towards you) and the curved side of the convex lens should be facing the sky. Push the eye lens (smaller lens) into the centre of the hole in the circular piece and apply some glue on the side beforehand to help the fixation. Now apply some glue in the inner part of the tube and press the circular piece inside the tube and leave to dry. After drying, wrap the joints properly with the electrical tape. Now apply the same process with the larger tube and the big lens, just apply some glue to the inner walls of the larger tube and push the big lens inside it and tape it properly after drying. Finally, paint both the tubes and leave to dry before adding the stickers. Now simply insert the small tube inside the larger tube and put them on an inclined surface so that it faces the sky and your Homemade Telescope is ready, just adjust the distance between both the lenses by sliding the inner tube back and forth to get a good view of the astronomical wonders.
Making Invisible Ink

Cool Gadgets Which Can Be Made at Home That are Also Useful!
There are various cool gadgets that can be made at home, few of them are quite easy to assemble and use; whereas some gadgets are quite complex and it needs special skills and knowledge to make them. We have researched and picked few cool gadgets to make at home which are not too complicated and are definitely useful in some or the other way in your daily life.
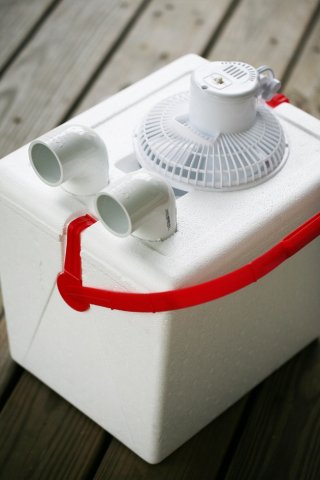
Homemade AC Unit Under Rs.1000
Things you will need for this cheap homemade AC:
- A thermocol ice box big enough to hold three to four 2 litre bottles
- A small 6 inches fan
- Two 1 ½ inch elbows, and
- A sharp knife
How to make it:
- Now to begin with, first remove the front shield of the fan, and then place the front shield above the lid of the box and the elbows nearby as shown in the image. Then cut marks for the fan and the elbows followed by cutting holes for fan and the elbows. Further, fit the fan front down and elbows in the holes as shown in the image; if required use glue or electric tape to fix them properly. That’s it; your homemade mini AC unit is ready. Just keep 3 to 4 two litre bottles filled with frozen water or big ice bags inside the box and turn on the fan, the cool breeze will start flowing out of the elbows and in a few minutes this small AC would cool a hot and humid room.
Rocket Stove
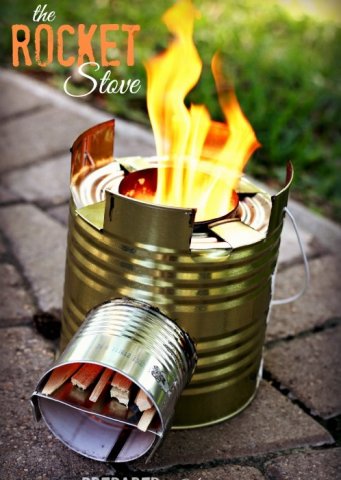
The rocket stove is a mini stove which can be used while camping, picnic and barbeque parties in your home lawn.
The objects required to prepare this mini stove are:
- One large can with lid
- Three small cans
- Some insulation material which is fireproof (like chopped fibres or foam)
- Tin cutter machine
- Heavy duty gloves to protect your fingers
- Marker, and
- A wire hanger
How to make it:
- First of all, take a lid from the small can and use it to trace a circle on the side of a large can (lower side and not in the middle). Then, cut a circle on the large can to make a hole as we will insert the small can in this hole. Once, you check that the small can fits in the hole we made in the big can, take it out and now, mark a circle on this smaller can. Repeat the process and cut a similar hole in the small can. Now insert the smaller can inside the big can from the side and fit it into the side of another smaller can (already vertically inserted in the bigger can) as shown in the figure. Take a lid of the bigger can and cut out a circle equal to the lid of the smaller can from the bigger lid, cut tabs around the bigger can and fill the insulation between the walls of both the cans. Then keep the cut-out big lid on the top to cover the insulation and mold the flaps using a hammer. Cut a rectangular piece from the third small can and fit in into the lower can popping out of the bigger can by cutting the lower can about an inch on both the sides and mold the extra tin along the curves. Finally, use the wire hanger to make a handle by making two small holes on the sides of the stove. The Rocket Stove is ready to use, now just put some thin wood pieces on top of the platform (not below it) and light it to get flames to cook your food. P.S. – Don’t use it in a closed room.
Bonus Item: Gadget Organizer Bag for All Gadgets Accessories
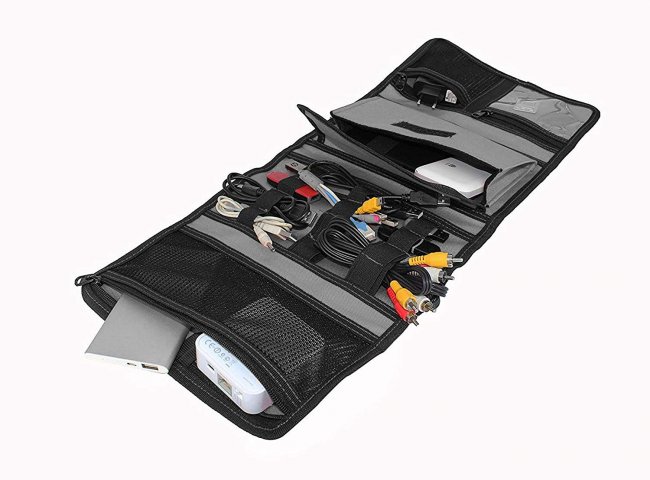
This Gadget Organizer Bag by Saco will help you keep all the small electronics, wires and accessories and other digital devices in this foldable bag and it can be purchased from amazon.in for Rs.450. Having everything in one place makes it easier to find something when you need it in a hurry, and is a boon for travellers as well.
-
 चिलचिलाती गर्मी से परेशान है तो आज ही खरीदें इन 10 सबसे अच्छे कहीं भी ले जा सकने वाले पंखों को और पाएं गर्मी से राहत। कुछ सुझाव और अन्य जानकारी के साथ (2020)
-
 Don't Have Space for an Air Conditioner? Buy a Portable Air Cooler for Respite from the Sweltering Heat This Summer. Your Guide to the Best Portable Air Coolers in India (2020)
-
 7 Cool Gadgets to have in 2019! You Won't Believe How Much Easier These Nifty Gadgets Can Make Your Life + Tips on Shopping Smart
-
 Want to Stand Out from the Tech Crowd? Here are 11 Really Cool Gadgets to Buy in 2019
-
 Why Keep Things Simple When There's So Much Awesome Tech Around: 15 Super-Cool Gadgets for Your Room in 2019
Tickle your grey cells
One doesn't always have to start a project or make something because they need it. Creating something, anything, is a wonderful way to test your creativity and utilise parts of your brain that may not always be engaged. And it is a whole lot of fun! Gadgets and smartphones have simplified our lives to the point where we do not use our mind for so many things anymore - dust out those grey cells and make something useful in the bargain.
 Highlight the Best Facets of Your Incomparable Beauty: Discover the Best Face Highlighter Currently Available in India and Everything You Need to Know About Using Face Highlighters for Maximum Effect (2023)
 Forget the Blemishes and Get that Picture Perfect Flawless Radiance on Your Face: Check out the Best Foundations for Oily Skin Currently Available in India and Everything You Need to Know About Makeup Foundations (2023)
 Make Your Presence Felt Wherever You Go: Discover the Best Perfumes Under 2000 for Both Men and Women to Announce Your Arrival and Make Any Occasion Memorable (2023)
 Protect Your Oily Skin from the Harmful Rays of the Sun: Discover the Best Gel Based Sunscreens for Oily Skin and Everything You Need to Know Before Buying One (2023)
 Minor Blemishes and Wrinkles Affecting Your Confidence? Check out the Best BB Creams to Conceal Your Worries and Nourish Your Skin to Restore the Healthy, Radiant and Glowing Complexion Back Again (2023)