-
 यदि आप अपने बच्चो का मनोरंजन करने के लिए एक मजेदार लेकिन सुरक्षित परियोजना की तलाश कर रहे हैं, तो इस लेख में पढ़े कि बिना गोंद के स्लाइम कैसे बनाया जाए (2019)
-
 Learn How to Make Your Own Chemical Free Slime without Borax and Keep the Kids Engaged for Hours: 8 Recipes for Borax Free Slime, 3 of Them Edible! (2020)
-
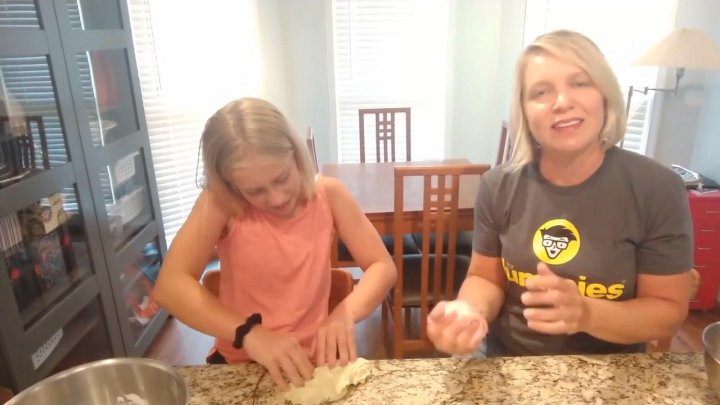
 Have You Tried Making Slime? What It Is, How to Make It, and What You Absolutely Need to Know to Make the Best Slime (2021)
Tips to Know Before Making Slime
Don't Just Substitute Ingredients
If you discover a recipe you think looks promising, search for alternatives, and check if there are any variations to that recipe. In this way, you’ll also find out new recipes tried out by others, and pick up some valuable information. It’s important to do your research.
Ingredients also differ widely; even the products of the same brand, depending on your locality, differ. Read labels. This will help you distinguish harmful components from the benign ones. Also, this is particularly important if you’re allergic to certain chemicals. This is why we suggest that you don’t just substitute ingredients.
For instance, the most widely used glue by people to make slime is Elmer's White School Glue, which is both washable and non-toxic. However, many types of glue available in the market are toxic and are not safe for use by kids or by individuals with sensitive skin.
Handling Hard and Rubbery Slime
If you use the excess borax solution in your recipe, you’ll end up with a slime that’s thick and rubbery, instead of stretchy when you pull it. Here’s a tip on what to do when this happens – soak your slime mixture in hot water. The duration for soaking it depends on how hard and rubbery the slime is. After some time, when the water has cooled down, try working the slime in the water to make it flexible again. You might have to carry out this step several times to make the slime stretchy again.
Do you want to tweak the process a bit? Add lotion in the slime to make it stretchy. After taking out the slime from the water, add some lotion in the slime, and work around it.
Slime Storage
Slime can neither be stored nor used for a longer period. Do not store slime for more than a week. Even for use within a week’s duration, pack the slime in a plastic bag and store it in the fridge. This will prevent any mould from growing.
Also, if anyone touches slime with dirty hands, try to throw it out immediately. Do not let your kids play around with slime when they’re sick because some of the ingredients in the slime may aggravate their condition. In cases where many children are playing with slimes such as in a daycare or a classroom, toss it out once the activity is complete. It only takes 5 minutes to make a batch of saline slime. Therefore, instead of storing it, make a new one!
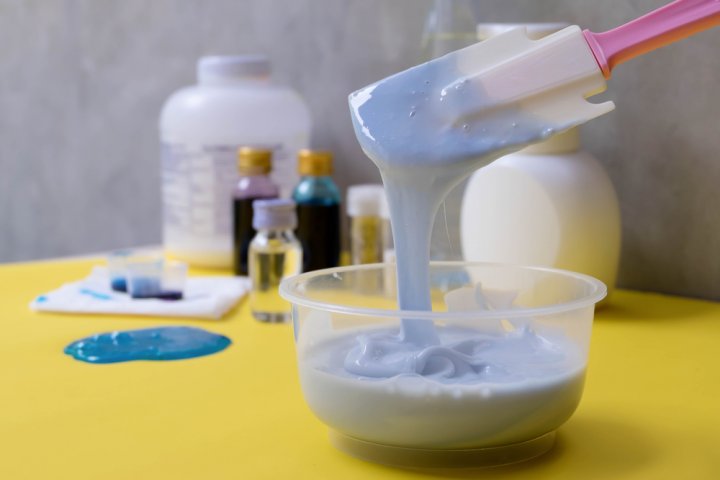
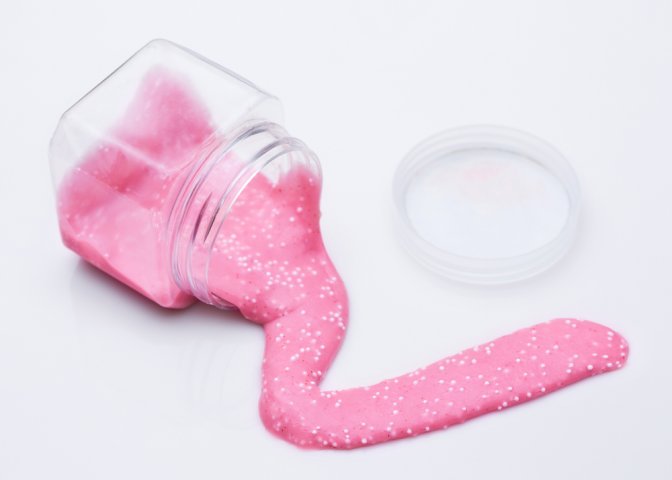
10 Best Recipes to Make Slime Glue
Recipe 1 – Slime without Borax
Ingredients:
- 2 (4-ounce) bottles washable school glue
- 1–2 drops food colouring (optional)
- ¼ cup glitter
- 1 teaspoon of baking soda
- 2–3 tablespoons of saline solution (contact lens solution)
Steps:
- Pour out the glue into a bowl. Mix in the Glitter and food colouring. The colouring is optional.
- Pour baking soda to the glue mix and stir well.
- Add the contact lens solution. Put two tablespoons of saline solution and mix gradually. The solution should begin to thicken. You will also notice that it’s sticky.
- Mix the solution well until a ball of slime forms.
- Knead the slime solution with your hands until it becomes smooth. If the slime is too soft, add another ½ tablespoon of saline solution.
Recipe 2 – Slime with Borax
Ingredients:
- School glue
- Borax (sodium tetraborate)
- Food colouring (optional)
- Water
- 2 bowls
Steps:
- In a bowl, add 1 oz. glue. The glue, which is nearly ¼ of the glue bottle, needs to be mixed well with ¼ cup of water. In case you need coloured slime, add food colouring to the water and glue mix. Lift some of the mixture out of the jar with the mixing stick and check for variations in the flow.
- Then add ¼ cup of borax to the mixture and stir gradually.
- Knead the mixture with your hands till the slime is less sticky.
- Also, if there’s leftover water in the bowl, simply discard it. You now have your perfect slime!
Recipe 3 – Slim with Glue and Detergent
Ingredients:
- Glue
- Liquid laundry detergent
- Food colouring
Steps:
- Pour glue into a mixing bowl. This does not have a specific measurement for you need to experiment with the quantities to get your ideal consistency.
- Now, add colour in the mixture according to your own taste. A small quantity of colour will give a lighter colour whereas a larger quantity will result in a deep coloured slime.
- Pour the liquid detergent into the bowl. The ratio of the liquid detergent to glue should be 1:4.
- Now, mix the ingredients with a mixing stick until the slime achieves a fine finish.
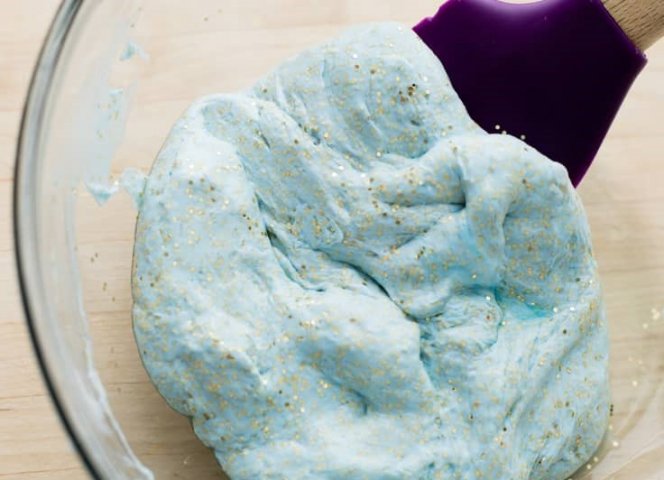
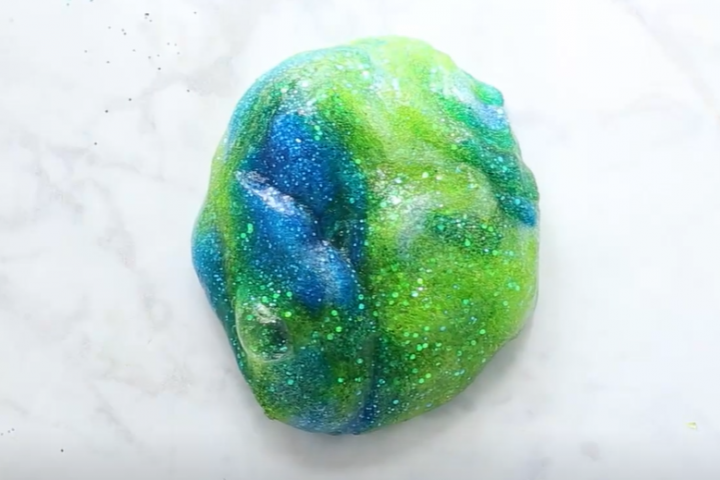
Recipe 4 – Galaxy Slime
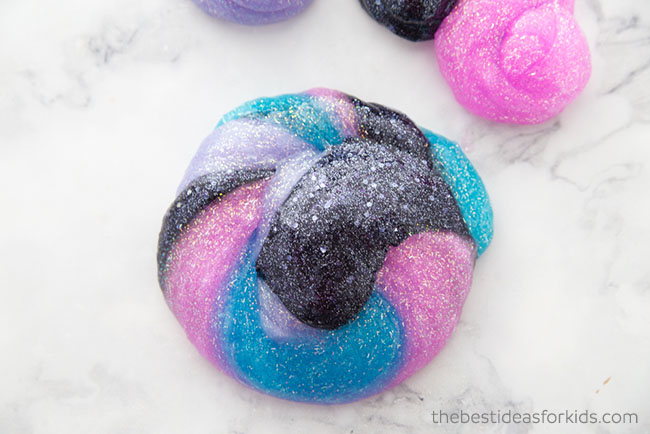
This is the favourite slime of all science lovers! The recipe of galaxy slime is quite similar to those mentioned below. For this particular slime, you’ll need to add extra silver glitter to make it look like this slime has stars on it.
Ingredients:
- 1 bottle of Elmer’s Glitter Glue
- 1 table spoon of water
- Silver glitter
- ½ tablespoon of baking soda
- 1½ tablespoon of contact lens solution
Steps:
- Take a bowl and pour glue in it.
- Now, add baking soda and mix in thoroughly.
- Then, put glitter in and continue to mix gently.
- Gradually add in your contact lens solution. Add it in the mixture slowly and stir it with a mixing stick.
- Now mix the solution until the slime forms and begins to thicken. For a uniform slime, knead the mixture with your hands. Line the silver stars and twist them up to form your galaxy.
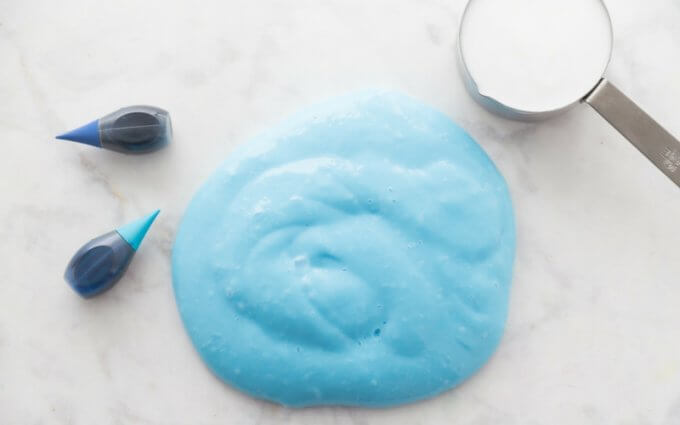
Recipe 5 – Fluffy Slime
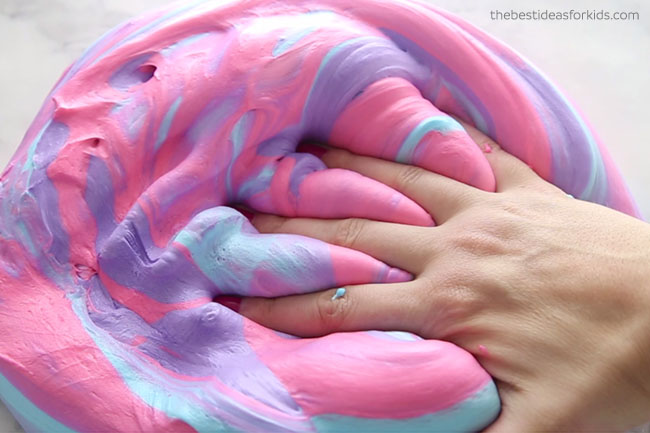
Ingredients:
- ⅔ cup Elmer's white glue
- ½ teaspoon baking soda
- ¼ cup water
- 2-3 cups shaving cream
- 1½ tablespoon contact lens solution
- Food colouring
Steps:
- Take a bowl and pour glue in it.
- Now add baking soda and water to it.
- Then, add shaving cream to the mixture to make it fluffier.
- The next step is to add the food colour of your choice and mix it well.
- Gradually add contact solution to the mix.
- Now knead the solution for five minutes for a uniform mixture.
- After that, add a few drops of contact solution and keep on kneading it. You will observe that the slime gets sticky. If the slime is too gluey, add some oil or lotion to it and knead it. This will helps in improving the consistency of the slime.
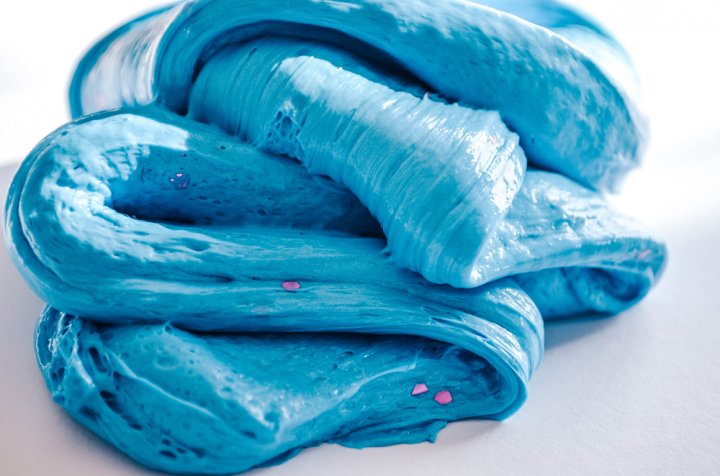
Recipe 6 – Unicorn Slime
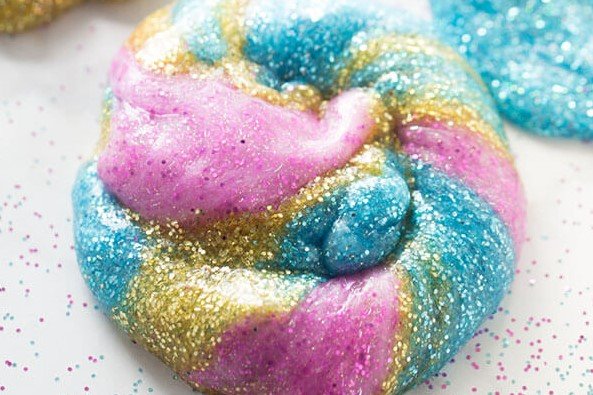
Ingredients:
- 1 bottle of Elmer's glitter glue (6 oz)
- Pink, gold and blue glitter to get the shiny slime
- ½ teaspoon baking soda
- 1½ tablespoon contact lens solution
Steps:
- Take a bowl and pour glue in it.
- Add baking soda to the glue and mix in thoroughly.
- Now add your desired level of glitter and continue to mix.
- Gradually add in your contact lens solution. Add it in the mixture slowly while kneading the mixture at the same time. You will notice the thickening of slime by this step.
- Keep on pressing and twisting the slime until you achieve the desired consistency. If you find that the slime is sticky, add a bit of lotion or baby oil to your hands and knead it again.
Recipe 7 – Mermaid Slime
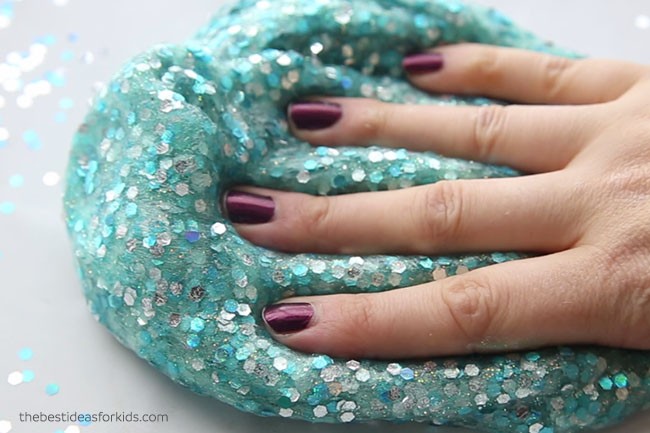
Ingredients:
- 2 bottles of Elmer's glitter glue (6 oz)
- 1 tablespoon or up to ¼ cup of water
- Green and blue chunky glitter
- ½ teaspoon baking soda
- 1½ tablespoon contact lens solution
Steps:
- Take a bowl to mix your slime ingredients.
- Pour in your desired levels of blue glitter glue into the bowl. Then add a small amount of green glitter glue. The quantity of blue glitter glue should be more than that of green. Mix both kinds of glue uniformly.
- Add ½ teaspoon of baking soda to the solution and mix it.
- Add 1 tablespoon of water if you want a flexible slime.
- Add chunky glitter here so as to cover the slime and give it a mermaid tail-like appearance. Then re-add a small quantity of blue glitter.
- Slowly add in your contact lens solution and mix well until you get a uniform slime.
Recipe 8 – Slime with Liquid Starch
Ingredients:
- Elmer's school glue
- Liquid starch
- Hot water
- Food colouring
Steps:
- Take a bowl and put some glue in it. The amount of glue to be added depends on you.
- If you notice bubbles in the glue, pop them with a mixing stick.
- Next, add some water in it. The quantity of water should be just enough to cover it entirely from the top.
- Mix it until it has become a smooth white creamy paste. Make sure that it doesn't have chunks because then it’ll result in an uneven, chunky slime.
- Next, add a few drops of food colour and mix it up.
- Add liquid starch to the mixture next, and mix it thoroughly.
- Knead it well to ensure a uniform slime. You now have your slime ready!
Recipe 9 – Slime with Saline Solution
Ingredients:
- 100 ml clear glue (PVA)
- 50 ml water
- 20 ml saline solution (lens washer)
- Food colouring
- 60 gm baking soda (2 teaspoons)
- 200 ml hot water
Steps:
- Pour 100 ml of clear glue in a bowl and add 50 ml of water to it.
- Then, pour in 20 ml of lens washer solution and food colouring.
- Stir the mixture well until the colour spreads through the solution thoroughly and uniformly.
- Set this bowl aside and add 6 gm of baking soda in another container.
- Pour in 200 ml of hot water and stir the mixture well. Make sure that the powder has transformed into a paste fully. Now let the mixture cool.
- Once the solution has cooled off, mix in the two solutions together and take the slime out of it once the air bubbles reduce to none.
- Now press the solution with your hands. It is now ready!
Recipe 10 – Slime with Glue and Sugar
Ingredients:
- Glue
- Powdered sugar
- Clear bowl
- Mixing stick
Steps:
- Fill a bowl with a cup of glue.
- Now, add at least 2-3 cups of sugars to make the slime semi-solid and not too sticky. The sugar is too be added gradually and steadily. If the mix is sticking to the bowl, add more sugar to it until it becomes non-sticky and flexible.
- The recipe gives a beautiful crystal textured slime.
- The slime will be quite sticky due to the ingredients. Adding water will make the slime easy to hold and twist.
- For later use, reserve the slime in a plastic, zip lock bag. You can also store it in a container.
- Also, improvise throughout the recipe preparation according to your own taste.
3 Non-Toxic Liquid Glue in India

HOOV All Purpose Liquid Glue

HOOV All Purpose Liquid Glue has a super strong hold, bonds fast and dries transparent to mix in between two surfaces. The no-run method serves to hold the glue where you apply it, so that you are not left with a gluey dripping mixture. It is incredibly simple to apply. However, remember to use it on a clear dry surface. For cloth or paper, just apply a light layer of glue, press, and let it dry. For other materials such as wood or pottery, apply a thick coat and press it. Now, let it dry overnight.
HOOV All Purpose Liquid Glue is the perfect glue for crafts, art projects and fixing broken things. The reliable and non-toxic ingredients it incorporates makes this all-purpose glue excellent for making slime at home or in the classroom. You can buy this product from Flipkart.
Faber Castell White Glue
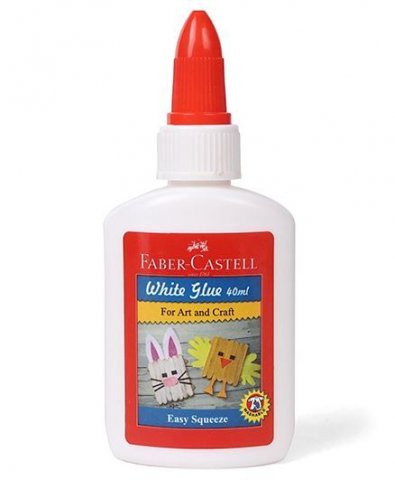
Faber Castell White Glue is created for use in art and craft, schools, offices and homes. It’s for anyone and everyone! This glue can also be applied on a plethora of surfaces such as paper, wood, cardboard, photos, etc. The glue comes in an easily squeezed bottle with a nozzle for a mess-free experience. It can be easily washed from fabric and skin. It is non-toxic and has a soft flow for the comfort of the user. However, bear in mind that it is not suitable for children under 3 years of age. You can buy this product for ₹ 20.00 from First Cry.
Elmer's Liquid School Glue
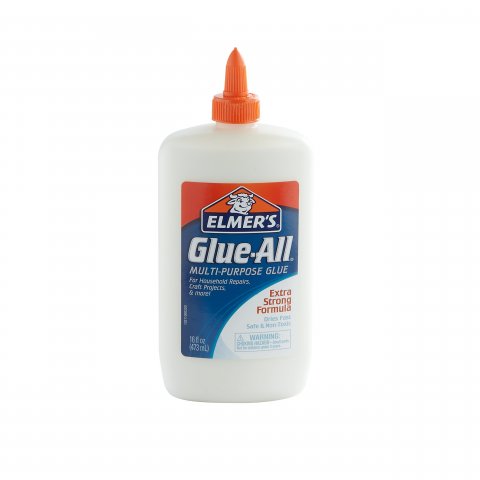
Now, you can easily stick items ranging from paper and clothes to pottery, wood and so much more with the fantastic non-toxic formula of Elmer's Washable School Glue. It is specifically developed to be washable and simple to use. Elmer's School Glue is ideal for home arts and crafts and school projects. Elmer's School Glue is flexible before sticking and does not flow, providing guaranteed outcomes with each and every use. To make liquid glue slime, you can also use this liquid glue! In a gist, this remarkable glue is reliable, washable, safe, no-drip and non-toxic. Its creamy formula forms a clear slime base and is great for bonding items numerous together. You can get this for ₹ 1,569.00 from Desert Cart.
-
 एक वर्ष के लड़कों के लिए 2019 के 10 सबसे उत्तम खिलौने: एक साल के बच्चे रोज नई चीज सीखते हैं, उन्हें ऐसे खिलौने दें जो मज़ेदार हों और उनके विकास में मदद करें
-
 एक साल के नन्हे लड़के के लिये 10 दिलचस्प खिलौने जो न ही उसका ध्यान खीचेंगे, परन्तु पकडे रहेंगे और साथ ही उसका मानसिक विकास भी करेंगे (2019)
-
 Magnets Can Be Fun at Any Age, but These 10 Magnetic Toys Have Been Created to Aid the Development of Children. Buy One for Your Little One Today (2020)!
-
Have You Tried Making Slime? What It Is, How to Make It, and What You Absolutely Need to Know to Make the Best Slime (2021)
-
 Wondering What to Play on Your Nintendo Switch? Check out the Nintendo Switch Best Games for Both Adults and Kids and Enjoy a Truly Enthralling and Immersive Gaming Experience (2021)
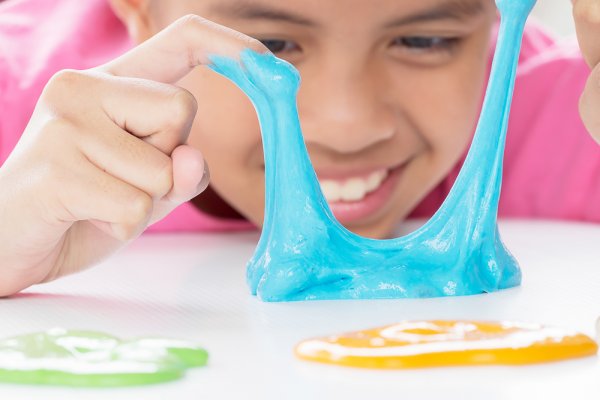
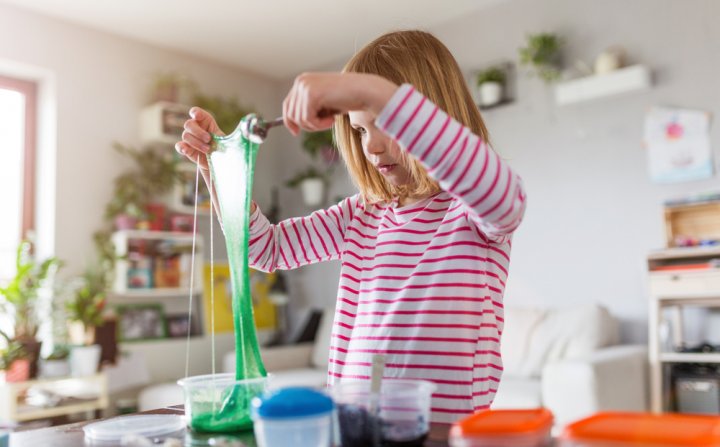
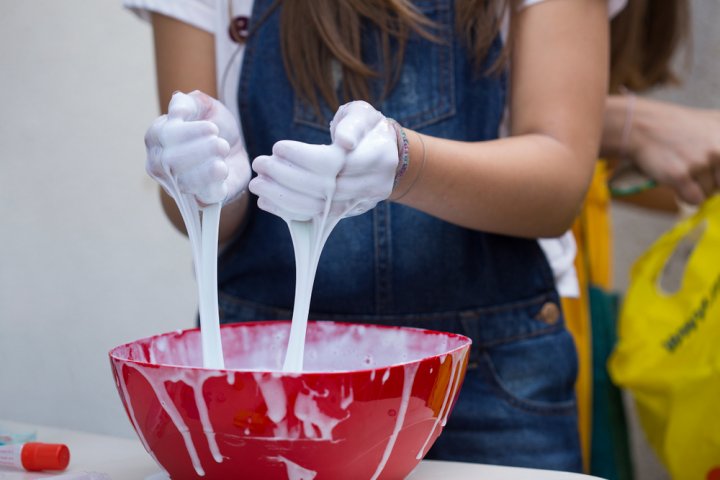
Slime – A Beautiful Toy for Your Kids
Slime is a great thing to play for kids. The only thing to keep in mind while preparing slime at home is to ensure that it does not have any harmful ingredients to which your kids might be allergic to. There are so many ways to make colourful (and often edible) slime conveniently for your kids. The sheer delight and excitement in their eyes when they are playing with it is worth all the effort that goes in preparing it. We hope this BP Guide would have helped you understand some of the easy recipes for making slime. Stay connected with us for more such engaging content.
 Highlight the Best Facets of Your Incomparable Beauty: Discover the Best Face Highlighter Currently Available in India and Everything You Need to Know About Using Face Highlighters for Maximum Effect (2023)
 Forget the Blemishes and Get that Picture Perfect Flawless Radiance on Your Face: Check out the Best Foundations for Oily Skin Currently Available in India and Everything You Need to Know About Makeup Foundations (2023)
 Make Your Presence Felt Wherever You Go: Discover the Best Perfumes Under 2000 for Both Men and Women to Announce Your Arrival and Make Any Occasion Memorable (2023)
 Protect Your Oily Skin from the Harmful Rays of the Sun: Discover the Best Gel Based Sunscreens for Oily Skin and Everything You Need to Know Before Buying One (2023)
 Minor Blemishes and Wrinkles Affecting Your Confidence? Check out the Best BB Creams to Conceal Your Worries and Nourish Your Skin to Restore the Healthy, Radiant and Glowing Complexion Back Again (2023)