-
 The 10 Best Eyeliners in India That Won't Smear or Smudge No Matter What! Plus Tips on Applying Eyeliner and How to Get the Perfect Wing Tips (2019)
-
 Slay with Your Eyes with The 10 Best Eyeliner Pencils in India
-
 10 Best Eyeliner Pens in India in 2020 + Pro Tips for Perfect Wing Tips and the Dramatic Eyes You Always Wanted
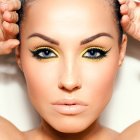
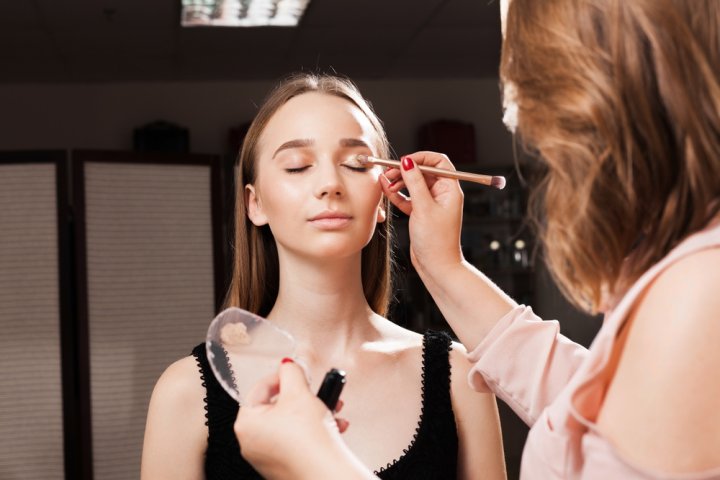
What Exactly Is a Cut Crease?
This eyeshadow trend has been around for ages since the 1920s to be specific, and it came back with a bang and it will probably be around for a long time too. Back in the day, this eyeshadow technique was done to attract attention to the eyes of the actresses, as films were black & white. Today though, this technique adds a bit of dramatic flair to a person’s look, your eyes look bigger and it adds depth and dimension. Cut crease basically is an eyeshadow technique where you define the crease of the eyelid by cutting across it with a concealer or liquid foundation and then applying a contrasting eyeshadow. Many different styles and techniques evolved from this particular trend, and while they all look different, they still follow the same basic steps.
Primer? Eyeshadow Pallette? What Else Do You Need?
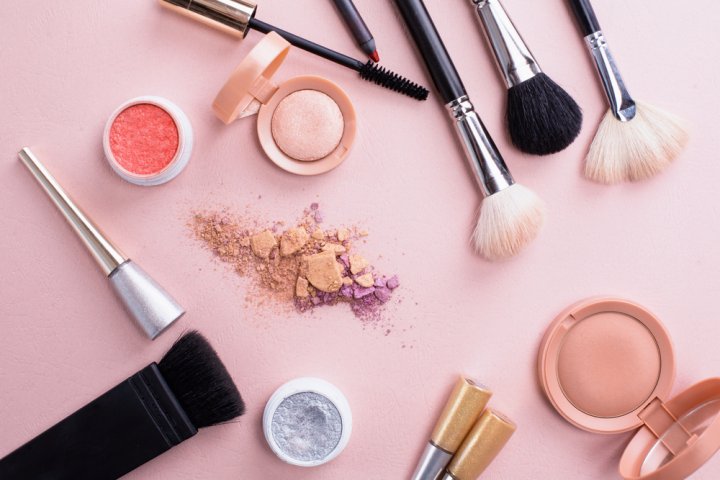
Creating your cut crease isn't a very complicated task requiring special products, you most probably have everything you need at your disposal. For starters, having an eye primer is important for any eyeshadow to look as it helps your eyeshadow stay put and helps avoid creasing. However, if you don't own one, you don't have to go buy one and mess up your budget. There are other alternatives that can work well too. You can apply regular face primer on your lid or even better, applying concealer all over your lid then setting it with a loose powder does well too. You will also need an eyeshadow palette, preferably one that has different shades from dark to neutral to light and shimmery shades. It is always good to have a range of shades to create a more dramatic look. Another product needed is a liquid liner. Even without an eyeshadow, liquid eyeliner just compliments the shape of the eye and is essential for everyday makeup to many ladies. And for Cut Crease, liquid eyeliners are a staple, it accentuates the cut crease look and completes it. Pencil liners are important for this look as well. Depending on the eyeshadow colours or your preference, the lower waterline need to be pencilled. False lashes though is totally personal and subjective; if you’re doing cut crease for an occasion it would step up your whole look. However, if you’re doing cut crease for a normal look or a smaller event, you don't need to put on lashes.
What Brushes to Use?
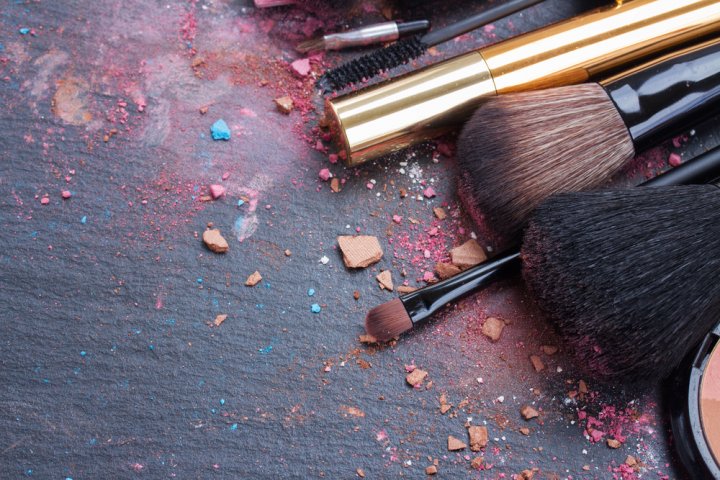
Before getting on to what brushes to use, it is more important to know what type of material is the brush made of as it gives you a better understanding before purchasing brushes. There are two types, natural and synthetic brushes. The natural brushes are usually made from animal hair, mainly goat hair and they work wonders with powder products like blushes, eyeshadows and bronzes. They can load up more products and blend them on the skin very well. However, on liquid products, natural bristles soak up the products and don't apply well to the skin. This is where synthetic brushes shine, as they work wonderfully with liquid products like foundations and concealers. Unfortunately, they don't pick up on powder products well making them useless for eyeshadows, blushes and powders.
So for the cut crease look, all you will require is an eyeshadow brush, a flat concealer brush and a thin eyeliner brush. There is no need to change or purchase specific eyeshadow brush for this technique. Using an eyeshadow brush you are comfortable with is good. The flat concealer brush is used for applying concealer and cutting the crease, so choose a brush that corresponds to the size of your eyes, a bigger brush for bigger eyes and a smaller brush for smaller eyes. An eyeliner brush is used for creating a precise cut that looks smooth and cleaner.
How to Cut Crease Like a Pro
Prime Your Lids
Before applying the primer, make sure your face is cleansed and moisturized. Then apply a thin layer of primer on the lid and blend from lid all the way to the brows. You can also use a thin layer of concealer if you don't have a primer, just blend it out and make sure you let it dry and set it with a loose powder.
Eyeshadow Base
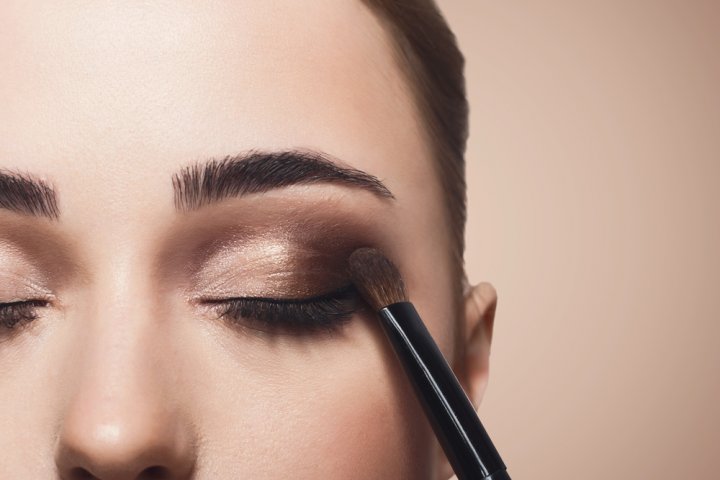
The next step is to apply a matte, natural-looking shade like a medium brown shade on the crease and blend it out back and forth. You can tilt your head back a bit to make sure you’re packing the shadow on the crease and slightly above it. Get a shade lighter than the brown and blend the outer edges of the shadow you applied to soften the harsh edges. If you find the result of the shadow quite faint and want a more pronounced colour, you can re-apply the first shade you used back into the crease again.
Note: Use the same colour group for the eyeshadows but in different shades. For example, when using medium brown shade, a tan shade can be used for diffusing the brown harsh edges. You can not use light blue as it is a different colour group from brown.
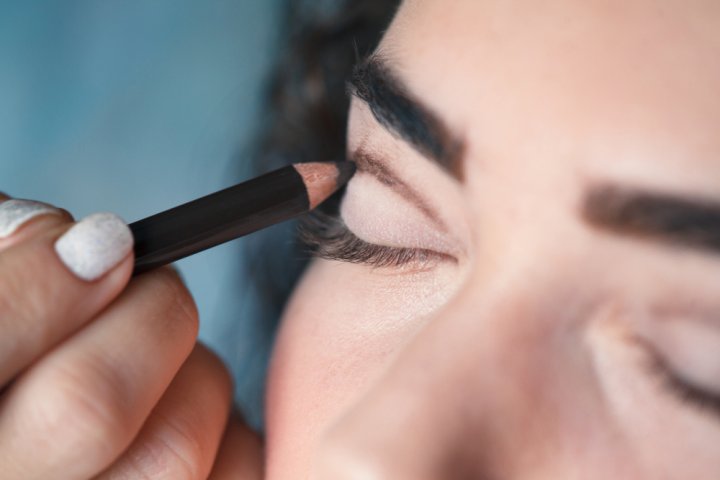
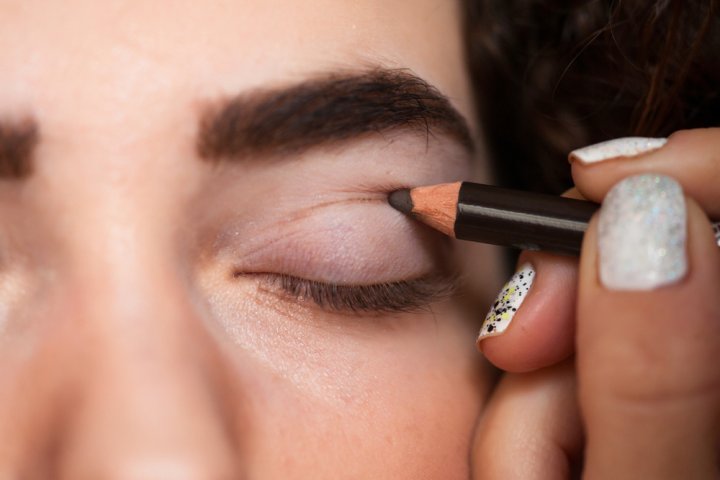
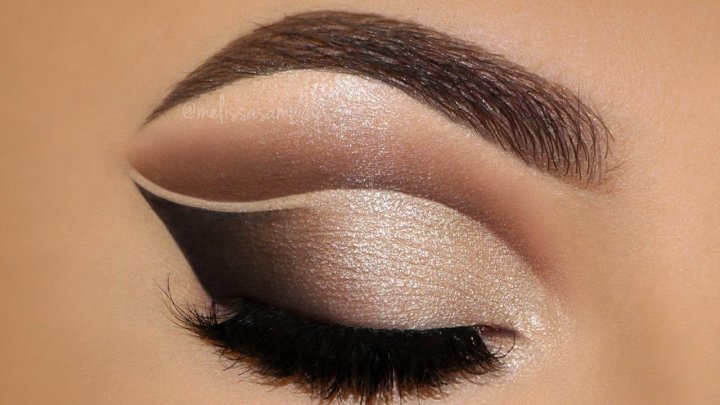
Cutting the Crease
This is where you need steady hands and focus. So make sure you’re comfortable and get your mirror closer. Get your flat concealer brush and coat it with concealer then apply it to the base of your eyelid from one corner of the eye to the other. Once you applied it, open your eyes fully then close them, you will see that there is some concealer that transferred around your crease area. That is how high the concealer coverage must cover, so work your concealer upwards slowly and steadily. Do not rush this step, patience is key. After you’re done applying concealer to the lid, you can use the thin eyeliner brush to create a smoother line on the borders for a better finish.
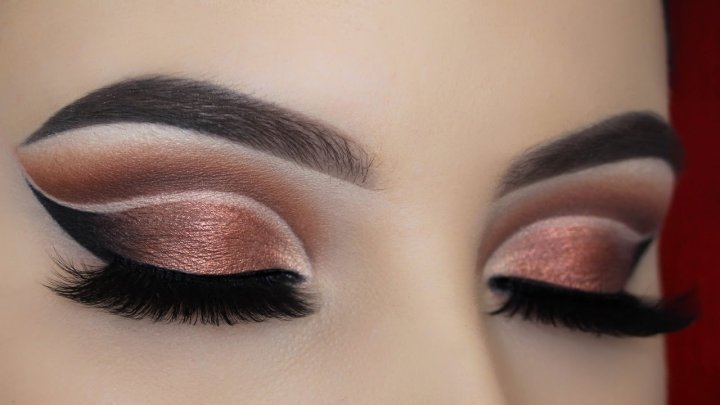
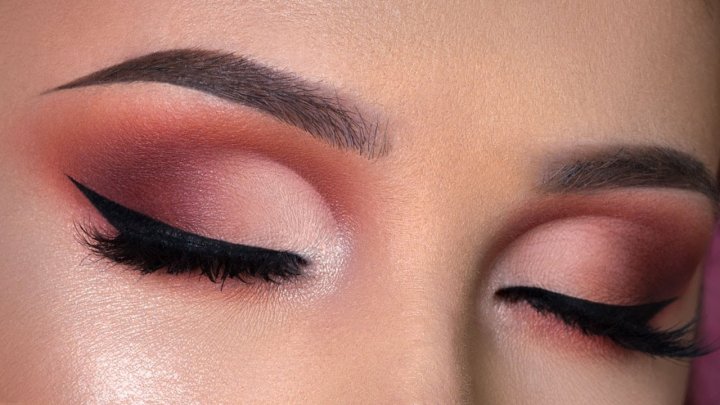
Shimmery Eyeshadow
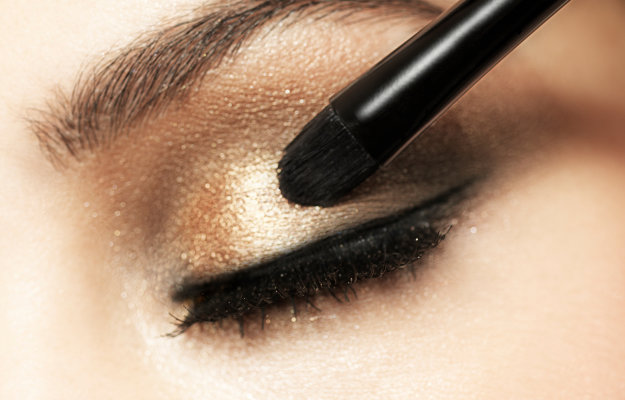
Now that you cut your crease, it's time to decorate it and what better way to do so than with shimmery shades? This step is quite simple, you just apply a shimmery shadow like a gold or champagne colour on the lid that is covered in concealer. You can also skip out this step if you want a simple and softer look. But why do that after going through the trouble of cutting your crease?
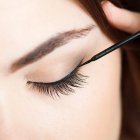
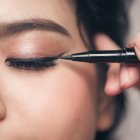
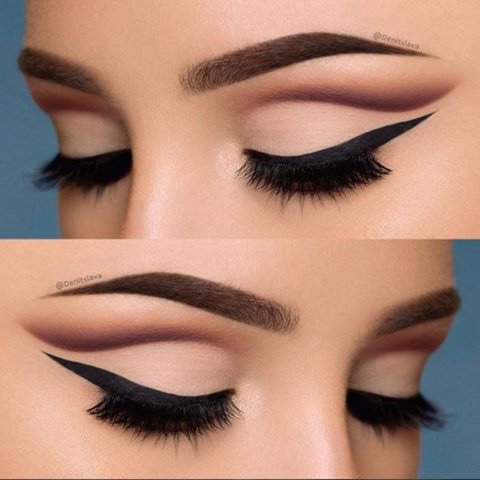
Eyeliner and False Lashes
To make this look pop, applying a winged eyeliner is essential. Always start by making the wings, tilt them slightly upwards, then line the lids and connect them to the wing. The eyeliner shouldnt be thick as you want the cut crease to be the focus of your look. Adding false lashes can intensify the whole look and is definitely a showstopper.
Final Touchups

For the last step, apply the medium brown shadow on the lower lash line and smoke it out a bit, do not smoke out towards the inner eye. You just want a hint of brown for a more intense overall look. Apply a highlight on the inner eye corner and coat your lashes with mascara.
Cut Crease Trendy Techniques
Over the years the cut crease trend evolved and we see different styles and different colour combinations go viral. While these new trends look more complicated to learn, they aren't at all. They all follow the same basic rules and steps for cutting crease. With a little more practice and creativity, you can do the same as well. Let’s take a look at some of the more popular looks and how they are achieved.
Half Cut Crease
The half cut crease as the name suggest is cutting the crease half way, the inner eye part. This technique also follows the same steps as the basic cut crease when applying the eyeshadow except that the eyeshadow on the inner half of the eye extends upwards to the brow. The shadow on the outer eye half, however, does not extend as much. The reason for this is because when you apply the concealer to cut the crease on the inner half of the lid, there should be a contrast against it, or else the cut won't be visible. After this step, the half cut crease resumes the same routine as the basic cut crease.
Double Cut Crease
The double-cut crease can be intimidating but with a little bit of practise and steady hands, you can master this technique. This look has a very precise application of eyeshadow. So, having smaller brushes is an advantage. Double cut crease follows the same steps as the basic cut crease till after the cutting of the crease. The main difference between the two styles is that in the double-cut crease, the eyeshadow doesn't cover the whole lid and there is a gap at the crease line. Over time and with practice, this look would be easy to recreate, so don't feel discouraged if it doesn't turn out well the first time.
Glitter Cut Crease
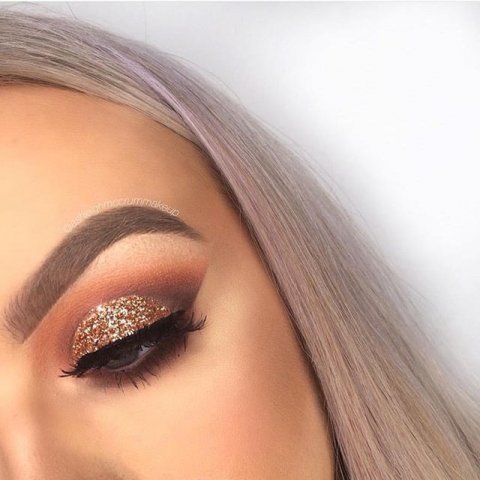
Out of all the mentioned cut crease trends, this is the most similar to the basic cut crease. The glitter that is added on the crease just gives off an elegant and simple look. All you need for applying glitter on the crease is a thin flat angle brush if your glitter comes in a gel form, or if you have a glitter with its applicator wand you can use it directly on the crease. You apply the glitter from the beginning of your crease at the inner half and following through till you wing out the glitter at the outer half of the eye. For better results, try to mimic the same shape and flow of your black liquid liner. As always with this technique, patience is a virtue.
-
 Make Her Feel Like a Queen with These 10 Gifts for Wife on Her Birthday to Gladden Her Heart and Fill Her with the Warmth of Love (2019)
-
 Are You Plagued by Dark Circles? Take Action and Try These 15 Simple Home Remedies! Top 3 Reasons for Dark Circles and 3 Steps to Prevent Them!
-
 Make Dry Skin a Thing of the Past(2020): 10 Foundations to Keep Flak, Dry, Patchy, Skin at Bay
-
 Step Out Looking Like a Diva with the Perfect Saree Makeup: All the Makeup Styles You'll Ever Need and How to Achieve Them (2019)
-
 Eye Cream Should Have a Firm Spot in Your Beauty Routine(2020): Best Under-Eye Creams on the Internet, with Hard-Working Formulas that Will Refresh and Restore ASAP.
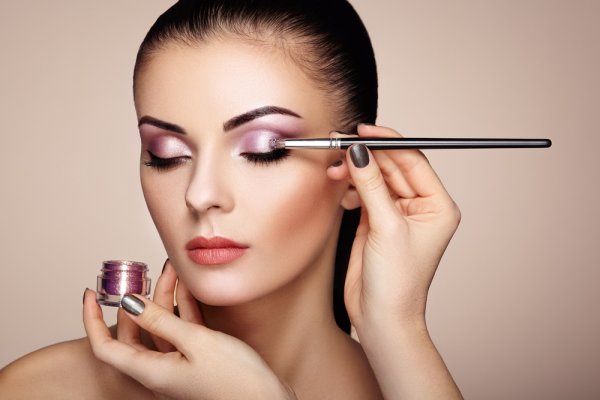
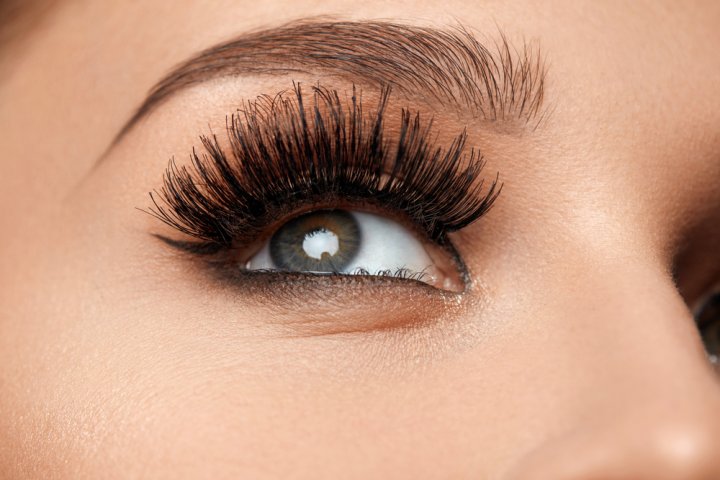
Eye Make Up
Eye make up is an art, and is very difficult to get it right every time. Make sure you take the right shade of make up so as to get the perfect look for that upcoming event. As always, be patient and you're bound to get it perfectly right. With a little bit of effort, you're definitely going to nail the look!
 Highlight the Best Facets of Your Incomparable Beauty: Discover the Best Face Highlighter Currently Available in India and Everything You Need to Know About Using Face Highlighters for Maximum Effect (2023)
 Forget the Blemishes and Get that Picture Perfect Flawless Radiance on Your Face: Check out the Best Foundations for Oily Skin Currently Available in India and Everything You Need to Know About Makeup Foundations (2023)
 Make Your Presence Felt Wherever You Go: Discover the Best Perfumes Under 2000 for Both Men and Women to Announce Your Arrival and Make Any Occasion Memorable (2023)
 Protect Your Oily Skin from the Harmful Rays of the Sun: Discover the Best Gel Based Sunscreens for Oily Skin and Everything You Need to Know Before Buying One (2023)
 Minor Blemishes and Wrinkles Affecting Your Confidence? Check out the Best BB Creams to Conceal Your Worries and Nourish Your Skin to Restore the Healthy, Radiant and Glowing Complexion Back Again (2023)